How To Remove Keyboard Switches (And Install New Ones)

Over the years, computers have gone from electronic luxuries used for only a handful of purposes to necessities for many, capable of handling a range of tasks. Additionally, especially in the realm of PC gaming, full-on customization has become increasingly prevalent. Those with an affinity for computers who use them often will go to great lengths to optimize their units with better hard drives, graphics cards, and more. In addition to replacing their stock mice, they'll go out of their way to replace their generic, unimpressive mechanical keyboards as well.
While there are some weird keyboards out there that are difficult to believe are actually real, most people opt for something fairly streamlined. Perhaps they want something with raised, distinct keycaps, or they prefer something with raised lettering. Maybe they want a sturdier unit or one with built-in LEDs to make typing in the dark a bit easier.
Alternatively, some would rather take apart an existing keyboard to improve upon it, replacing keycaps or even the switches underneath to better suit their needs. If you're one such person hoping to remove and replace your keyboard's switches, you'll be delighted to know that it's not too difficult of a job to do.
How to remove switches from a keyboard
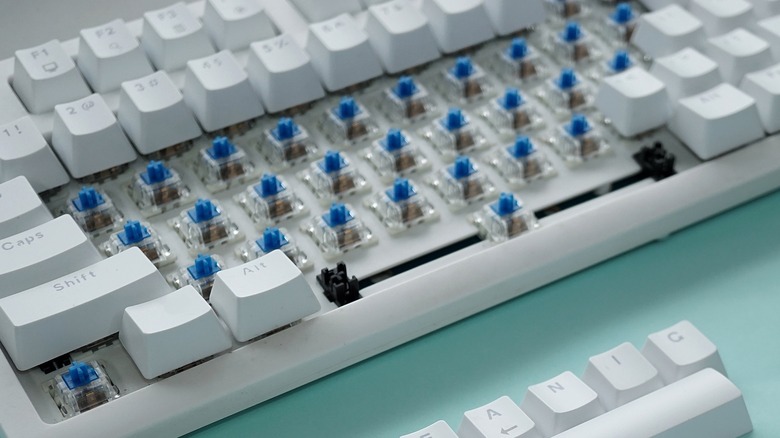
First and foremost is the removal process, which isn't very hard and only requires a couple of tools depending on the type of keyboard in question. Hot-swap keyboards allow you to simply pull the switches out with a switch puller, while soldered circuit boards are a bit more involved.
- Unplug the keyboard from the PC.
- Remove the keycaps from the switches that are about to be replaced. This is best done with a specific keycap removal tool to avoid damaging the caps.
- Using switch pullers, grab and lift out each switch. You may need to pinch the sides of the switch depending on which ones you have.
- If the switches are soldered, they will need to be desoldered using a soldering iron to get them out.
That's all it takes. Your keycaps are set aside and the old keyboard switches you wanted out are successfully removed. Now, you're ready to move on to the next step, which is installing replacement switches into your keyboard.
How to install new keyboard switches
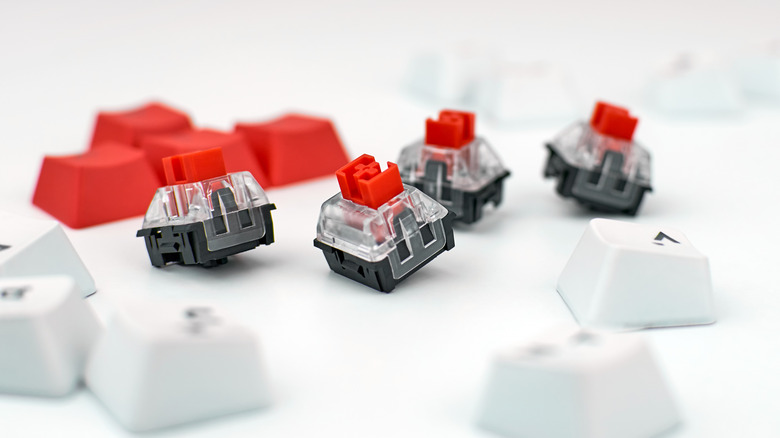
There are many types of mechanical keyboard switches on the market — the main three being linear, tactile, and clicky — so it's important to know which one you want before you buy and install them. Once you identify the type you want, getting them put in is a short, simple process.
- Insert the new switches into the keyboard. Ensure they have the proper number of pins — three or five — for the board and that they are inserted correctly.
- If necessary, solder the new switches into place.
- Reattach the keycaps to the switches. Firmly press down until they are connected.
- Reconnect the keyboard to the PC and test out the new switches.
Just like that, you should be all set with brand-new keyboard switches. Though this could be a tedious process, especially if you're replacing most of or an entire keyboard, it could be a money-saver as opposed to buying a whole new keyboard. That is, unless you're in the market for a more budget-friendly mechanical keyboard.