
When I discovered bird photography for the first time, I was obsessed. I was 13 years old and on a family vacation to the seaside, so I had plenty of time to learn; I spent long hours reading books and articles, hoping to absorb as much information as possible so that I could take the kind of photos I saw in professional bird photography portfolios.
But while I learned all about camera settings, gear, and composition, there was one topic that I didn’t grasp until years later: lighting.
You might think that lighting a bird photo is simple – after all, the sun does it for you, and you have zero control over the sun! – but it actually involves careful consideration of the sun’s position in relation to you and your subject. Plus, the quality of the light is dramatically affected by the amount of cloud cover and the sun’s angle.
I’ve been photographing birds for over a decade, and in this article, I share all my best bird photography lighting tips, including:
- The best time of day for amazing bird images
- My favorite lighting direction to capture plenty of detail
- A simple way to produce artistic bird photos
- The type of lighting you should consistently avoid
Ready to level up your bird photography? Then let’s dive right in, starting with my first tip:
1. Shoot during the golden hour
If you want great bird photos, there’s one type of lighting that will rarely let you down:
That gorgeous yellow light produced by the low sun in the hour or two after sunrise and the hour or two before sunset. (In other words, golden hour light.)
In fact, many bird photographers refuse to shoot outside of the golden-hour window – and while I don’t advocate such an extreme approach, I do think that you should shoot during the golden hours as much as possible.
Plus, the golden hours tend to coincide with birds’ peak activity, so it’s often the best time to capture great subjects in great poses, anyway.
Golden hour lighting is soft, and it comes from a low angle. Therefore, you get flattering illumination, minimal shadows, and evenly lit subjects that feature plenty of detail.

You can also use the low sun to produce stunning artistic effects, such as silhouettes. (More on that in a later section!)
When I go on bird photography trips, I do my best to never miss a golden-hour lighting opportunity. If the forecast shows clear skies, then I’ll aim to be up with the sunrise, and I’ll also be sure to head back out around three hours before sunset.
Bottom line: The more you can shoot during the golden hour, the better. When planning your outings, be sure to check the sunrise and sunset times. Then be prepared to get in position before the magic light appears.
2. Avoid photographing when the sun is high in the sky
Midday light is the complete opposite of golden hour light.
It’s contrasty. It’s unflattering. It washes out colors. And it comes from high above the birds’ heads, so it produces unpleasant shadows that obscure detail.
Am I going to say that you should never, ever photograph around noon? No. You can take great photos of birds at any time of day – but if you shoot when the sun is high in the sky, you’ll have a much harder time getting solid images. Colorful birds will look bland, and your camera will struggle to record detail (especially when faced with birds featuring both black and white plumage).
When I was starting out as a bird photographer, this was a mistake that I often made. I would head to the local park in the middle of the day, and I’d end up with a slew of photos featuring harsh shadows and washed-out colors. It was a frustrating experience, but I learned from it, and I now rarely schedule bird photography outings to coincide with strong midday lighting.
Instead, I generally try to schedule my bird photography for late in the afternoon or early in the morning, and I suggest you do the same. But if you do find yourself out on a shoot in the middle of the day, try to reduce the harsh light by, for instance, working in the shade or heading to a beach (where the bright sand will reflect light up toward the bird). In my experience, neither of these approaches is ideal – midday shade still tends to sap colors, while even a reflective beach won’t completely cancel out the effects of a high sun – but they’re better than the alternative!
3. Cloudy days are okay, but not ideal
At this point, I’ve shared the benefits of shooting early and late in the day, and I’ve explained why you shouldn’t shoot when the sun is high in the sky. But you might be wondering: What about overcast light? Does that work for bird photography? Or should you avoid cloudy days, too?
For many bird photographers, cloudy days are neutral. They don’t offer the beautiful, flattering light of the golden hour. But they don’t come with the harsh, unpleasant light of a bright midday sun, either.
Personally, I don’t mind cloudy days; the light is soft and the shadows are minimal, which helps emphasize the little details. And the gentler lighting helps saturate colors, which can be great for photographing colorful birds such as warblers. I captured this next image around 11 AM on an overcast morning:

Had the sun been shining, the shadows would have been unbearably strong, and I would have packed up instead of hanging out with this little blue heron. But thanks to the clouds, I was able to capture a flattering portrait of my subject, even if it doesn’t have the same level of drama as a golden-hour photo.
I want to mention, however, that cloudy days do come with a problem: The light is (relatively) weak. This is less of a problem when the (obscured) sun is higher in the sky, but outside of those midday hours, if you’re dealing with overcast skies, you’ll need to boost your ISO to capture fast-moving birds and birds in flight. Otherwise, you’ll be forced to drop your shutter speed, and you’ll end up with blurry photos.
When I’m photographing in morning or afternoon overcast light, I’ll often boost my ISO a couple of stops. Depending on the light levels, I may also reduce my shutter speed so it sits between 1/320s and 1/1000s. No, these speeds aren’t great for capturing fast-moving subjects, but I’ll work hard to press the shutter button when the birds are relatively stationary (and I’ll take a lot of photos to increase my chances of nailing a sharp shot!).
So when shooting on cloudy days, pay careful attention to your bird photography camera settings. And pay careful attention to the level of cloud cover, too. If the day is really overcast, you may want to consider staying indoors, especially in the early morning and late afternoon.
4. Use front light to capture lots of gorgeous detail
When photographing birds during the golden hour, the sun is low in the sky, which means you can work with three broad types of lighting:
- Backlight, which comes from behind the subject
- Sidelight, which comes from next to the subject
- And front light, which comes from in front of the subject (and beams over your shoulder)
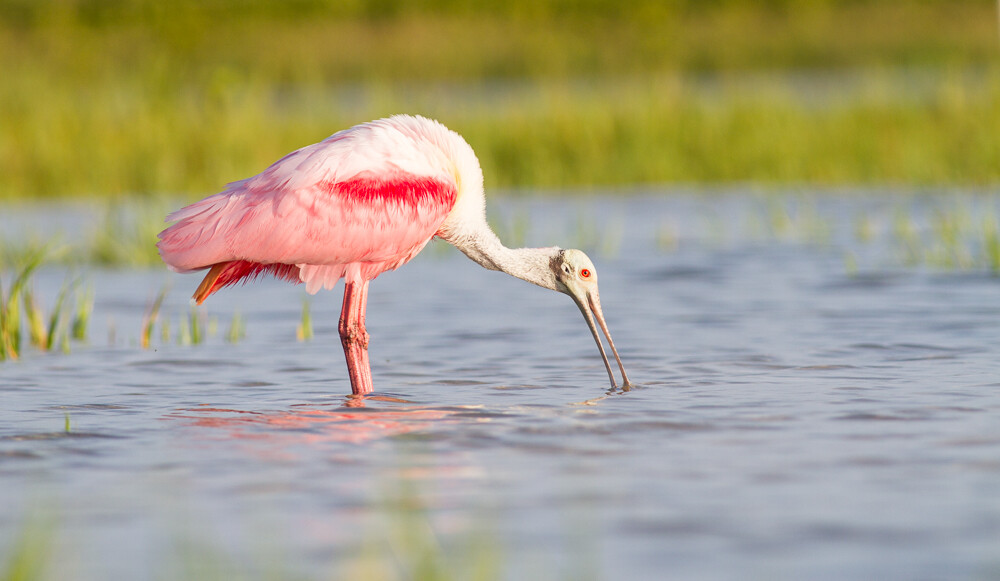
Any of these lighting types can work well for bird photography, but front lighting is my go-to choice, and here’s why:
It illuminates birds directly, so you get plenty of gorgeous detail, and you don’t have to deal with difficult shadows. In fact, most of the images featured throughout this article were front lit, including this one:

By the way, there’s an old trick you can use to always find a good front-lit angle:
Simply watch your own shadow, and when you find a subject, change your position until your shadow points at the bird. I like to adjust my angle when I’m a good distance away from my subject; then, once the shadow is pointing in the right direction, I get down on the ground and start a slow approach.
5. Use backlight to get beautiful silhouettes
Front lighting is a great way to capture detailed bird shots, but what if you want to take images that are intensely artistic? That’s where backlighting comes in.
Get down low to the ground, and position yourself so your subject sits between you and the sun. You can experiment with the sun’s placement, but I generally recommend either keeping it just outside the frame or using the bird to block it.

Switch your camera over to Manual mode, then deliberately crank up that shutter speed until you’re dramatically underexposing the bird. Take a shot, then quickly review it on your LCD. The best silhouettes tend to feature a bright – but still detailed! – background and a pitch-black bird, though you can always try boosting the exposure slightly to keep some detail in your subject, as I discuss in the next section.
6. Overexpose backlit subjects for artistic bird photos
If you position yourself so that the bird sits between you and the sun, you have two basic options:
You can expose for the background, thereby creating a silhouetted bird (see above!).
Or you can expose for the bird, which will create a blown-out, detailless background:

The silhouette technique is much more common, and it can be a great way to highlight beautiful background colors at sunrise and sunset. That said, in certain cases, an overexposed background can look beautiful, too.
By the way: There’s nothing wrong with trying out both methods. If the bird is being cooperative, why not underexpose for a nice silhouette, then overexpose for a blown-out background?
Be careful with your exposures, however. You want to blow out the background, but you want to keep plenty of detail on the bird. You may need to take several shots before you really nail the exposure, so be ready to shoot and adjust as required!
7. Use sun and shade for gorgeous colors and effects
What happens when you take golden hour sunlight and you combine it with shade?
Lots and lots of magic.
A sun-shade combination is a great way to produce all sorts of artistic effects. It’ll help you get the kind of bird photos that stand out from the crowd.
For instance, if you find a background that’s front lit by the sitting sun and you juxtapose it with a shaded bird in the foreground, you’ll end up with stunning background colors:

And if you find a background that’s in the shade but a bird that’s powerfully lit – here, sidelight is often your friend! – you’ll get a beautiful low-key effect, where the bird stands out but the background is intensely dark:

The best effects come from lots of trial and error, so when you’re out shooting, don’t be afraid to play with different combinations of sun and shade. Some of the images won’t turn out great, but others will look amazing.
Bird photography lighting tips: final words
Now that you’ve finished this article, you know how to find the best lighting for bird photography. And you know how to use lighting to produce plenty of gorgeous effects.
So head out with your camera. Find some birds. And practice your lighting techniques!
What types of light do you plan to use in your bird photography? What types of birds do you like to photograph? Share your thoughts in the comments below!

