How to Install and Configure Meilisearch on Debian 12
On this page
- Prerequisites
- Step 1 - Configure Firewall
- Step 2 - Install Meilisearch
- Step 3 - Create a system user for Meilisearch
- Step 4 - Configure Meilisearch
- Step 5 - Create directories and give permissions
- Step 6 - Run Meilisearch as a service
- Step 7 - Install Nginx
- Step 8 - Install SSL
- Step 9 - Configure Nginx
- Step 10 - Loading Sample data in Meilisearch
- Step 11 - Use Limited Keys for Searching
- Step 12 - Searching through Sample Data
- Step 13 - Tuning Search Ranking and Filtering Data
- Step 14 - Conclusion
Meilisearch is an open-source search engine written in Rust language. Being written using Rust requires fewer resources to run and can be run using a single command-line binary. The installation process is simpler than the alternative search engines and requires fewer steps. Its features include fuzzy matching and schema-less indexing. It comes with a web frontend for demo purposes. It can be integrated into various web applications through various libraries available in multiple languages like JavaScript, Python, PHP, Ruby, etc.
In this tutorial, you will learn how to install Meilisearch in production on a Debian 12 server and use it to perform several simple searches.
Prerequisites
-
A server running Debian 12 with a minimum of 2GB of RAM.
-
A non-root user with sudo privileges.
-
The uncomplicated Firewall(UFW) is enabled and running.
-
A Fully Qualified Domain Name (FQDN) like
meilisearch.example.compointing to your server. This is beneficial if you want to serve Meilisearch via SSL using a proxy server. -
Everything is updated.
$ sudo apt update && sudo apt upgrade
-
A few essential packages are required for the tutorial. Some of these may already be installed on your server.
$ sudo apt install curl wget nano software-properties-common dirmngr apt-transport-https ca-certificates lsb-release debian-archive-keyring gnupg2 ufw unzip -y
Step 1 - Configure Firewall
The first step before installing any packages is to configure the firewall to allow HTTP and HTTPS connections.
Check the status of the firewall.
$ sudo ufw status
You should see something like the following.
Status: active

To                         Action      From
--                         ------      ----
OpenSSH                    ALLOW       Anywhere
OpenSSH (v6)               ALLOW       Anywhere (v6)
Allow HTTP and HTTPs ports.
$ sudo ufw allow http
$ sudo ufw allow https
Check the status again to confirm.
$ sudo ufw status
Status: active

To                         Action      From
--                         ------      ----
OpenSSH                    ALLOW       Anywhere
80/tcp                     ALLOW       Anywhere
443/tcp                    ALLOW       Anywhere
OpenSSH (v6)               ALLOW       Anywhere (v6)
80/tcp (v6)                ALLOW       Anywhere (v6)
443/tcp (v6)               ALLOW       Anywhere (v6)
Step 2 - Install Meilisearch
There are several ways to install Meilisearch. We will use the simplest method which involves copying the binary file to our server.
Install Meilisearch.
$ curl -L https://install.meilisearch.com | sh
Make the binary executable.
$ chmod +x meilisearch
Right now the binary is only usable from the directory where you downloaded it. To be able to use it from anywhere, move the binary file to the /usr/local/bin directory.
$ sudo mv ./meilisearch /usr/local/bin/
Confirm that Meilisearch is installed and running properly.
$ meilisearch --version
meilisearch 1.7.6
Step 3 - Create a system user for Meilisearch
Running Meilisearch as root can create security issues. To avoid them, create a system user for running Meilisearch.
$ sudo useradd -d /var/lib/meilisearch -b /bin/false -m -r meilisearch
Step 4 - Configure Meilisearch
Before moving ahead, we need to create a master key that Meilisearch uses for the authentication process. You can use the OpenSSL command-line utility to create it. Run the following command to create a 30-character long master key. You can choose any length for your master key. The longer, the better.
$ openssl rand -hex 30
You should receive a similar output with a 30-character long key. Copy this value because we will need it in the coming steps.
65ed5fc15848f7ceb8e646d4928fcf79f494cec239a2874cacd118e42611
Grab the latest configuration file from the Meilisearch GitHub repository and copy it to the /etc directory.
$ sudo sh -c 'curl https://raw.githubusercontent.com/meilisearch/meilisearch/latest/config.toml > /etc/meilisearch.toml'
Open it for editing.
$ sudo nano /etc/meilisearch.toml
Update the following lines in the file to configure the database path, dump path, snapshot directory, and, working environment, and add the master key you generated before for authentication.
The updated values in the configuration file should look like the following.
env = "production"
master_key = "173e95f077590ed33dad89247247be8d8ce8b6722ccc87829aaefe3207be"
db_path = "/var/lib/meilisearch/data"
dump_dir = "/var/lib/meilisearch/dumps"
snapshot_dir = "/var/lib/meilisearch/snapshots"
Meilisearch collects regular data anonymously. You should disable it using the following option. Uncomment it to deactivate Meilisearch's telemetry.
no_analytics = true
By default, Meilisearch uses no more than two-thirds of the available RAM on your system. You can control this by uncommenting and setting the following variable. You can also specify the value as the exact number of bytes to be precise and accurate.
max_indexing_memory = "1 GiB"
Meilisearch uses no more than half of the CPU cores available. You can, however, control this value by uncommenting and setting the following variable.
max_indexing_threads = 1
Setting this value more than the number of CPU cores of the machine will tell Meilisearch to use the maximum number of available cores.
One more setting you should know is the amount of maximum payload that Meilisearch can take. The default value is set at 100MB. You can change it by configuring the following variable.
http_payload_size_limit = "100 MB"
Once finished, save the file by pressing Ctrl + X and entering Y when prompted.
Step 5 - Create directories and give permissions
Create the directories where Meilisearch will store its database, database dumps, and snapshots.
$ sudo mkdir /var/lib/meilisearch/dumps -p
$ sudo mkdir /var/lib/meilisearch/snapshots
Set the owner and group on these directories to the system user we created for Meilisearch.
$ sudo chown -R meilisearch:meilisearch /var/lib/meilisearch
Set the owner and group on the Meilisearch binary file.
$ sudo chown meilisearch:meilisearch /usr/local/bin/meilisearch
Set proper permissions on the directory.
$ sudo chmod 750 /var/lib/meilisearch
Step 6 - Run Meilisearch as a service
To make Meilisearch available at all times for search requests, it is better to run it as a system service. For this, we need to create a service file for it.
Create and open /etc/systemd/system/meilisearch.service for editing.
$ sudo nano /etc/systemd/system/meilisearch.service
Paste the following code in it.
[Unit]
Description=Meilisearch
After=systemd-user-sessions.service

[Service]
Type=simple
WorkingDirectory=/var/lib/meilisearch
ExecStart=/usr/local/bin/meilisearch --config-file-path /etc/meilisearch.toml
User=meilisearch
Group=meilisearch

[Install]
WantedBy=multi-user.target
Save the file by pressing Ctrl + X and entering Y when prompted.
Enable the service.
$ sudo systemctl enable meilisearch
Start the Meilisearch service.
$ sudo systemctl start meilisearch
Check the service status
$ sudo systemctl status meilisearch
You should receive a similar output.
? meilisearch.service - Meilisearch
     Loaded: loaded (/etc/systemd/system/meilisearch.service; enabled; preset: enabled)
     Active: active (running) since Fri 2024-05-03 03:02:53 UTC; 5s ago
   Main PID: 1008 (meilisearch)
      Tasks: 6 (limit: 2251)
     Memory: 23.0M
        CPU: 10ms
     CGroup: /system.slice/meilisearch.service
             ??1008 /usr/local/bin/meilisearch --config-file-path /etc/meilisearch.toml

May 03 03:02:53 meilisearch meilisearch[1008]: Commit date:                "unknown"
May 03 03:02:53 meilisearch meilisearch[1008]: Package version:        "1.7.6"
May 03 03:02:53 meilisearch meilisearch[1008]: Anonymous telemetry:        "Disabled"
May 03 03:02:53 meilisearch meilisearch[1008]: A master key has been set. Requests to Meilisearch won't be authorized unless you provide an authentication key.
May 03 03:02:53 meilisearch meilisearch[1008]: Check out Meilisearch Cloud!        https://www.meilisearch.com/cloud?utm_campaign=oss&utm_source=engine&utm_medium=cli
May 03 03:02:53 meilisearch meilisearch[1008]: Documentation:                        https://www.meilisearch.com/docs
May 03 03:02:53 meilisearch meilisearch[1008]: Source code:                        https://github.com/meilisearch/meilisearch
May 03 03:02:53 meilisearch meilisearch[1008]: Discord:                        https://discord.meilisearch.com
May 03 03:02:53 meilisearch meilisearch[1008]: 2024-05-03T03:02:53.891366Z  INFO actix_server::builder: starting 2 workers
May 03 03:02:53 meilisearch meilisearch[1008]: 2024-05-03T03:02:53.891396Z  INFO actix_server::server: Actix runtime found; starting in Actix runtime
Meilisearch is installed and running. Let us expose the service to the outside using the Nginx server as a reverse proxy and use Let's Encrypt to serve it over SSL.
Step 7 - Install Nginx
Debian 12 ships with an older version of Nginx. You need to download the official Nginx repository to install the latest version.
Import Nginx's signing key.
$ curl https://nginx.org/keys/nginx_signing.key | gpg --dearmor \
    | sudo tee /usr/share/keyrings/nginx-archive-keyring.gpg >/dev/null
Add the repository for Nginx's mainline version.
$ echo "deb [signed-by=/usr/share/keyrings/nginx-archive-keyring.gpg] \
http://nginx.org/packages/mainline/debian `lsb_release -cs` nginx" \
    | sudo tee /etc/apt/sources.list.d/nginx.list
Update the system repositories.
$ sudo apt update
Install Nginx.
$ sudo apt install nginx
Verify the installation. On Debian systems, the following command will only work with sudo.
$ sudo nginx -v
nginx version: nginx/1.25.5
Start the Nginx server.
$ sudo systemctl start nginx
Check the service status.
$ sudo systemctl status nginx
? nginx.service - nginx - high performance web server
     Loaded: loaded (/lib/systemd/system/nginx.service; enabled; preset: enabled)
     Active: active (running) since Fri 2024-05-03 03:04:02 UTC; 5s ago
       Docs: https://nginx.org/en/docs/
    Process: 1699 ExecStart=/usr/sbin/nginx -c /etc/nginx/nginx.conf (code=exited, status=0/SUCCESS)
   Main PID: 1700 (nginx)
      Tasks: 3 (limit: 2251)
     Memory: 2.9M
        CPU: 7ms
     CGroup: /system.slice/nginx.service
             ??1700 "nginx: master process /usr/sbin/nginx -c /etc/nginx/nginx.conf"
             ??1701 "nginx: worker process"
             ??1702 "nginx: worker process"

May 03 03:04:02 meilisearch systemd[1]: Starting nginx.service - nginx - high performance web server...
May 03 03:04:02 meilisearch systemd[1]: Started nginx.service - nginx - high performance web server.
Step 8 - Install SSL
We need to install Certbot to generate the SSL certificate. You can either install Certbot using Debian's repository or grab the latest version using the Snapd tool. We will be using the Snapd version.
Debian 12 comes doesn't come with Snapd installed. Install Snapd package.
$ sudo apt install -y snapd
Run the following commands to ensure that your version of Snapd is up to date.
$ sudo snap install core && sudo snap refresh core
Install Certbot.
$ sudo snap install --classic certbot
Use the following command to ensure that the Certbot command can be run by creating a symbolic link to the /usr/bin directory.
$ sudo ln -s /snap/bin/certbot /usr/bin/certbot
Verify if Certbot is functioning correctly.
$ certbot --version
certbot 2.10.0
Run the following command to generate an SSL Certificate.
$ sudo certbot certonly --nginx --agree-tos --no-eff-email --staple-ocsp --preferred-challenges http -m [email protected] -d meilisearch.example.com
The above command will download a certificate to the /etc/letsencrypt/live/meilisearch.example.com directory on your server.
Generate a Diffie-Hellman group certificate.
$ sudo openssl dhparam -dsaparam -out /etc/ssl/certs/dhparam.pem 4096
Check the list of systemd timers. Certbot automatically installs and starts a timer for renewal purposes.
$ sudo systemctl list-timers
You will find snap.certbot.renew.service as one of the services scheduled to run.
NEXT                        LEFT           LAST                        PASSED    UNIT                        ACTIVATES                   ---------------------------------------------------------------------------------------------------------------------------------------
Fri 2024-05-03 17:17:15 UTC 14h left      Fri 2024-05-03 02:54:42 UTC 11min ago apt-daily.timer              apt-daily.service
Fri 2024-05-03 06:42:20 UTC 3h 36min left Fri 2024-05-03 02:54:42 UTC 11min ago apt-daily-upgrade.timer      apt-daily-upgrade.service
Fri 2024-05-03 10:39:00 UTC 7h left       -                           -         snap.certbot.renew.timer     snap.certbot.renew.service
Do a dry run of the process to check whether the SSL renewal is working fine.
$ sudo certbot renew --dry-run
If you see no errors, you are all set. Your certificate will renew automatically.
Step 9 - Configure Nginx
Open the file /etc/nginx/nginx.conf for editing.
$ sudo nano /etc/nginx/nginx.conf
Add the following line before the line include /etc/nginx/conf.d/*.conf;.
server_names_hash_bucket_size 64;
Save the file by pressing Ctrl + X and entering Y when prompted.
Create and open the file /etc/nginx/conf.d/meilisearch.conf for editing.
$ sudo nano /etc/nginx/conf.d/meilisearch.conf
Paste the following code in it. Replace meilisearch.example.com with your domain name.
server {

    listen 443 ssl;
    listen [::]:443 ssl;

    http2 on;
    http3 on;
    quic_retry on;

    server_name meilisearch.example.com;

    access_log  /var/log/nginx/meilisearch.access.log;
    error_log   /var/log/nginx/meilisearch.error.log;

    ssl_certificate      /etc/letsencrypt/live/meilisearch.example.com/fullchain.pem;
    ssl_certificate_key  /etc/letsencrypt/live/meilisearch.example.com/privkey.pem;
    ssl_trusted_certificate /etc/letsencrypt/live/meilisearch.example.com/chain.pem;

    ssl_session_timeout  5m;
    ssl_session_cache shared:MozSSL:10m;
    ssl_session_tickets off;
    ssl_early_data on;

    ssl_protocols TLSv1.2 TLSv1.3;
    ssl_prefer_server_ciphers on;
    ssl_ciphers ECDHE-ECDSA-AES128-GCM-SHA256:ECDHE-RSA-AES128-GCM-SHA256:ECDHE-ECDSA-AES256-GCM-SHA384:ECDHE-RSA-AES256-GCM-SHA384:ECDHE-ECDSA-CHACHA20-POLY1305:ECDHE-RSA-CHACHA20-POLY1305:DHE-RSA-AES128-GCM-SHA256:DHE-RSA-AES256-GCM-SHA384;
    ssl_ecdh_curve X25519:prime256v1:secp384r1:secp521r1;
    ssl_stapling on;
    ssl_stapling_verify on;
    ssl_dhparam /etc/ssl/certs/dhparam.pem;

    location / {
        proxy_pass http://localhost:7700;
        proxy_set_header Host $host;
        proxy_set_header X-Real-IP $remote_addr;
        proxy_set_header X-Forwarded-For $proxy_add_x_forwarded_for;
        proxy_set_header X-Forwarded-Proto $scheme;
    }
}
# enforce HTTPS
server {
    listen 80;
    listen [::]:80;
    server_name  meilisearch.example.com;
    return 301   https://$host$request_uri;
}
Save the file by pressing Ctrl + X and entering Y when prompted.
Verify your Nginx configuration.
$ sudo nginx -t
Restart the Nginx server.
$ sudo systemctl restart nginx
Meilisearch is now running and available via the URL https://meilisearch.example.com. You should see the following text when you open the URL.
{"status":"Meilisearch is running"}
This URL can only be used for searching via the command line. If you want to access Meilisearch via a frontend, you will need to integrate it with another CMS or software to make it work the scope of which is outside this tutorial. Meilisearch ships with an inbuilt frontend interface but that works only if you are using it for development purposes. You can change the instance's environment to development in the configuration file and restart Meilisearch to activate the interface. It should look something like the following.
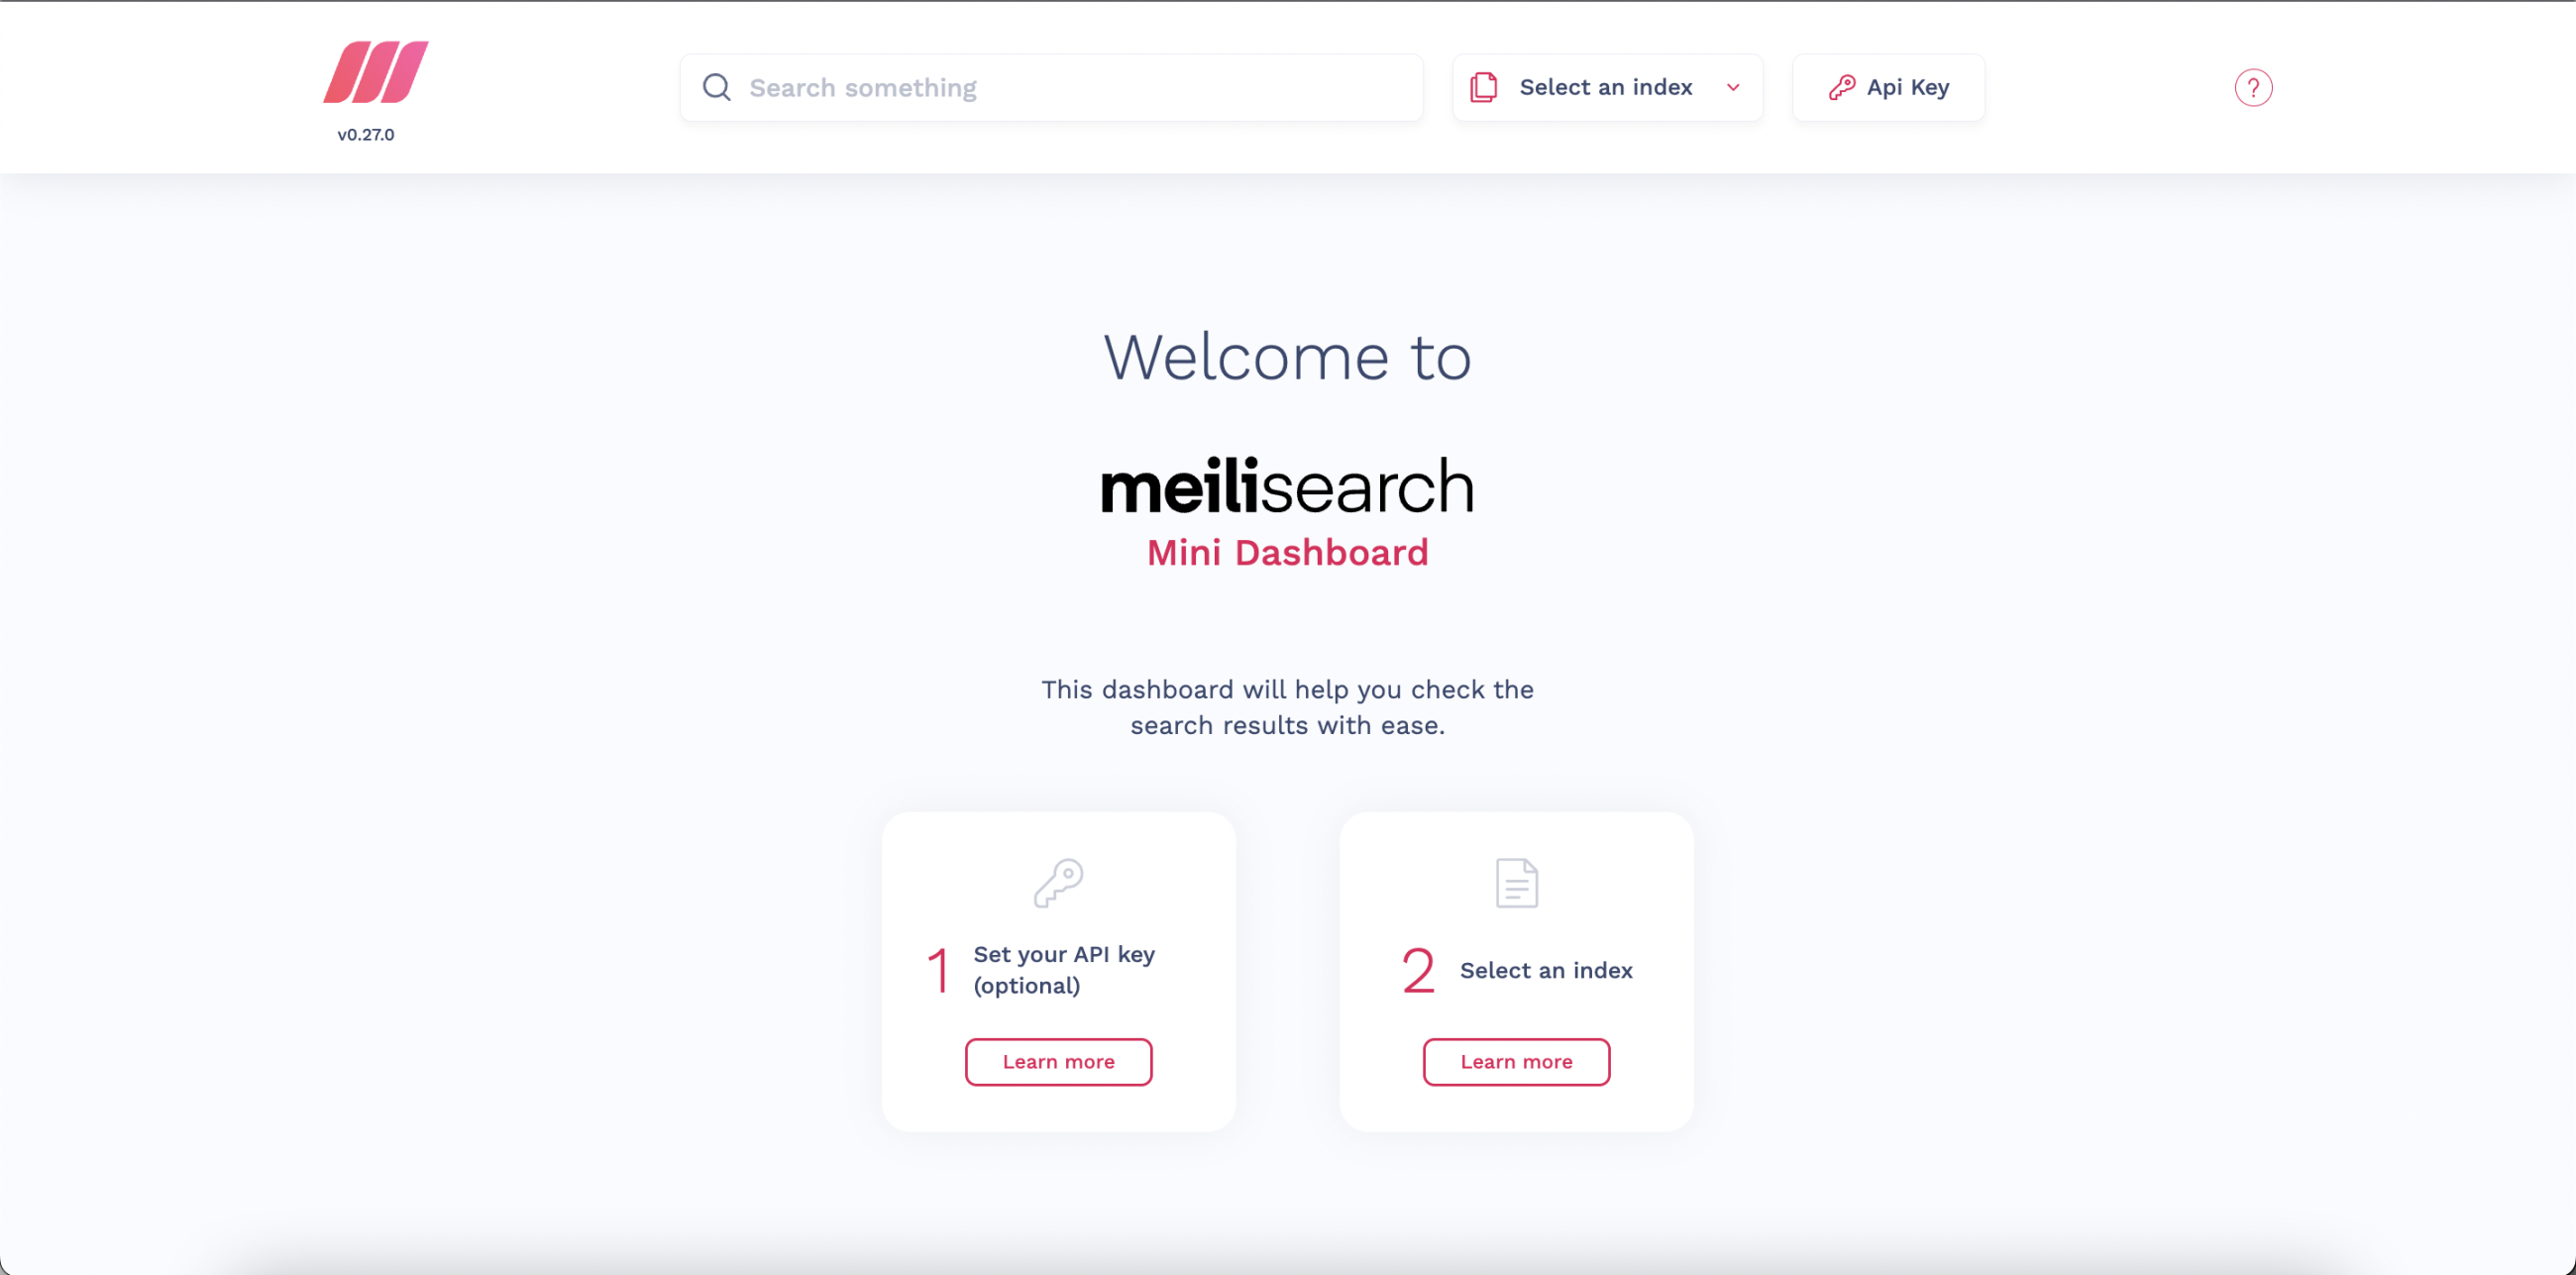
For a production environment, you will need to integrate Meilisearch with another CMS.
Let us start using it to index some documents and use it for searching.
Step 10 - Loading Sample data in Meilisearch
The Meilisearch project provides a sample JSON formatted movie file with the data scrapped from The Movie Database (TMDB). Download the file.
$ wget https://www.meilisearch.com/movies.json
You can run the tail command to see a part of the data. It should look like the following.
$ tail -n 3 movies.json

{"id":460070,"title":"J.T. LeRoy","overview":"A young woman named Savannah Knoop spends six years pretending to be a transgender writer named JT Leroy, the made-up literary persona of her sister-in-law.","genres":["Drama"],"poster":"https://image.tmdb.org/t/p/w500/43ffZhMCWQhzMneGP4kDWoPV48X.jpg","release_date":1556236800},
{"id":460071,"title":"Lizzie","overview":"Massachusetts, 1892. An unmarried woman of 32 and a social outcast, Lizzie lives a claustrophobic life under her father's cold and domineering control. When Bridget Sullivan, a young maid, comes to work for the family, Lizzie finds a sympathetic, kindred spirit, and a secret intimacy soon blossoms into a wicked plan.","genres":["Crime","Drama","Thriller"],"poster":"https://image.tmdb.org/t/p/w500/z2iuBcwznen3kC9z4LeOzBSz1BB.jpg","release_date":1536883200}
]
As you can see, each individual entry contains an id, a title, a link to the poster image, an overview of the film, a release date, and a list of genres. The release date is in the EPOCH format.
Let us load the data into Meilisearch using curl via an HTTP POST request.
$ curl \
  -X POST 'http://localhost:7700/indexes/movies/documents' \
  -H 'Content-Type: application/json' \
  -H 'Authorization: Bearer 65ed5fc15848f7ceb8e646d4928fcf79f494cec239a2874cacd118e42611' \
  --data-binary @movies.json
Let us go through the command arguments:
- -X POST
- specifies that we are performing an HTTP POST request and sending data. - -H Content-Type - specifies the file content type.
- -H Authorization: Bearer - is to pass the master key with your requests.
- --data-binary - specifies the file to be included.
Here we are creating a new Meilisearch index at /indexes/movies/documents location. You should receive a similar output telling you that the request has been enqueued. Meilisearch processes all requests asynchronously.
{"taskUid":0,"indexUid":"movies","status":"enqueued","type":"documentAdditionOrUpdate","enqueuedAt":"2024-05-03T03:12:55.599798591Z"}
You can also run the above command by replacing the URL http://localhost:7700 with https://meilisearch.example.com and it will work the same way. You can do so for all the commands in this tutorial but for simplicity's sake, we will stick to the http://localhost:7700 URL.
Run the following command to check the status of the request.
$ curl -X GET 'http://localhost:7700/indexes/movies/tasks/0'
You should receive a similar output.
{"uid":0,"indexUid":"movies","status":"succeeded","type":"documentAddition","details":{"receivedDocuments":19547,"indexedDocuments":19546},"duration":"PT29.866920116S","enqueuedAt":"2024-05-03T03:13:18.233702815Z","startedAt":"2024-05-03T03:19:45.370142371Z","finishedAt":"2024-05-03T03:20:05.108395540Z"}
This tells us that the task has been completed and the movie database is now fully indexed and ready for use.
Step 11 - Use Limited Keys for Searching
There is one tool we need that helps with readable command-line JSON formatting. It is called jq. Run the following command to install it.
$ sudo apt install -y jq
Even though we added the master key to the configuration file, you will need to pass it again with each request. Before moving ahead, we need a more restricted key that will enable read-only mode. Meiliserch creates a default read-only key by default. Let us grab it.
$ curl -X GET 'http://localhost:7700/keys' -H 'Authorization: Bearer 65ed5fc15848f7ceb8e646d4928fcf79f494cec239a2874cacd118e42611' | jq
You should see a similar output.
{
  "results": [
    {
      "name": "Default Search API Key",
      "description": "Use it to search from the frontend",
      "key": "591e51d2f6700ead7ba134a7aed0966d72e2022e43847caf48df3e4800c9279a",
      "uid": "d004073b-b813-4016-82cb-7995df5149f6",
      "actions": [
        "search"
      ],
      "indexes": [
        "*"
      ],
      "expiresAt": null,
      "createdAt": "2024-05-03T03:02:53.887256411Z",
      "updatedAt": "2024-05-03T03:02:53.887256411Z"
    },
    {
      "name": "Default Admin API Key",
      "description": "Use it for anything that is not a search operation. Caution! Do not expose it on a public frontend",
      "key": "0f3cdcfe5d9a56273d6c708f068a82382a97b629b70f4962f969687b5e327196",
      "uid": "b4fc2f96-4347-4750-9ba6-2da73c26e2bd",
      "actions": [
        "*"
      ],
      "indexes": [
        "*"
      ],
      "expiresAt": null,
      "createdAt": "2024-05-03T03:02:53.886580786Z",
      "updatedAt": "2024-05-03T03:02:53.886580786Z"
    }
  ],
  "offset": 0,
  "limit": 20,
  "total": 2
}
From now on, we will use the Default Search API key to perform searches.
Step 12 - Searching through Sample Data
There are two ways to search using Meilisearch, you can either use the API via the command line or use the web interface. The web interface is fairly limited and only works if you use Meilisearch in a development environment, and the API is the recommended way to use Meilisearch. Since we have configured our search for production, we will only use the command line method.
Searching via the API is like uploading data via HTTP POST request. You make a request to the /search endpoint of the API. For example, let us search for any movies with the word saint in it.
$ curl \
  -X POST 'http://localhost:7700/indexes/movies/search' \
  -H 'Content-Type: application/json' \
  -H 'Authorization: Bearer 591e51d2f6700ead7ba134a7aed0966d72e2022e43847caf48df3e4800c9279a' \
  --data-binary '{ "q": "saint" }' | jq
You should receive an output formatted in JSON like the following.
{
  "hits": [
    {
      "id": 25248,
      "title": "Saint Ralph",
      "overview": "This Canadian made comedy/drama, set in Hamilton, Ontario in 1954, is a sweet and - at times - goofy story that becomes increasingly poignant as the minutes tick by.  It's the fictional tale of a wayward 9th grader, Ralph (Adam Butcher), who is secretly living on his own while his widowed, hospitalized mother remains immersed in a coma. Frequently in trouble with Father Fitzpatrick (Gordon Pinsent), the principal of his all-boys, Catholic school, Ralph is considered something of a joke among peers until he decides to pull off a miracle that could save his mother, i.e., winning the Boston Marathon.  Coached by a younger priest and former runner, Father Hibbert (Campbell Scott), whose cynicism has been lifted by the boy's pure hope, Ralph applies himself to his unlikely mission, fending off naysayers and getting help along a very challenging path from sundry allies and friends.",
      "genres": [
        "Comedy",
        "Drama"
      ],
      "poster": "https://image.tmdb.org/t/p/w500/3MdWgqUunIBWnc7mYi2dtZrD54Y.jpg",
      "release_date": 1123200000
    },
    {
      "id": 26894,
      "title": "Saint Sinner",
      "overview": "In 1815 a monk, Tomas Alcala, unwittingly unleashes two female succubi, Munkar and Nakir, upon an unsuspecting 21st century. He is chosen by God to travel through the centuries and stop the demons' rampage.",
      "genres": [
        "Fantasy",
        "Horror",
        "Science Fiction",
        "TV Movie"
      ],
      "poster": "https://image.tmdb.org/t/p/w500/cxljKsfUI6PVFPIgPvsesUWHai4.jpg",
      "release_date": 1035590400
    },
    {
      "id": 27023,
      "title": "Saint John of Las Vegas",
      "overview": "An ex-gambler is lured back into the game by a veteran insurance-fraud investigator.",
      "genres": [
        "Comedy"
      ],
      "poster": "https://image.tmdb.org/t/p/w500/kN4Vur1SccouDR0k3tmJXJHdrXw.jpg",
      "release_date": 1264723200
    },
  ...
To test the fuzzy matching feature of Meilisearch in which similar sounding words can be used to find the exact search. This is helpful in case you make a typo and still expect the correct result.
$ curl \
  -X POST 'http://localhost:7700/indexes/movies/search' \
  -H 'Content-Type: application/json' \
  -H 'Authorization: Bearer 591e51d2f6700ead7ba134a7aed0966d72e2022e43847caf48df3e4800c9279a' \
  --data-binary '{ "q": "seint" }' | jq
Here, we have misspelled saint as seint and Meilisearch will still return entries with the word saint.
{
  "hits": [
    {
      "id": 10105,
      "title": "Saints and Soldiers",
      "overview": "Five American soldiers fighting in Europe during World War II struggle to return to Allied territory after being separated from U.S. forces during the historic Malmedy Massacre.",
      "genres": [
        "War",
        "Drama",
        "Action",
        "Adventure",
        "History"
      ],
      "poster": "https://image.tmdb.org/t/p/w500/efhqxap8fLi4v1GEXVvakey0z3S.jpg",
      "release_date": 1063238400
    },
    {
      "id": 25248,
      "title": "Saint Ralph",
      "overview": "This Canadian made comedy/drama, set in Hamilton, Ontario in 1954, is a sweet and - at times - goofy story that becomes increasingly poignant as the minutes tick by.  It's the fictional tale of a wayward 9th grader, Ralph (Adam Butcher), who is secretly living on his own while his widowed, hospitalized mother remains immersed in a coma. Frequently in trouble with Father Fitzpatrick (Gordon Pinsent), the principal of his all-boys, Catholic school, Ralph is considered something of a joke among peers until he decides to pull off a miracle that could save his mother, i.e., winning the Boston Marathon.  Coached by a younger priest and former runner, Father Hibbert (Campbell Scott), whose cynicism has been lifted by the boy's pure hope, Ralph applies himself to his unlikely mission, fending off naysayers and getting help along a very challenging path from sundry allies and friends.",
      "genres": [
        "Comedy",
        "Drama"
      ],
      "poster": "https://image.tmdb.org/t/p/w500/3MdWgqUunIBWnc7mYi2dtZrD54Y.jpg",
      "release_date": 1123200000
    },
    {
      "id": 26894,
      "title": "Saint Sinner",
      "overview": "In 1815 a monk, Tomas Alcala, unwittingly unleashes two female succubi, Munkar and Nakir, upon an unsuspecting 21st century. He is chosen by God to travel through the centuries and stop the demons' rampage.",
      "genres": [
        "Fantasy",
        "Horror",
        "Science Fiction",
        "TV Movie"
      ],
      "poster": "https://image.tmdb.org/t/p/w500/cxljKsfUI6PVFPIgPvsesUWHai4.jpg",
      "release_date": 1035590400
    },
 …
Step 13 - Tuning Search Ranking and Filtering Data
Search engines can return better results if they know how to rank or give importance to certain results based on the importance of a particular field. Meilisearch has a default set of bias rules that you can configure to improve your search results.
But first, we need to check the ranking rules set by Meilisearch.
$ curl -X GET 'http://localhost:7700/indexes/movies/settings/ranking-rules' -H 'Authorization: Bearer 0f3cdcfe5d9a56273d6c708f068a82382a97b629b70f4962f969687b5e327196'
You will get the following output.
["words","typo","proximity","attribute","sort","exactness"]
- words - results are sorted by decreasing number of matched terms.
- typo - results are sorted by increasing the number of typos. Fewer typo queries are returned at the top.
- proximity - results are sorted by increasing the distance between matched terms.
- attribute - results are sorted by attribute ranking order.
- sort - results are sorted according to parameters decided at query time.
- exactness - results are sorted by the similarity of matched words with the query words.
You can read more about relevance in the official Meilisearch documentation.
Issue the following command to change the bias rule order.
$ curl \
  -X POST 'http://localhost:7700/indexes/movies/settings/ranking-rules' \
  -H 'Content-Type: application/json' \
  -H 'Authorization: Bearer 0f3cdcfe5d9a56273d6c708f068a82382a97b629b70f4962f969687b5e327196' \
  --data-binary '[
      "words",
      "typo",
      "proximity",
      "release_date:asc",
      "attribute",
      "sort",
      "exactness",
      "rank:desc"
  ]'
Now let us filter the search results. First, let us ask Meilisearch to use only certain attributes to perform the search and leave out the meaningless attributes like id aside.
$ curl \
  -X POST 'http://localhost:7700/indexes/movies/settings' \
  -H 'Content-Type: application/json' \
  -H 'Authorization: Bearer 0f3cdcfe5d9a56273d6c708f068a82382a97b629b70f4962f969687b5e327196' \
  --data-binary '{
      "searchableAttributes": [
          "title",
          "overview",
          "genres"
      ]
  }'
Here, we are performing a search only using the title, overview and genres attributes that will give better results.
Next, we can format our search results to only display certain attributes while hiding the others.
$ curl \
  -X POST 'http://localhost:7700/indexes/movies/settings/displayedAttributes' \
  -H 'Content-Type: application/json' \
  -H 'Authorization: Bearer 0f3cdcfe5d9a56273d6c708f068a82382a97b629b70f4962f969687b5e327196' \
  --data-binary '[
          "title",
          "overview",
          "genres",
          "release_date"
      ]'
This will only show the attributes that we have included in our query with the results.
Finally, you can also provide a list of attributes to be filtered or sorted. This includes both quantitative filtering using mathematical operators like < or > and filtering through inclusion in a specified set. This is also called a faceted search.
$ curl \
  -X PATCH 'http://localhost:7700/indexes/movies/settings' \
  -H 'Content-Type: application/json' \
  -H 'Authorization: Bearer 0f3cdcfe5d9a56273d6c708f068a82382a97b629b70f4962f969687b5e327196' \
  --data-binary '{
      "filterableAttributes": [
          "genres",
          "release_date"
      ],
      "sortableAttributes": [
          "release_date"
      ]
  }'
We can combine all these rules to perform a query like the following.
$ curl \
  -X POST 'http://localhost:7700/indexes/movies/search' \
  -H 'Content-Type: application/json' \
  -H 'Authorization: Bearer 591e51d2f6700ead7ba134a7aed0966d72e2022e43847caf48df3e4800c9279a' \
  --data-binary '{ "q": "house", "sort": ["release_date:desc"], "filter": "genres = Horror" }' | jq
Here we are looking for all the movies in the Horror genre from the newest to the oldest containing the word house in the title. You should receive a similar output.
{
  "hits": [
    {
      "id": 440559,
      "title": "Housesitters",
      "overview": "Angie and Izzy get a housesitting gig that seems too good to be true. Gruesome supernatural hijinks ensue.",
      "genres": [
        "Comedy",
        "Horror"
      ],
      "poster": "https://image.tmdb.org/t/p/w500/9Gnu0PBdYzyd7ZkO74XK0xCH0iY.jpg",
      "release_date": 1524873600
    },
    {
      "id": 449550,
      "title": "Housewife",
      "overview": "Housewife is centered on Holly whose mother murdered her sister and father when she was seven. 20 years later and slowly losing her grip on the difference between reality and nightmares, she runs into a celebrity psychic who claims that he is destined to help her.",
      "genres": [
        "Horror"
      ],
      "poster": "https://image.tmdb.org/t/p/w500/ohHxS7PIRQb9O6KTrDtqYshYGts.jpg",
      "release_date": 1504828800
    },
    {
      "id": 392703,
      "title": "House of Darkness",
      "overview": "Inspired by true events, the supernatural thriller \"House of Darkness\" recounts the mysterious case of a San Francisco family who claimed that a dark force was responsible for the tragic events that unfolded.  Trying to save their struggling marriage Kelly (Sara Fletcher, \"Adulthood\"), her husband Brian (Gunner Wright, \"J. Edgar\") and their daughter Sarah (Mykayla Sohn, \"The Chosen\") move to a rural farmhouse in search of some serenity. Unbeknownst to them, nearly every family that has lived in the house has suffered some form of tragedy, dating back nearly 100 years. Shortly after their arrival, Kelly begins to sense that her husband’s behavior is growing increasingly strange and violent. Kelly also comes to discover the voices she’s hearing echoing through the halls, are not coming from her daughter. Will Kelly and her family be the next victims of the dark forces in the house?",
      "genres": [
        "Horror",
        "Thriller",
        "TV Movie"
      ],
      "poster": "https://image.tmdb.org/t/p/w500/ueQM9RsT0HLL2RuuiLmD07j8lKB.jpg",
      "release_date": 1460851200
    },
…
Step 14 - Conclusion
You have finished installing and configuring Meilisearch in a production environment on a Debian 12 server. You also performed some basic searches and learned how to improve the search results through ranking and filtering. If you have any questions, post them in the comments below.

