How to Install and Use ClamAV Antivirus on Debian 12
ClamAV or Clam Anti-Virus is an open-source anti-virus and anti-malware toolkit for multiple operating systems. It supports a multi-threaded daemon, a command-line scanner, and automatic signature database update. ClamAV is designed to scan files quickly and also provides real-time protection for your Linux box. It also scans compressed and archived files, and it has built-in archive extraction capabilities for multiple formats such as 7Zip, Tar, ISO, IMG, HFS, XZ, Bzip2, and many more.
In this tutorial, you'll learn how to install ClamAV on Debian 12 server. You'll also learn how to use 'freshclam' to update your database signatures, how to use 'clamscan' to scan files and directories on a Linux system, and also learn how to use 'clamav-daemon' for automatic scanning.
Prerequisites
Before moving one, make sure you have the following:
- A Debian 12 server
- A non-woot user with administrator privileges
Installing ClamAV
ClamAV is an open-source anti-malware toolkit with cross-platform support. It is available on most Linux distribution repositories. On a Debian system, you can easily install ClamAV via the APT package manager.
First, run the 'apt' command below to update your Debian package index.
sudo apt update
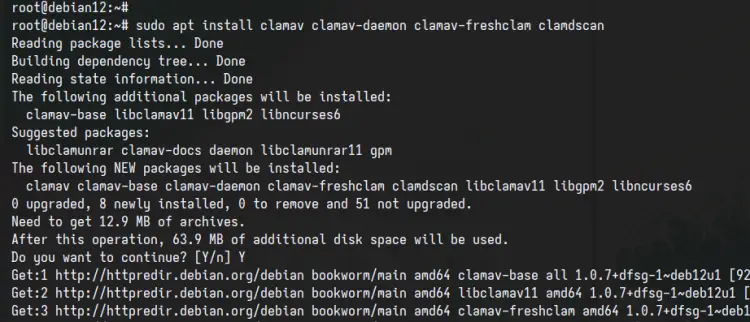
Now install 'clamav' and other packages using the command below. Enter 'Y' to proceed with the installation.
sudo apt install clamav clamav-daemon clamav-freshclam clamdscan
In this example, you'll install the following packages:
- clamav: ClamAV anti-virus package
- clamav-daemon: scanner daemon for ClamAV for automatic scanning
- clamav-freshclam: ClamAV utility for updating virus database signatures and used for mail server integration
- clamdscan: The command line interface for 'clamav-daemon'
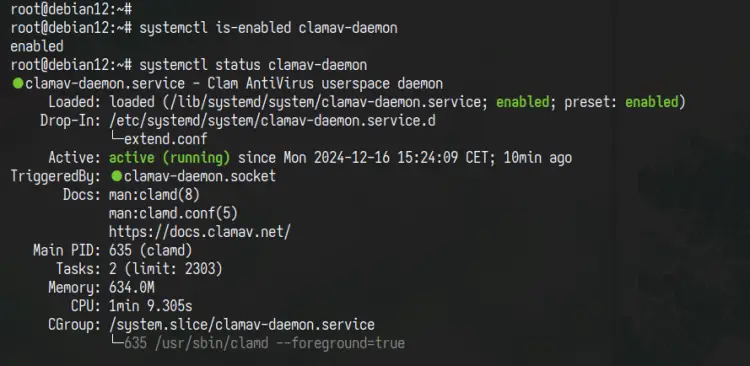
After the installation is finished, check the ClamAV service status with the command below.
sudo systemctl is-enabled clamav-daemon
sudo systemctl status clamav-daemon
Configuring ClamAV
After you've installed ClamAV, you need to configure mirror and update the signature databases, and then start and enable the 'clamav-freshclam' service to enable automatic update of malware/virus signature databases.
Open the configuration '/etc/clamav/freshclam.conf' with the following 'nano' editor:
sudo nano /etc/clamav/freshclam.conf
Adjust the 'DatabaseMirror' configuration with your default country code. Or you can leave the configuration as default.
DatabaseMirror db.<country code>.clamav.net
Save the file and exit the editor.
Now run the 'freshclam' command below to update your anti-virus database.
sudo freshclam
Once the database is updated, run the 'systemctl' command below to start and enable the 'clamav-freshclam' service. Your anti-virus database will be updated automatically by the 'clamav-freshclam' service.
sudo systemctl enable --now clamav-freshclam
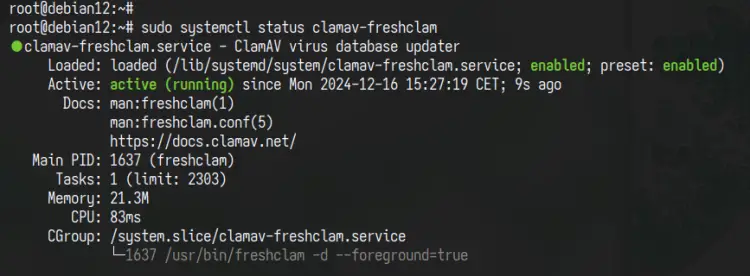
Lastly, check the 'clamav-freshclam' service with the command below. You'll see that the service is running and enabled.
sudo systemctl status clamav-freshclam
Scanning Files and Directories with ClamAV
So far, you've installed ClamAV and configured the database signature via the 'clamav-freshclam' service. In this section, you'll learn how to scan files and directories with the ClamAV 'clamscan' command.
Before scanning files or directories, ensure that the 'clamav-daemon' service is running. Check it with the command below.
sudo systemctl status clamav-daemon
If running, you'll see an output such as 'active(running)'.
To scan the file with ClamAV, run the 'clamscan' command followed by the filename like the following.
clamscan file.docx
As for scanning a directory, you can follow the directory name like the following.
clamscan /home/
Now you can run the command below to skip any result with the status 'OK'.
clamscan -o /home/
Or you can just show the infected file with the '-i' option.
clamscan -i /home/
Run the command below to scan the directory recursively and print infected files.
clamscan -i -r /home
Lastly, you can use the '-r' with the '--move' parameter to move infected files to the target directory.
clamscan -i -r --move=/home/$USER/infected /home/
Automatic Scanning with ClamAV Daemon
ClamAV provides automatic scanning via the 'clamav-daemon' service. Now you'll learn how to configure the 'clamav-daemon' to automatically scan your system directories such as '/home', '/etc', and '/var'.
Open the ClamAV daemon configuration '/etc/clamav/clamd.conf' using the 'nano' editor.
sudo nano /etc/clamav/clamd.conf
Insert the configuration below to configure automatic scan for directories such as '/home', '/etc', and '/var'. The 'ScanOnAccess' will enable real-time protection through the 'clamd' to scan files when they're accessed.
ScanOnAccess yes
OnAccessIncludePath /home
OnAccessIncludePath /etc
OnAccessIncludePath /var
Save the file and exit the editor when finished.
Now run the 'systemctl' command below to start and enable the 'clamav-daemon' service.
sudo systemctl restart clamav-daemon
Lastly, check the 'clamav-daemon' service status to ensure it is running.
sudo systemctl status clamav-daemon
You can see below that the 'clamav-daemon' service is running, which means that ClamAV scanning will be run automatically.
Debugging ClamAV
The default log file for ClamAV is located in the '/var/log/clamav/clamav.log' file. You can check the log file with the 'tail' command below.
tail -f /var/log/clamav/clamav.log
Now run the 'tail' command below to check the log file for the 'freshclam' service that will automatically update your anti-virus database.
tail -f /var/log/clamav/freshclam.log
You can also monitor the ClamAV service status using the 'clamdtop' command.
clamdtop
Conclusion
Congratulations! You've completed the installation of ClamAV on the Debian 12 server. You've also configured the 'DatabaseMirror' for ClamAV signatures and learned about the 'freshclam' command for updating database signatures from the command line. Next, you've learned how to scan files and directories with ClamAV via 'clamscan' command. Lastly, you've configured an automatic scan for viruses and malware with ClamAV through the 'clamav-daemon' and learned how to check ClamAV logs and processes.


