A few weeks back I got an email asking about what can be done in Photoshop if you caught your subject with one eye partially closed when you pressed the shutter. I’ve had that happen so many times over the years that I already had a fix for it. In fact, it literally only takes two-minutes if that (well, maybe three minutes the first time you try it, but after that, you’ll have it down to two-minutes flat). Here goes:
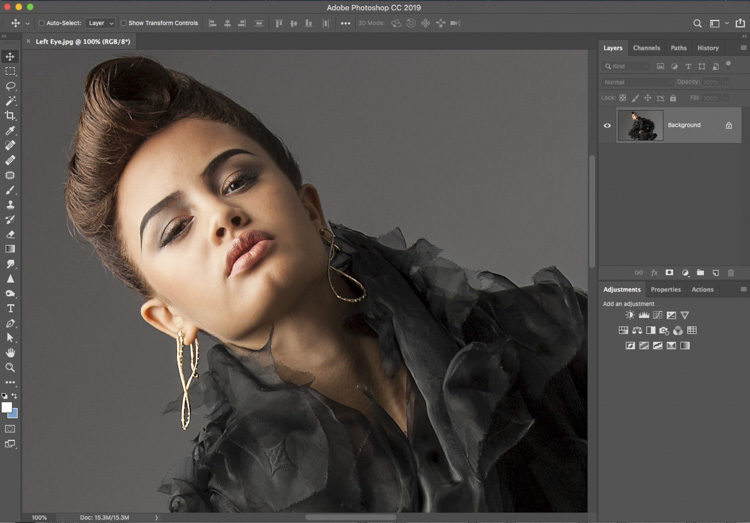
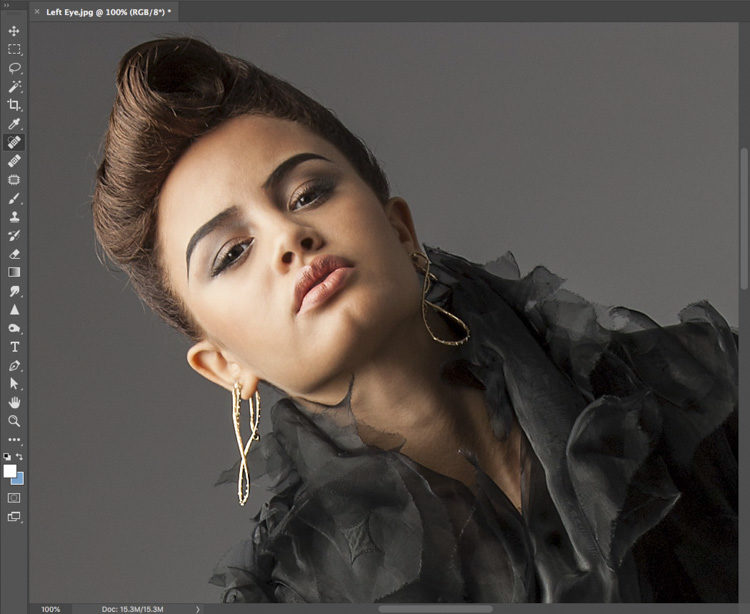
Above: Here’s our original image and her eye on the left is partially closed (it was the only one I shot that day where her eye was like this), but luckily the fix is easy because her other eye is fully open and that’s what we’ll use to do our quick retouch.
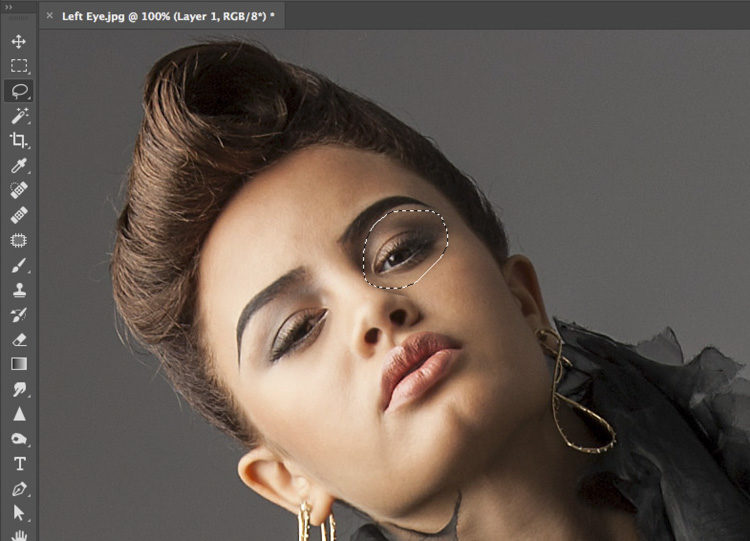
STEP ONE: Zoom in tight and use Photoshop’s Lasso tool to make a very loose selection around her open eye, as shown here. Now press Command-J (PC: Ctrl-J) to put that eye up on its own separate layer.
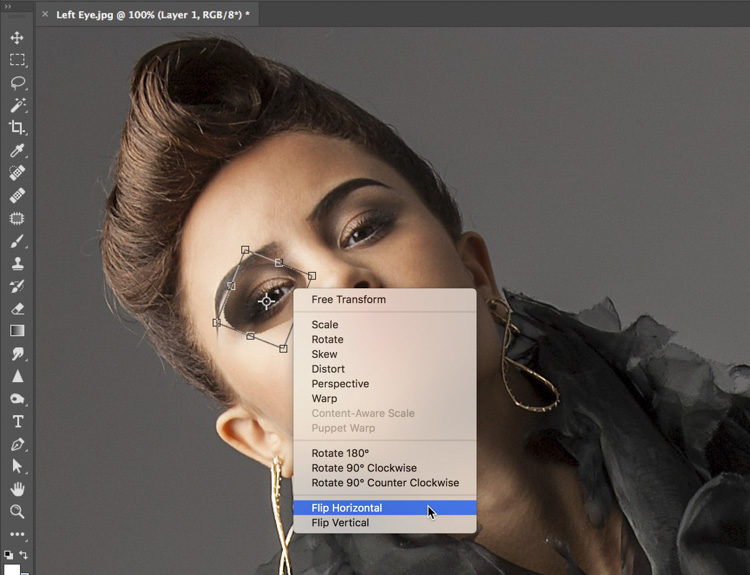
STEP TWO: Using the Move tool, drag the copy of her open eye over so it covers the partially closed eye (which is what I did here), but you can just leave it at that because she’d have two right eyes (and that would look weird). To fix that, press Command-T (PC: Ctrl-T) to bring up Free Transform (it puts a bounding box with handles around that copy of her eye) and then right-click anywhere inside that bounding box to bring up the pop-up menu you see here. Choose Flip Horizontal as shown here. Because she’s leaning over quite a bit in the image, it won’t be a perfect match to the other eye — you’re going to need to rotate the flipped copy into place, so move your cursor outside the Free Transform bounding box and your cursor changes into a two-headed arrow cursor. Click and drag in a circular motion to rotate her eye to where it looks about right (as seen here as well).
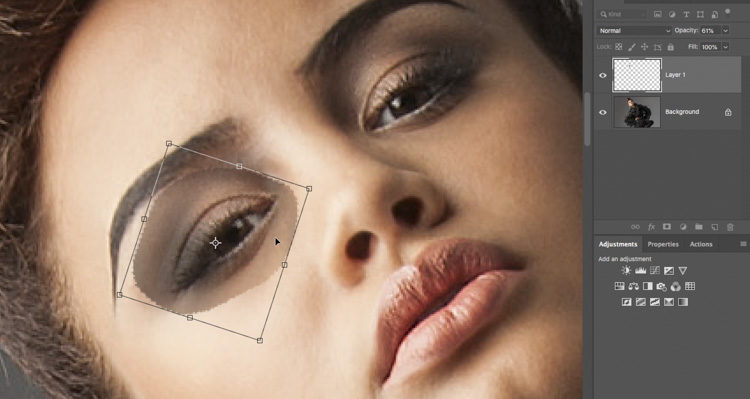
STEP THREE: To really make sure you get the eye at just the right position and angle, here’s a trick I use that works wonders. While you’re still in Free Transform, go over to the Layers panel and lower the Opacity for this layer down to around 60% or so. Now you can see through this copied eye, to the original eye’s position on the layer below it, and you’ll now be able to rotate the eye easily to the exact right amount, and then move your cursor inside the bounding box and drag the eye copy until it lines up perfectly (as seen here). Now press Return (Windows: Enter) to lock in your transformation, then raise the opacity of this layer back up to 100%. Before we move on, you can see the problem here — the shadows aren’t right, and that’s because the eye we copied was on the side of her face that was farther away from the light, and was partially in shadows. This isn’t going to be a problem, because we don’t need all that area around her eye; all we really need is the Iris and whites of the eyes to make it look open (which we’ll fix in the next step).
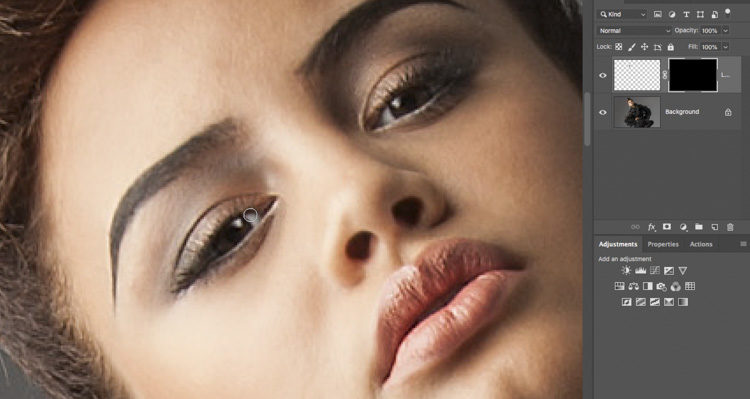
STEP FOUR: Hold the Option key (Windows: Alt key) and at the bottom of the Layers panel, click on the 3rd icon from the left to add a black Layer Mask over your image (its icon looks like a white rectangle with a black circle in the center). This hides the eye-copy layer behind that black mask so you can no longer see that layer, but that’s exactly what we want. We don’t want to see the whole eye copy — just the Iris and whites of the eyes. Set your Foreground color to white (if it isn’t already); choose a small soft-edged brush from up in the Brush Picker on the top left side of the Options Bar across the top, then paint over just the areas where you want to reveal the eye on the top layer. Here I pained over her eye on the left with that small soft-edged brush and it reveals just that part of the eye from the top layer. If you look closely, you can see my circular brush cursor painting on the far right side of her left eye. I’m careful not to paint in too much or it will start showing those shadows, so I’m pretty much just staying inside the eye area and not going onto the eyelashes or lids too much. We still have a problem. The catch-light in her left eye is on the wrong side.
STEP FIVE: To fix the catch lights, first we’ll create the missing one. Get the Clone Stamp tool; choose a soft-edged brush and make the size of the brush just a little larger than the white catch light in her right eye. Move your cursor over that eye; hold the Option key (Windows: Alt key) and click once to sample that white catch light. Now move over the left eye, where you catch-light should be (on the upper left side of her iris) and click once, and it clones the white catch-light from the right eye over onto the top left of her iris on the left eye. Of course, now she has two catchlights in the left eye, so we’ll need to remove the extra one so it matches the other eye.

STEP SIX: Get the Spot Healing Brush tool; make your brush size cursor just a little larger than the extra catch-light; then click once to remove the extra catch light. Easy peasy!
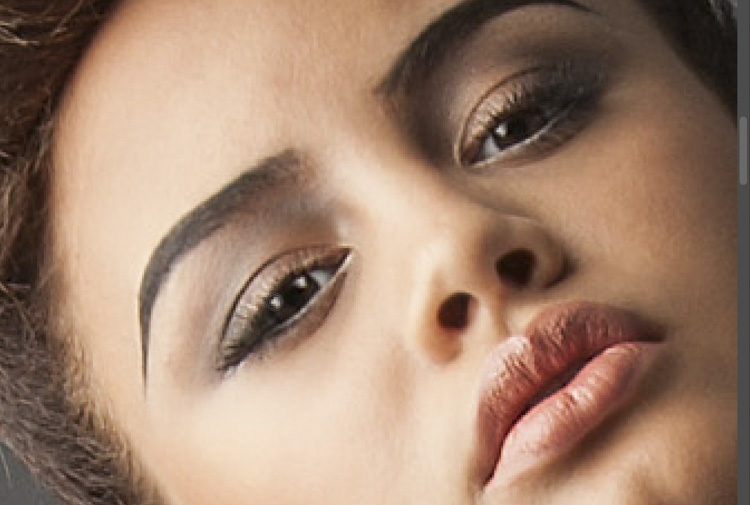
Above: I zoomed out here so you can see the final retouch, quick and easy. :)
Hope you found that helpful.
I was in the studio all day today…
The shot you see above was from a few years back — today I was in our studio at KelbyOne HQ making new images while recording an update to one of my most-popular online courses, it’s called “10 Essential Studio Techniques Every Photographer Needs to Know.” This new course will replace the original which was recorded nearly 8 years ago. The recording session today went great, and I was really tickled to get to redo the class using today’s tools and today’s techniques, and applying some of the things I’ve learned in the past eight years. I think (well, I certainly hope) it will help a lot of photographers who want to break into shooting in the studio. I’ll let you know when it comes out — shouldn’t be too long now.
Hope you all have a fantastic SuperBowl weekend. Don’t forget, when the Patriots lose, America wins! #GoRams!
Thanks,
-Scott