February Update for Lightroom Classic and Lightroom CC
Adobe has just released the first update to Lightroom Classic, Lightroom CC, and Adobe Camera Raw for 2019. There are always the anticipated updates for new cameras and lenses (as well as some bug fixes), but let’s take a closer look at the main item included in this release first.
Enhanced Details
This is a new featured that was added to Lightroom Classic, Lightroom CC for Mac and Win, and Adobe Camera Raw. As I primarily use it in Lightroom Classic, that’s where my examples were made. In a nutshell, Enhanced Details is a new algorithm for demosaicing raw files into pixels with the goal of producing even better detail with fewer artifacts. I’ve found this to be especially true along edges with high color contrast. Enhanced Details only works with mosaic raw files, whether from cameras with a Bayer array sensor (like Nikon, Canon, Sony, etc.) or X-Trans (Fuji).
The key to this new demosaicing method is the inclusion of Adobe Sensei-powered machine learning. I encourage you to read the Enhanced Details white paper that goes into the technical details behind the feature, and the Help Doc that covers the minimum requirements for use, unsupported files, and other details. Let’s look at some examples.
Putting it to use
One thing you need to understand from the start is that this process is not required or needed to be run on every photo in your library. In my experience (so far), I have found a limited number of photos where I can really see a noticeable difference. Your milage may vary, but I would suggest finding raw photos that have one (or more) of the following to test the feature:
- Visible artifacts resulting from the initial rendering
- A lot of fine detail
- High contrast color edges
- Photos you are planning to print at large sizes
Once you’ve found and selected a good candidate (in either Library or Develop) do either of the following:
- go to Photo > Enhanced Details
- right-click the selected photo and choose Enhanced Details from the contextual menu
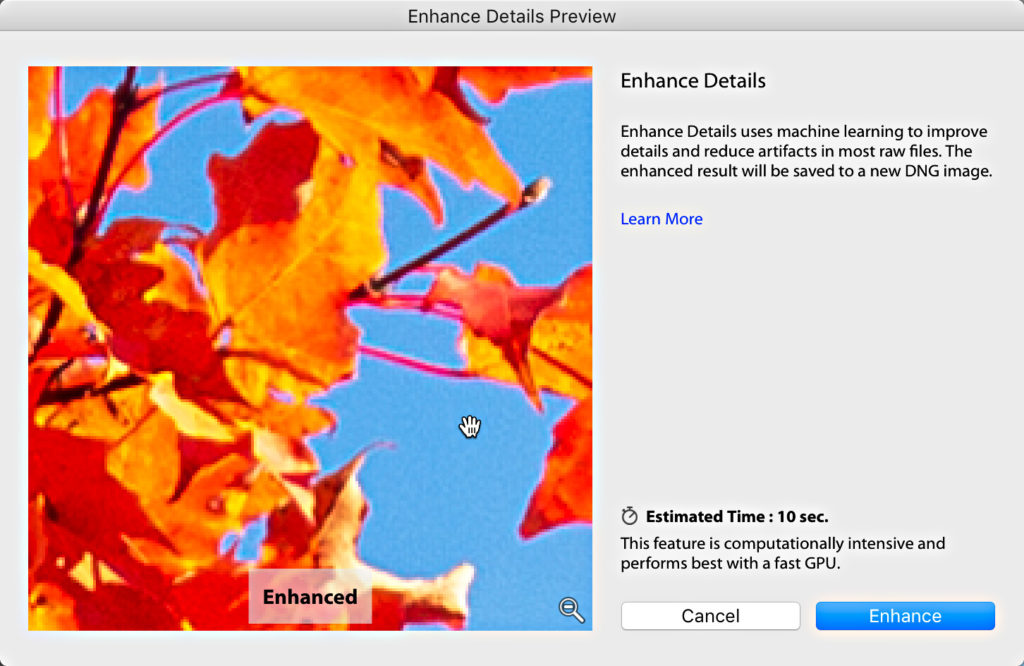
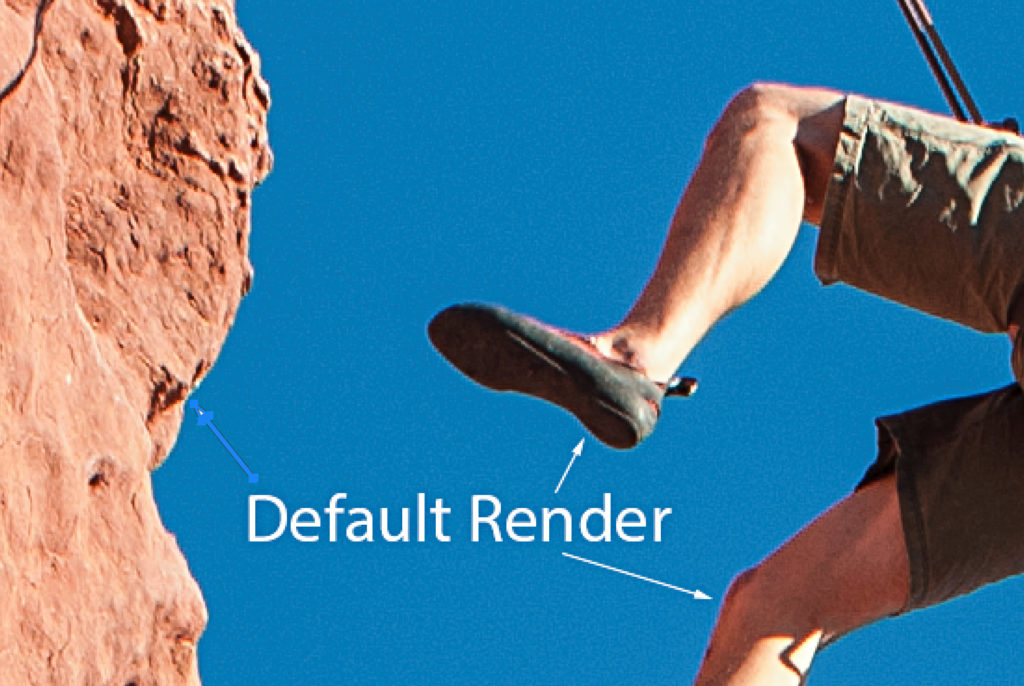
This will bring up a preview window allowing you to compare the before and after of the Enhanced Details rendering at 400%. Click and hold within that preview to see the Before, and release the mouse to see if Enhanced Details offers any improvement. You can pan and zoom within that preview to visit other areas of the selected photo. My experience has been that the preview tends to show a greater difference between the before and after than the actual results show, but if you don’t see any difference in the preview you won’t see it in the output either. Note, you can run Enhanced Details on a batch of selected photos, but no preview will be shown.

If it looks like an improvement is possible, click Enhance to run it through the new algorithm. This will create a new DNG version of the original photo with the word -Enhanced appended to the end. Note, in my testing the resulting enhanced DNG file has been as much as 3 to 5 times larger in file size than the source photo. This (and the time to render) is the price to pay for the improved rendering. The new DNG will appear in the same folder as the source photo when done.
For comparison purposes, I’ve found that selecting both the original and enhanced versions in Grid view, then using the Photo > Edit > Open as layers command to be a good way to compare the results (zoomed into 400%). This way you can just show/hide the enhanced layer to see the differences.
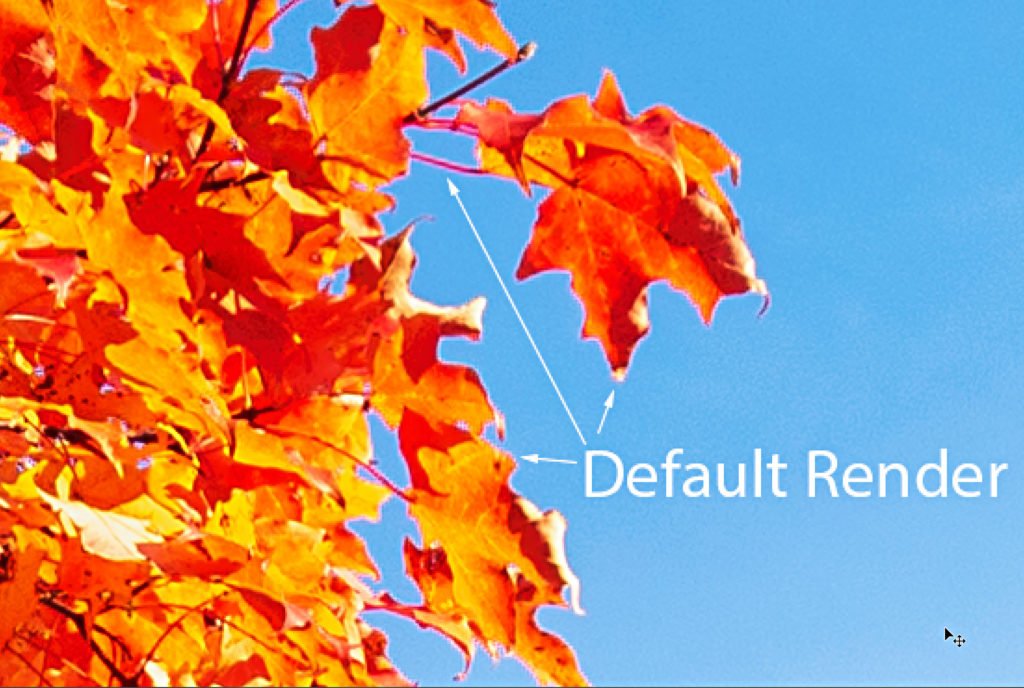
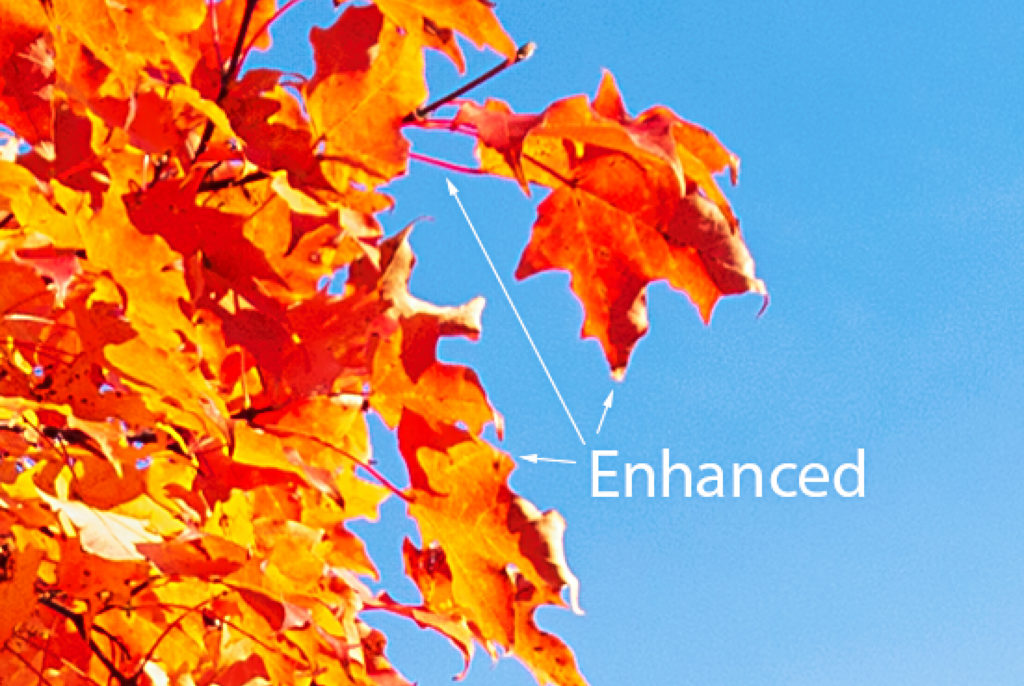
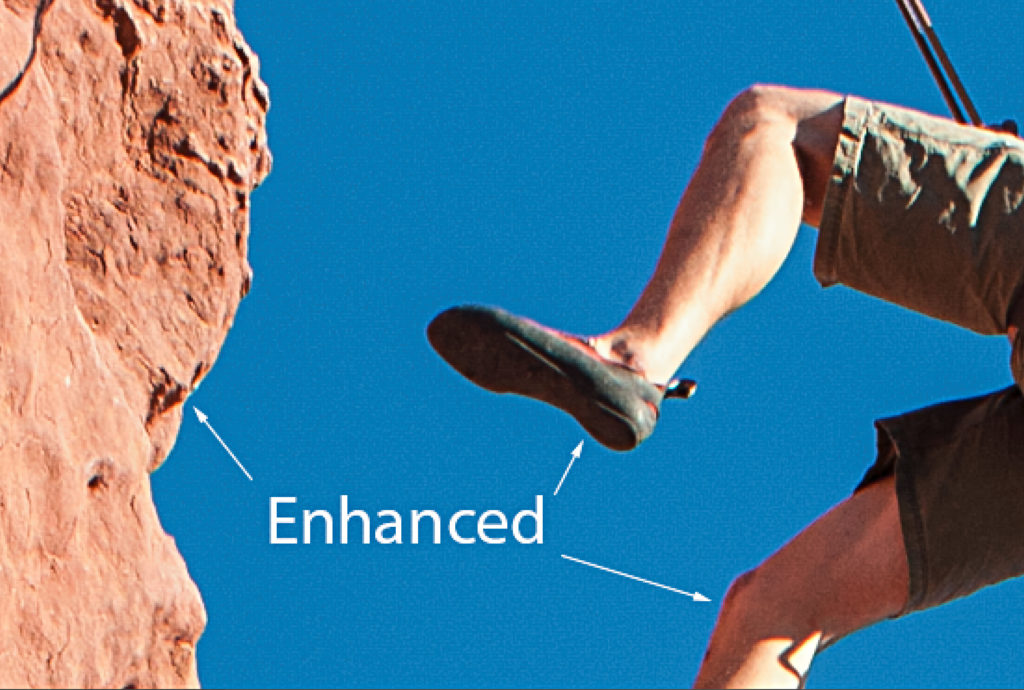
In the above example you can see the jaggedness along the edges of the leaves and stems has been greatly smoothed out in the Enhanced version. Here’s another example.
I’m excited at this first iteration of this new feature, and I’m very interested to see what the further inclusion of machine learning and AI can do to eek out every last bit of detail in our photos. I’m glad to have this feature in my kit, and will absolutely consider using it when printing photos at large sizes or if noticeable improvements are visible. I don’t see using it for every photo though. Time will tell.
Lightroom Classic
Aside from the Enhanced Details feature, Adobe has also brought the Nikon tethering up to par with the upgrade that was released for Canon last December. As a result, there is only one menu command for tethering under the file menu now, and Lightroom automatically detects which camera you are using. In addition to a faster and more stable tethering experience we can also control (depending on what mode you are shooting in) aperture, shutter speed, ISO, and white balance from the tether bar.
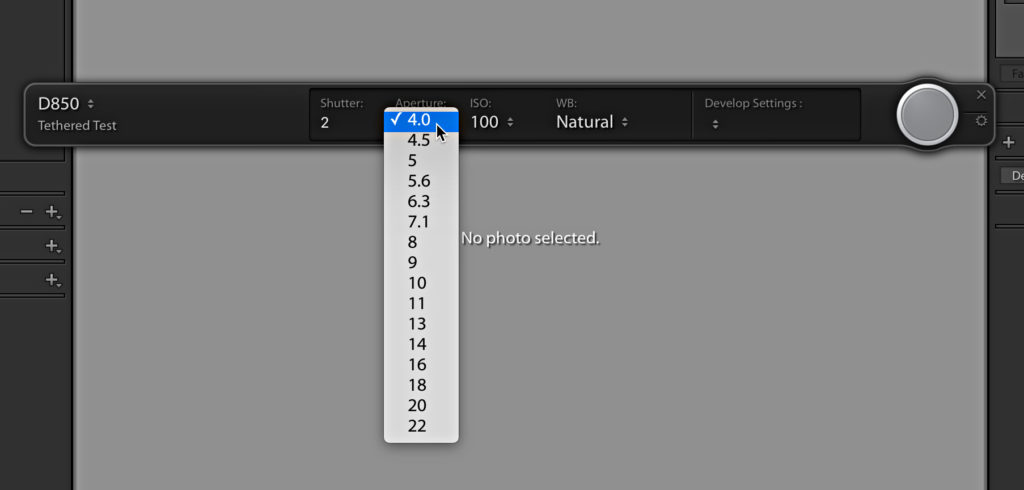
Tethering support was also expanded to include the Nikon Z6 and Z7. Here’s the complete list of supported cameras.
Lightroom CC for Win and Mac
The desktop version of Lightroom CC has taken a few more steps closer to feature parity with Lightroom Classic with the addition of Merge to HDR, Merge to Pano, and Merge to HDR Pano. All three options can be found under the Photo > Photo Merge menu, or via the right-click contextual menu.
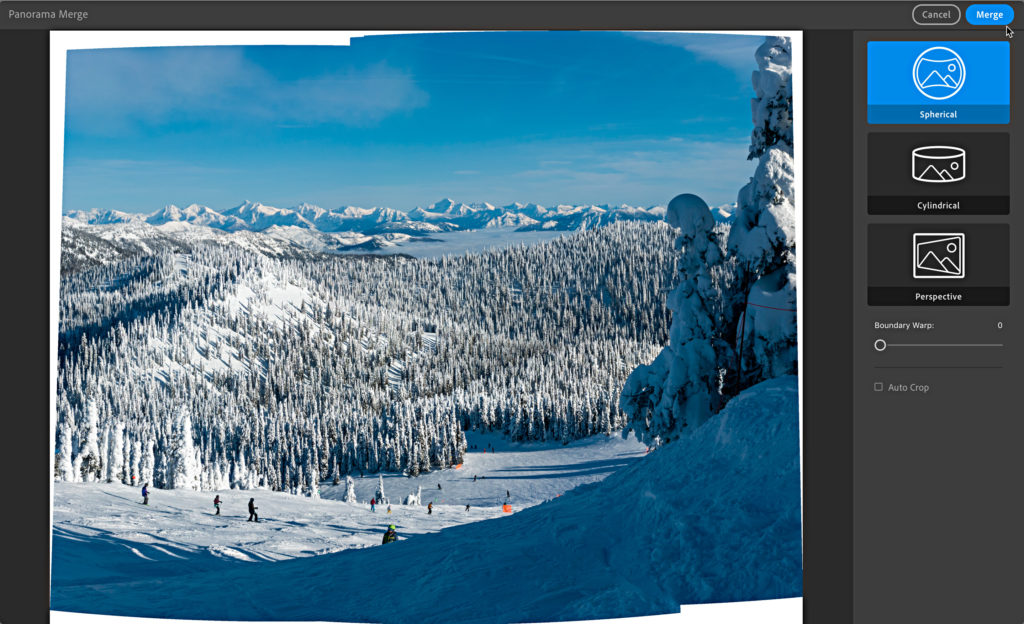
Although the interface has a more modern feel in keeping with Lightroom CC, the dialogs for each operation contain the same options as we’ve come to know in Lightroom Classic and ACR. I know this has been a feature set that has been in high demand by folks wanting to make the move to Lightroom CC from Classic, or who have already made the leap.
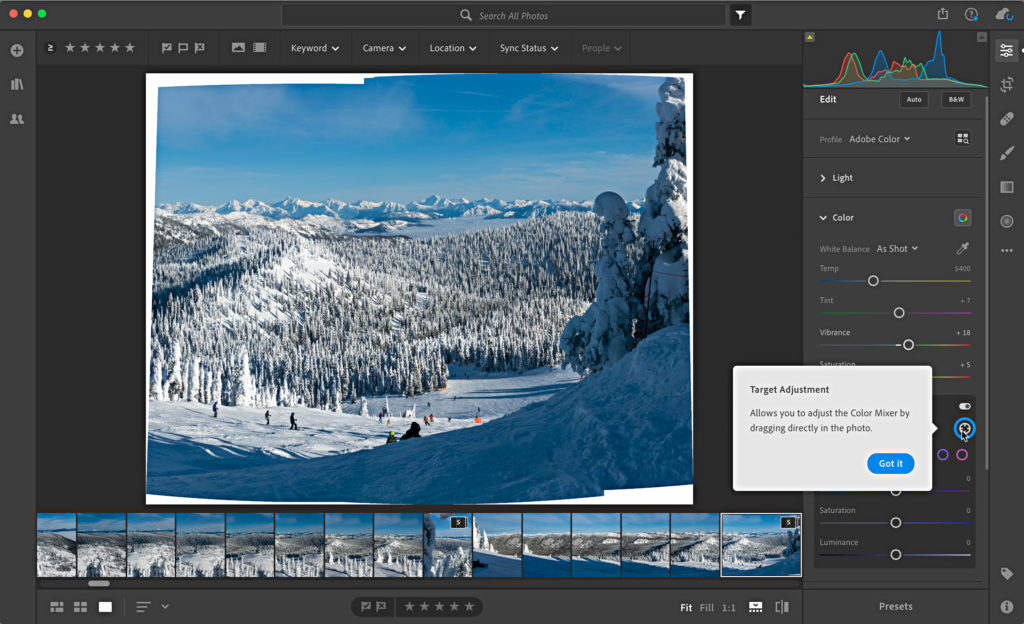
To sweeten the pot a little more, Adobe has also added the Targeted Adjustment Tool (TAT) to the Color Mixer and Tone Curve panels.
Highlight and shadow clipping indicators have also been added to the histogram.
Camera and Lenses
For new camera owners, the most important part of any update is support for their new babies. You can access the updated list of supported cameras and lenses. Adobe has also updated the list of fixes in this release.