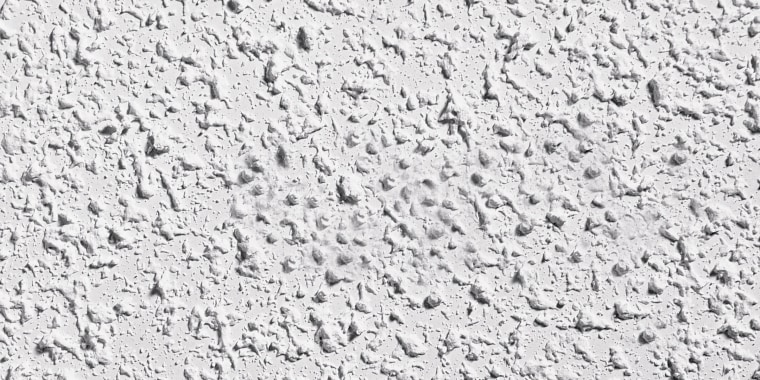
Much to the relief of homeowners everywhere, some bold and bizarre home design trends from the past (like avocado-colored bathrooms ... what?) can be easily updated. Yet for owners or prospective buyers mulling over the idea of replacing or refinishing a popcorn ceiling, there’s a lot to consider.
What are popcorn ceilings?
Popcorn ceilings — a style trend that originated in the '60s — are nothing more than texture added to drywall and plaster ceilings, which was considered a great way to add visual and textural interest overhead. It was also an easy way to hide imperfections and didn’t require any additional painting after application. But over time, popcorn ceilings were found to be incredibly difficult to keep clean and dust-free.
Now, the look feels very outdated.
Can you get rid of popcorn ceilings?
The good news: Updating an old-fashioned trend like a popcorn ceiling is an effective way to add value to your home.
According to New York City interior designer Kathleen Walsh, no homeowner can go wrong with saying goodbye to bygone ceilings and starting with a fresh overhead palette for the room.
"Ceilings deserve as much attention as your walls and floors, and are quite often an overlooked opportunity,” said Walsh. “Ceilings should invite the eye up and give the perception of taller height — whether that be via color or architectural elements. High, well-maintained ceilings allow a space to feel that much more well-proportioned and brighter; two elements that add to the attractiveness of a space, increasing overall value."
The bad news? It’s not an easy task to take on alone, and generally can require a small investment and help from an outside contractor. What’s more, popcorn ceilings sometimes contained asbestos, so be sure to have a sample tested before any work begins.
“Popcorn is very difficult to remove and practically impossible to touch up,” said Jody Finglas, president and owner of Finglas Painting, based in Croton, New York. “If it has to be removed due to water damage or client preference, it must first be scraped to remove the high spots and then primed and skim coated (which requires between three to five coats) until the ceiling is smooth, and then primed and repainted.”
How much does popcorn ceiling removal cost?
Want to outsource this job? Prepare to invest time and money. “A typical 12-inch-by-12-inch ceiling would take about a week to remove because of the scraping, priming and skim coating,” said Finglas. “Creating the smooth finish is the only way it can be removed, and costs associated with that vary from about $800 to $1500, depending on condition of ceiling.”
According to Finglas, the $800 to $1500 range is only for skim coating and doesn’t include priming and painting, which can run in the $2000 to $2700 range.
If you’re thinking of a DIY approach to the popcorn effect on your ceiling, start here.
How to remove popcorn ceilings yourself:
- Step 1: Prepare your room for a very big mess.
With all the scraping and sanding that’s about to go on overhead, it might start to feel like the sky is falling. To keep the mess from ruining your prized possessions, remove all furniture if possible and cover oversized items in sheets of plastic. Similarly, cover walls and floors with plastic drop cloths and secure into place using heavy duty painters tape.
Before any work begins, remove ceiling fans and fixtures, and cover exposed light fixtures and electrical outlets with painter’s tape. Be sure to cut power to those electrical elements before work commences. Also, gather your materials which will include, among other things: a tall ladder, professional hand scrapers, a garden sprayer, protective eyewear, gloves and a face mask.
- Step 2: Spray and Scrape. Repeat.
To make scraping off the popcorn texture easier, experts suggest lightly misting the ceiling with a garden pump sprayer. Work in small 4-inch-by-4-inch sections and let the water soak in for about 15 minutes. If the texture hasn’t softened at all, lightly mist the area again and wait another 15 minutes.
Using a large scraper, work in long strokes to remove the bubble effect. Be sure to hold the scraper steady so as not to gouge the ceiling and leave marks. To help contain the mess, have a mud pan handy for catching falling debris.
If spraying doesn’t help soften the texture, there’s a good chance that paint was mixed in when the ceiling was installed, which would make dry scraping the way to go. However, this is much more arduous work. If scraping is too ominous a task, consider covering it up with drywall or tongue and groove boards, which are sold at home improvement stores.
- Step 3: Prep for sanding and painting
If you’re able to remove the popcorn effect, congrats! But the work is hardly done. Now is the time to smooth out the area by sanding out imperfections and preparing the ceiling for a fresh coat of paint. If you’re up for the task of painting the ceiling yourself, refer to these useful room-painting tips. Or consult a professional painter who can help finish the job to perfection.
This story was originally published on Nov. 2, 2018.
