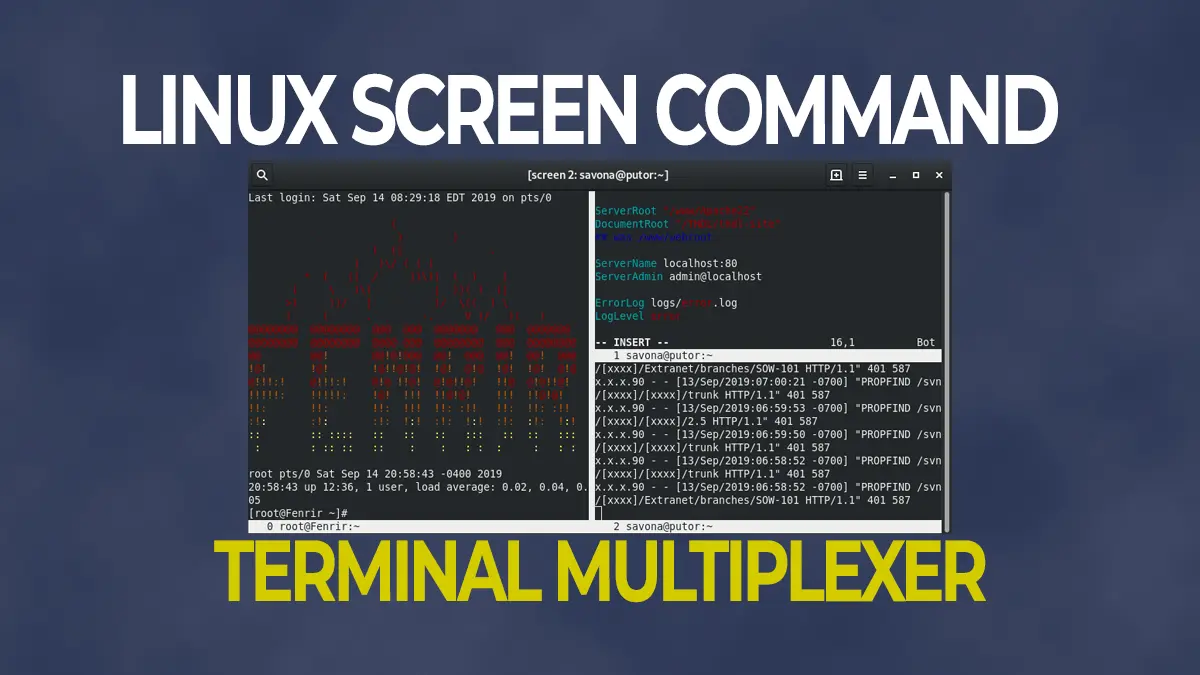
The Linux Screen utility allows you to run several login sessions inside a single terminal display. There are many benefits to using screen like the ability to detach and reattach sessions, and allowing remote processes to continue after you have disconnected from a system. This is known as terminal multiplexing.
A terminal multiplexer is a software application that can be used to multiplex several separate pseudoterminal-based login sessions inside a single terminal display, terminal emulator window, PC/workstation system console, or remote login session, or to detach and reattach sessions from a terminal.
-Wikipedia
In this tutorial we will introduce you to multiplexing by showing you how to install and use GNU Screen. The GNU Screen utility was first introduced in 1987 and is widely available on most modern Linux distributions. It is fairly simple to use (says the guy who loves vi) and with a few minutes of reading you can be up and running. There is a plethora of options, configurations and control commands available to screen. Although we cannot show you them all, we will show you the most common uses and options.
Table of Contents
Installing Screen
There is a high possibility that Screen is already on your system. On most of the Linux varieties such as RedHat and CentOS distributions, you can find Linux screen in /usr/bin/screen. To see if "screen" is in your PATH, you can use the which command:
[savona@putorius ~]$ which screen
/usr/bin/screen
If you do not have Screen, then you can install it easily from any package manager.
For example, on CentOS and RedHat you can install Screen using yum:
sudo yum install screen
With DNF on Fedora:
sudo dnf install screen
To install it on Ubuntu, Debian or similar:
sudo apt-get update
sudo apt-get install screen
Now that you know how to install the screen command, let's move ahead to explore it's usage and options.
Starting the Linux Screen Utility
Screen is started from the command line just like any other command:
[savona@putorius ~]# screen
Running the above command line will drop you inside of a window within Screen. This functions just like a normal shell except for a few special key combinations called control commands.
Screen Utility Control Commands
When you enter the screen utility, you can do all your work as you would in a normal environment. But since the screen is an application, it has command or parameters.
The Screen command uses the command "Ctrl+a" which is the combination of the control key (Ctrl) and a lowercase “a” as a signal to send commands to screen instead of the shell.
For example, "Ctrl+a" then "?" without the quotes. You should now have the screen help page.
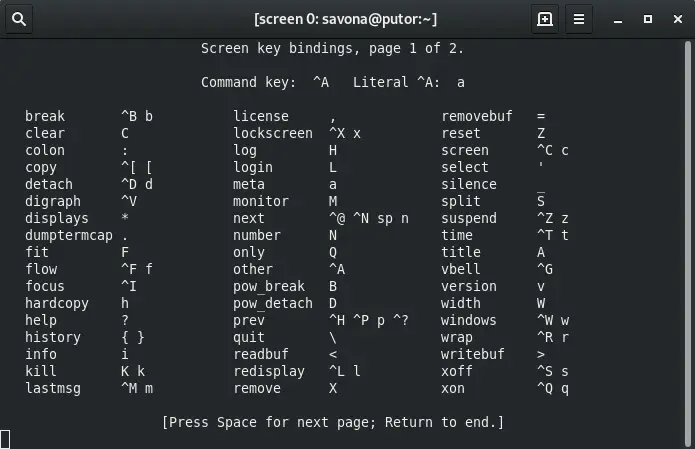
Key bindings are the commands that Screen accepts after you hit "Ctrl+a". You can reconfigure these keys to your taste using a .screenrc file, but the defaults are a good starting point.
Creating Windows
To create a new window, you just use "Ctrl+a" "c". This will create a new window for you with your default prompt. This will look like a completely new terminal window, but it is in fact a second session controlled by the screen utility. Both terminals are still fully function and commands ran inside of them will continue to run in the background regardless of which window you are currently in.
Let's try a simple experiment. On your system open a terminal window and enter screen.
[savona@putor ~]$ screen
This drops you into the first screen session. Now let's run a continual command, something that will not stop until we send a signal. A good choice is the watch command. Enter the watch command followed by the date command.
[savona@putor ~]$ watch date
Now that we have a continuous command running, let's hit "Ctrl+a" "c" to create a new screen session. This gives you a new prompt, but the old session is still running in the background. You can get back to the old session and prove this by hitting "Ctrl+a" "p" for previous. We will talk more about switching between sessions later in the article.
Here is an animation of how the experiment should look:

Creating Split Screen Sessions with The Screen Command
A really neat feature of the screen command is the ability to use split screen. This comes in handy when tailing logs or debugging scripts.
Splitting the Terminal Screen Horizontally
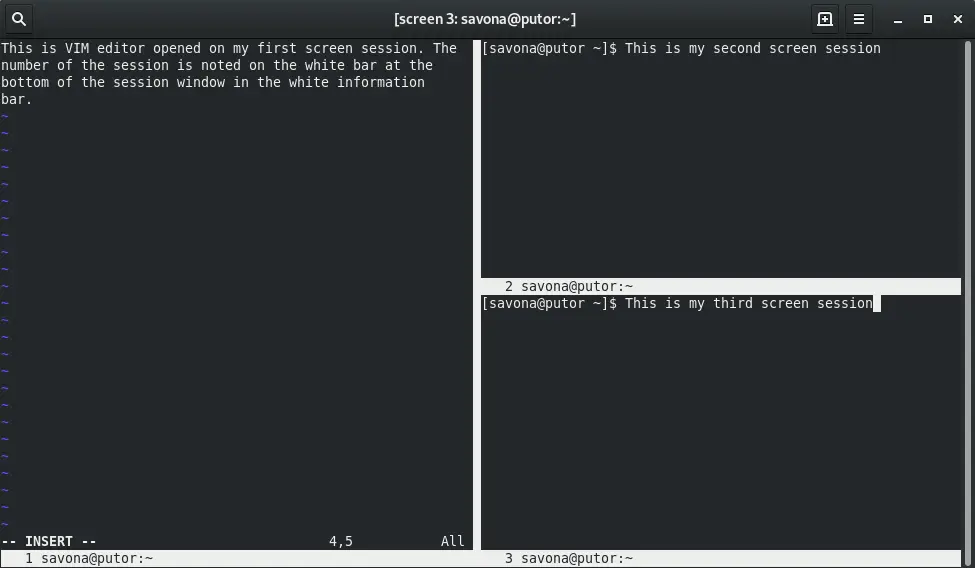
To split the screen horizontally, enter screen then use "Ctrl+a" "|" . This will split your terminal windows evenly down the center. But it will NOT create the second session. In order to create a session in the second region you will have to use "Ctrl+a" "Tab" to switch regions. Once in the empty region hit the command sequence to create a window, which we already learned is "Ctrl+a" "c".
Splitting the Terminal Screen Vertically
Creating a vertical split is done by using the "Ctrl+a" "S" (Capitol S) control commands. You can create a session in the new region the same way we did when splitting horizontally (see above).
Switching Between Windows
The Screen allows you to move forward and back. For example, you could use "Ctrl+a" "n" to go to the next window.
The windows work as a carousel and will loop back around to your first window if repeated.
You can create several windows and toggle through them with "Ctrl+a" "n" for the next window or "Ctrl+a" "p" for the previous window.
Each process will keep running until you kill that window.
Detaching From Screen
It is astounding to know that you can detach a part of screen and reattach later. Detaching is the one of the most powerful features of the screen utility in my opinion. As a Linux System Administrator this allows me to work on many different systems without having a thousand terminal windows open cluttering my screen and making it hard to find the session I need.
It is important to understand that if your network connection fails, screen will automatically detach your session. Other factors like SSH session timeouts could also end your sessions to remote systems.
You can detach from the window using "Ctrl-a" then "d". This will drop you back on your shell. All screen windows will continue to run and you can re-attach to them later.
This is great when you are using rsync or some other long running command.
Reattach to Screen
If you have detached from a screen, you can reattach by just running:
[savona@putor ~]$ screen -r
This will re-attach to your screen.
If you have multiple screen windows, you will see a list of detached screen windows which are available to reattachment.
[savona@putor ~]$ screen -r
 There are several suitable screens on:
     8671.pts-14.putor   (Detached)
     8606.pts-14.putor   (Detached)
     31428.pts-5.putor   (Attached)
 Type "screen [-d] -r [pid.]tty.host" to resume one of them.
To attach to a screen from the list, you just need to supply the name of the screen like so:
[savona@putor ~]$ screen -r 8671.pts-14.putor
NOTE: Tab completion can be used to complete the name after just a few characters.
Logging Your Screen Output
There may come a time when you want to log everything that happens in your terminal window. Fortunately, Screen makes this easy.
Using "Ctrl-a" "H" will create a running log of the current window.
After you send the above control commands a file named "screenlog.0" is created in your current directory. The Screen utility will keep appending data to the file until you end the session. Using the log function is very useful for capturing what you have done, especially if you are making a lot of changes. If something goes awry, you can look back through your logs.
Getting Alerts
The Screen command has the ability to monitor a window for activity or inactivity. This is great if you are downloading large files, compiling, or waiting for output.
If you are waiting for output from a long-running program, you can use "Ctrl-a" "M" to monitor the window for activity. Screen will then flash an alert at the bottom of the page when output is registered on that screen.
This is of great use when running a command that takes a long time to return data. You can just use the command, switch to another window and not have reasons to keep switching back to check the status.
You can also monitor for inactivity. Why is it important? If you are copying a large about of data with rsync or compiling a program, you can be notified when there is no more output. This is a great signal to when that job is done. To monitor for silence or no output use the control command "Ctrl-a" "_". By default the Screen command will alert after 30 seconds of silence.
Stopping Screen
To stop the screen utility you can just type exit just as you normally would to close a shell. It is compulsory to close all Screen windows to terminate the session or stopping Screen.
You should get a message about Screen being terminated once you close all windows.
[screen is terminating]
Alternatively, you can use "Ctrl-a" "k" to kill a specific window. You should get a message asking you to confirm if you want to kill the screen.
Control Command Shortcuts
After having a good understanding of the syntax used in screen, it is good that you also know the shortcuts being used so as to increase your efficiency. Here is a list of some of the most important control command combinations.
Shortcut Keys:
- Ctrl-a + c: It creates a new window.
- Ctrl-a + w: It displays the list of all the windows currently opened.
- Ctrl-a + A: It renames the current windows. The name will appear when you will list the list of windows opened with Ctrl-a + w.
- Ctrl-a + n: It goes to the next windows.
- Ctrl-a + p: It goes to the previous windows.
- Ctrl-a + Ctrl-a: It backs to the last windows used.
- Ctrl-a + k: It closes the current windows (kill).
- Ctrl-a + S: It splits the current windows horizontally. To switch between the windows, do Ctrl-a + Tab.
- Ctrl-a + |: It splits the current windows vertically.
- Ctrl-a + d: It detaches a screen session without stopping it.
- Ctrl-a + r: It reattaches a detached screen session.
- Ctrl-a + [: It starts the copy mode.
- Ctrl-a + ]: It pastes the copied text.
Conclusion
As we said in the introduction, there are too many options to cover in this tutorial. We covered the basics like detaching and reattaching terminal sessions, and also how to use split screen terminal windows. Using screen takes some practice, but once you get used to the control commands it can greatly increase your productivity.
There are plenty of other terminal multiplexers our there. Use the comments below to tell use what multiplexer you have used in the past and why it may or may not be better than screen.
I started using Screen last week, because I wanted to have text reflow in XTerm when scrolling back.. After installing, ricing and learning Screen a bit i was amazed at the power of Screen!
Now, you probably should mention that the more you use Screen, the better it gets. It is frustrating to start a process only to wish you had started it from Screen... Put Screen in your .profile or .bash_profile and then change shortcuts for your default terminal launchers in X to execute Screen. Instead of a launcher "uxterm", you modify to "uxterm -e screen"
To kill all detached sessions:
$ screen -ls | grep Detached | cut -d. -f1 | awk '{print $1}' | xargs kill
Censored... So much for hypertext! Go study Ted Nelson
Links are blocked from the comments because of past issues. Sorry for this inconvenience.
It is not inconvenience. It is censorship. Also, you can click the links and check for yourself if there is any harm. The fact that I abstracted from that webpage i referenced but which ref you deleted, makes people think that *me* had those great ideas, but that is not true! I did not explicitly name the author of whom ideas I borrowed in this first post because I thought I would have referenced them properly.. So it is not inconvenience at all for you, but you did destroy referencing, as though all these ideas you wrote in the article were yours! We know they are not and you should have referenced them, too! Wikipedia? Oh gezz, i should stop commenting
The fact that someone is writing how to use a tool doesn't make the idea theirs. It is simply relaying the information in a more digestible format than a man page. Unless your link was to the creator of screens web page or the official documentation (which I do reference) chances are it was not their original "idea" either. I am sorry you feel this way. If you think you have a good reference that I should add to the article please use the contact form and I will look into it as time permits.