
Scott’s Lightroom Q&A
PROGRAMMING NOTE: Tonight at 8:00 PM ET I’m doing another of my now legendary live “Book Chats” and everybody’s invited. Tonight’s featured book is “The Flash Book” and I’ll be sharing tips from the book, answering your questions on Flash, we’ve got some cool giveaways, some killer deals on books, and some really stupid stuff I have planned. Go grab a glass of wine – a fresh can of Spray Cheese, and join me tonight at my Facebook page. OK, on to our Lightroom Q&A:

Beside my role as Editor/Publisher of Lightroom Magazine, I also write the Lightroom Q&A Column in each issue as well, and today I thought I’d share my Q&A from the current issue (it came out last week; we publish the mag 10 times a year for KelbyOne members). So, here’s my Q&A from the May 2020 issue.
Q. I heard there’s a way you can organize your images on Lightroom’s built-in Map, but I don’t see any way to do it. What am I missing?
A. Perhaps the coolest thing about Lightroom Classic’s Map module is that you don’t have to do anything if your images have GPS data embedded in them, because Lightroom will automatically add those images to the map. So if your camera has a built-in GPS feature, and you have that feature turned on, it auto-embeds the GPS location data right into your RAW or JPEG file, and then Lightroom does the rest for you. There’s nothing to do to make it happen: it just happens. So, go to the Map module, press Command-F (PC: Ctrl-F) to bring up the Search field, and type in a place where you’ve taken photos, and you’ll see a pin there (or many pins). Click on a pin and
it shows the images that were taken at that location. You can toggle through all the images using the little arrow buttons on either side of the preview. That’s all there is to it. You can also manually add images to the map. Simply select a collection in the Collections panel, and then drag the images from the Filmstrip to the location on the map where they were taken. Lightroom will automatically add the GPS information to the metadata of those images.
Q. I’m using Lightroom Classic and recently I also started using Lightroom for the cloud. What’s driving me crazy is that some of the keyboard shortcuts aren’t the same. Why would Adobe make them different?

A. There’s lots to cover here. First, Lightroom Classic and Lightroom Cloud (as I call it) weren’t designed to be used together. In fact, Adobe recommends choosing one or the other. They’re don’t sync fully with each other and mobile and, well, it just creates some issues that will drive you even crazier. Once we get past that, yes, Adobe did change some of the keyboard shortcuts, and I honestly have no idea why (prank?). If it’s any consolation, as someone who has to teach both versions (though my workflow is based on Classic, and that’s what I use on a day-to-day
basis), it drives me crazy, too.
Q. I went on holiday last summer to a country in a different time zone, and I forgot to change the time setting in my camera, so all of the shots have the wrong time that they were taken. Is there a way to fix this?
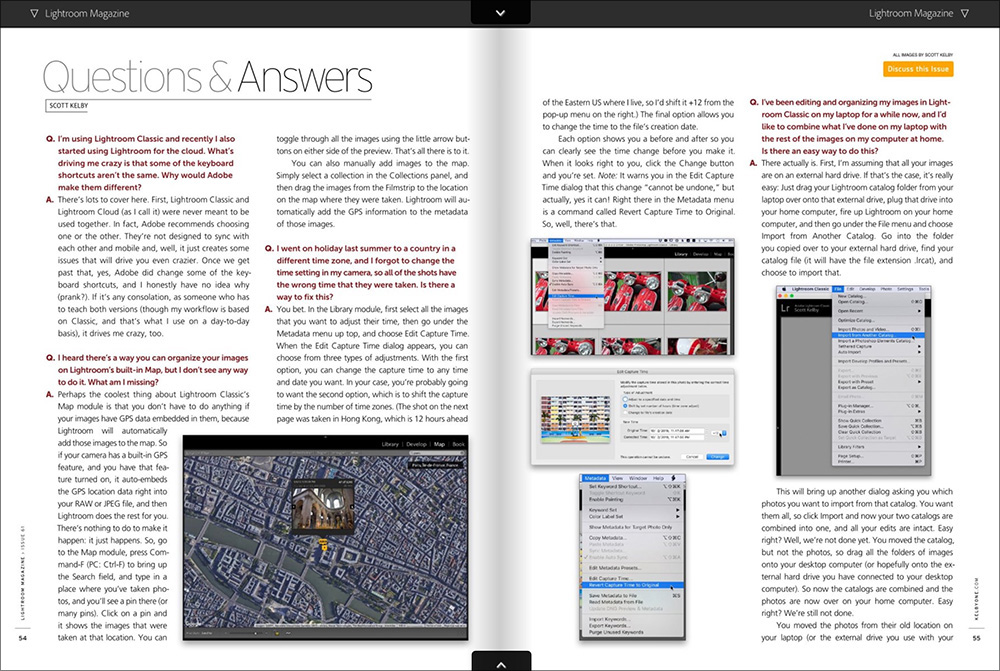
A. You bet. In the Library module, first select all the images that you want to adjust their time, then go under the Metadata menu up top, and choose Edit Capture Time (as shown above).
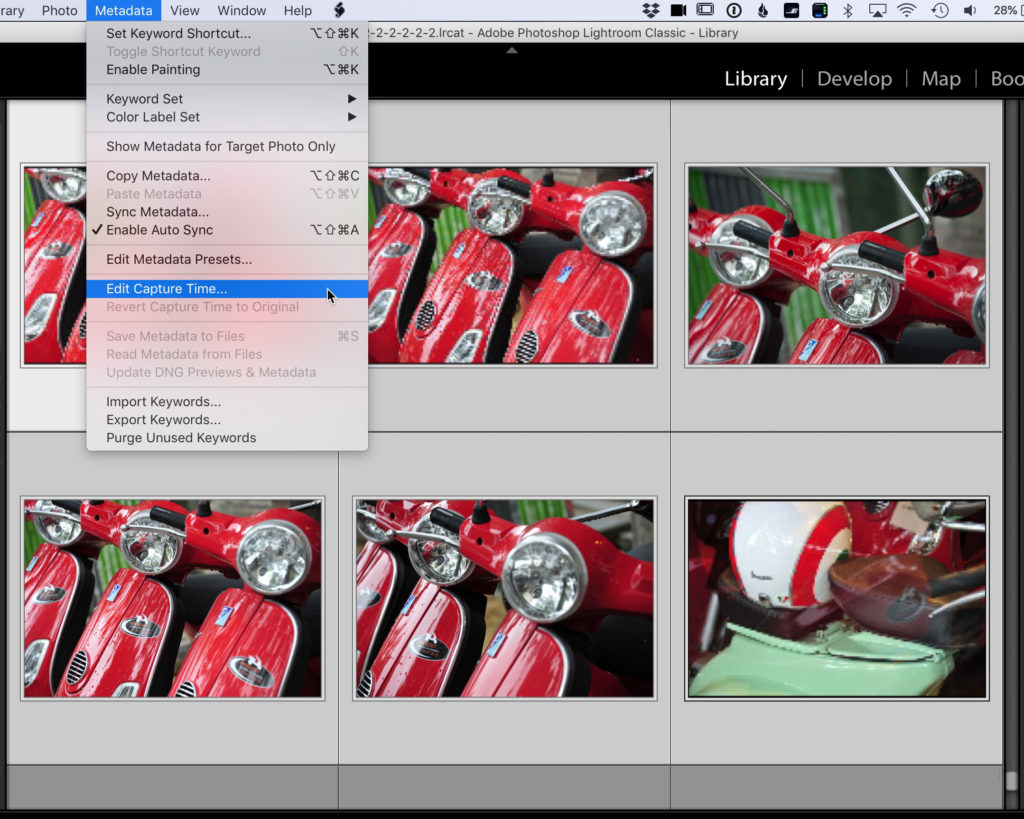
When the Edit Capture Time dialog appears, you can choose from three types of adjustments. With the first option, you can change the capture time to any time and date you want. In your case, you’re probably going to want the second option, which is to shift the capture time by the number of time zones. (The shot on the next page was taken in Hong Kong, which is 12 hours ahead of the Eastern US where I live, so I’d shift it +12 from the pop-up menu on the right.)
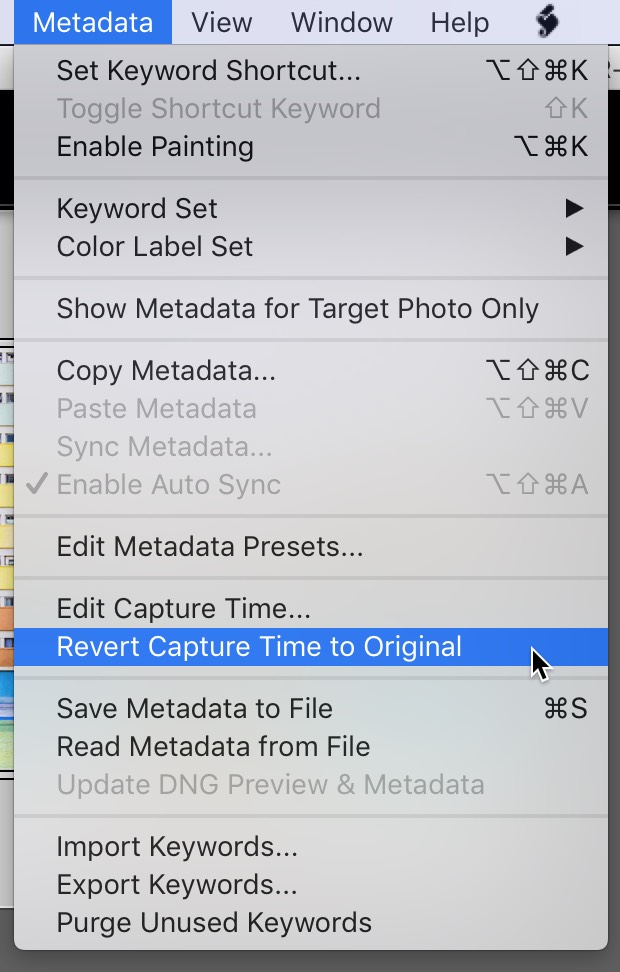
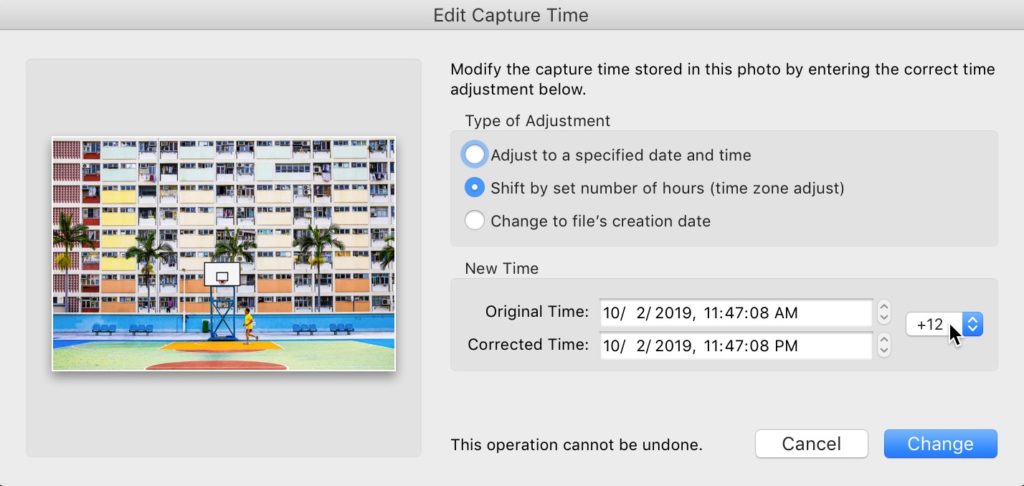
The final option allows you to change the time to the file’s creation date. Each option shows you a before and after so you can clearly see the time change before you make it. When it looks right to you, click the Change button and you’re set. Note: It warns you in the Edit Capture Time dialog that this change “cannot be undone,” but actually, yes it can! Right there in the Metadata menu is a command called Revert Capture Time to Original (as seen above). So, well, there’s that.
Q. I’ve been editing and organizing my images in Lightroom [classic] on my laptop for a while now, and I’d like to combine what I’ve done on my laptop with the rest of my image on my computer at home. Is there an easy way to do this?
A. There actually is. First, I’m assuming that all your images are on an external hard drive. If that’s the case, it’s really easy. Just drag your Lightroom catalog folder over onto that external drive; plug that drive into your home computer; fire up Lightroom on your home computer and then go under the File Menu and choose ‘Import from Another Catalog.”
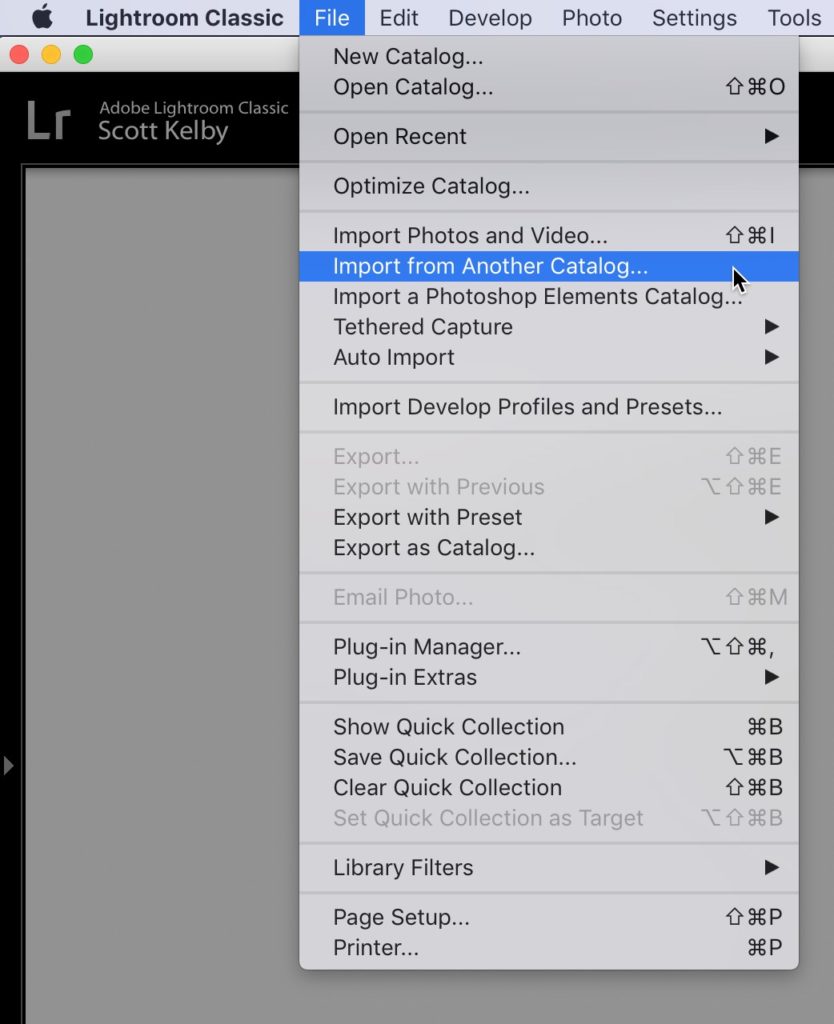
Go info that folder you copied over to your external hard drive; find your catalog file (it will have the file extension ‘.lrcat’) and choose to import that. This will bring up another dialog asking you which photos you want to import from that catalog. You want them all, so click Import and now your two catalogs are combined into one, and all your edits are intact. Easy right? Well, we’re not done yet. You moved the catalog, but not the photos, so drag all the folders of images onto your desktop computer (or hopefully onto the external hard drive you have connected to your desktop computer). So now the catalogs are combined and the photos are now over on your home computer. Easy right? We’re still not done.
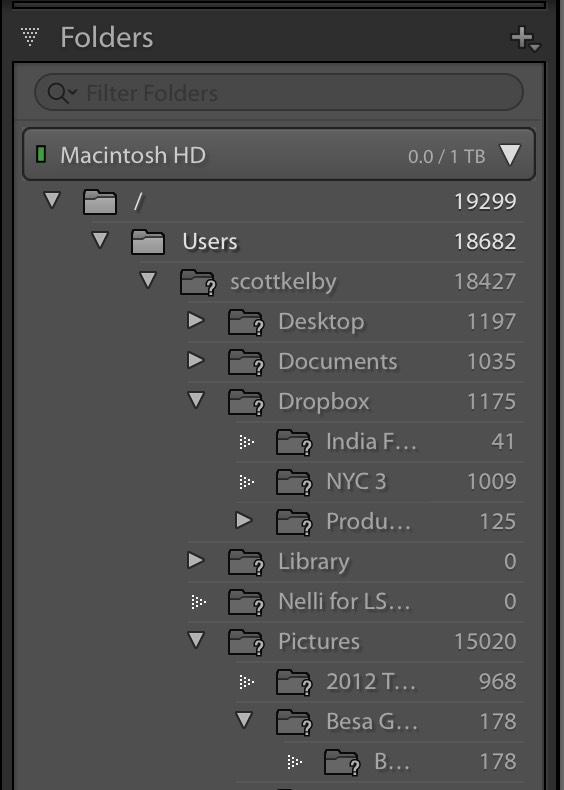
You moved the photos from their old location on your laptop (or the external drive you use with your laptop), but Lightroom doesn’t know that. So, when you go to your desktop computer’s Lightroom catalog, and click on an image that used to be on your laptop, in the Develop module you’ll see, “The file could not be found.” It still thinks those photos are on that other drive. Easy fix: Go to Lightroom’s Folder panel in the Library module, and you’ll see question marks on your missing folders. Right-click on one of the missing folders, and select Find Missing Folder. It will show you a path to where your photo used to be. You just have to show it where those images are now (where you put that folder on your desktop computer). Once you show it where you moved the folder, it then relinks all the images in that folder and you’re back to business. Now, if you moved 20 folders, you might have to relink all 20, but it’ll only take a couple of minutes. There ya go!
Anyway, here’s how to get rid of it: At the bottom of the image preview, you’ll see a gray horizontal Toolbar (if you don’t see it, press the letter T on your keyboard to make it visible). When you have the White Balance Selector tool (W) active, you’ll see a checkbox for Show Loupe. Turn off that checkbox, and your life just got that much better.
Q. When I use the White Balance eyedropper tool, there’s a grid of squares that appears below the tool. I find that grid really distracting. Do I need it, and if I don’t, is there a way to make it go away?
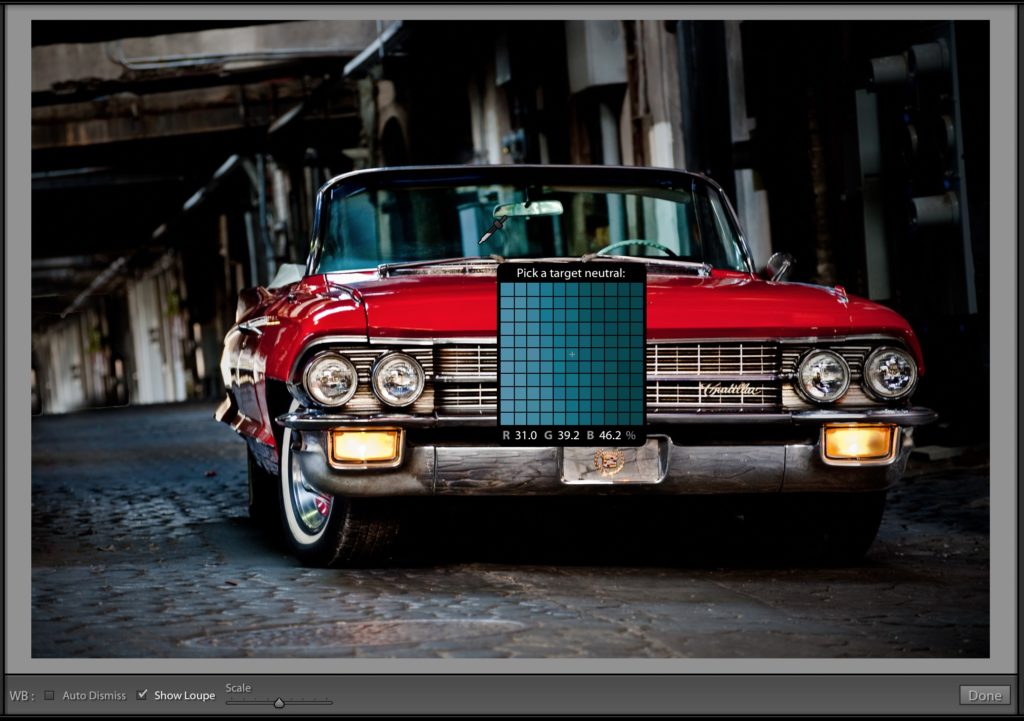
A. You don’t need it. It is annoying (distracting, maddening, etc.), and yes, you can get rid of it. First, what it was designed to do is help you find a neutral color to use for setting your white balance. Theoretically, you’d be
looking for all three of the R, G, B numbers at the bottom of the grid to be the same so you’d know the pixel your mouse is currently over is a neutral color. If you think that sounds dumb, you’re not alone.
Q. I have a lot of images in my catalog, and maybe that’s why my Lightroom is starting to feel sluggish. Is there a way I can speed things back up? Do I maybe have too many previews because my catalog file size is pretty large? What can I do?
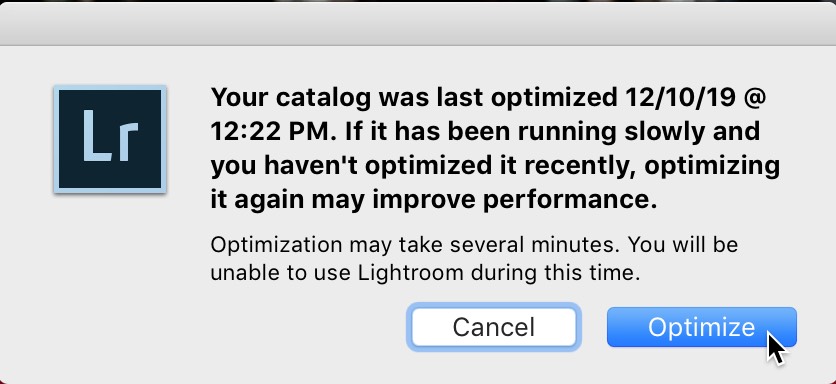
A. The first thing you might try is to optimize your catalog. It doesn’t take long and could really make a difference. Go under Lightroom’s File menu and choose Optimize Catalog. This will bring up a dialog telling you the last time you optimized your catalog (be prepared for a shock for how long it’s been), and then just hit the Optimize button and take a snack break. When you come back, hopefully things will be running a lot smoother. If they’re not, go read my article called “If Your Lightroom Is Running Slow, It’s Probably One of These 7 Reasons” right here at LightroomKillerTips.com.
Q. I was watching one of your classes online and I saw you bring up a side-by-side, before-and-after view of the image on which you were working. How were you doing that?
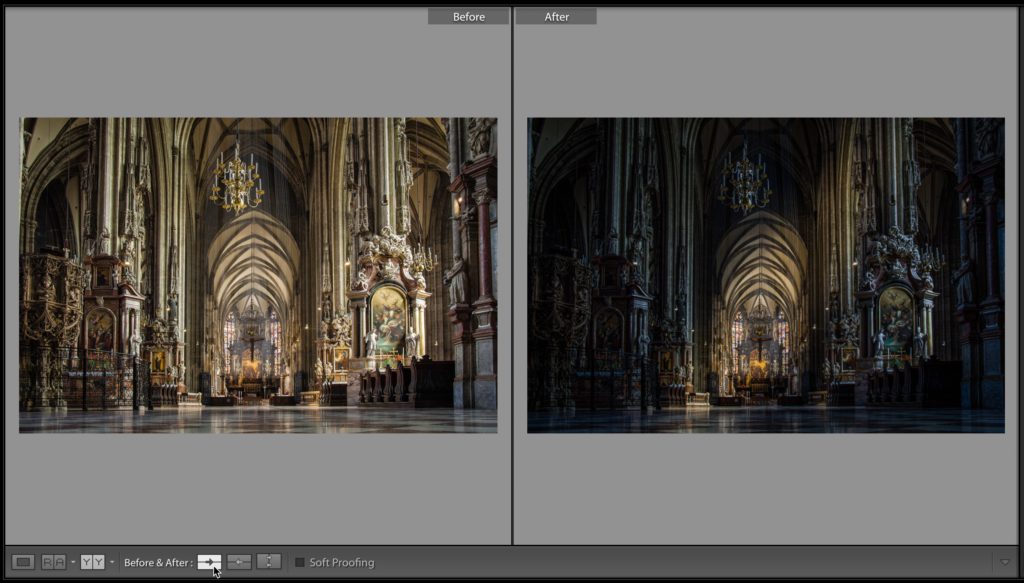
A. Lightroom’s before and after feature is actually fairly advanced, and there are all sorts of ways to see your before and after (side-by-side top or bottom, and split top or bottom). These views are all selected from the button in the Toolbar that appears along the bottom of your image work area (it’s the one with the letter Ys); however, I rarely use that button.
You can quickly get to the standard side-by-side before/after view by pressing the letter Y on your keyboard. To get back to the normal view, press Y again (the shortcut is easy to remember because the button itself shows the letter Y). I like this one because it’s so fast, and saves you from having to toggle through all the different before/after views just to get back
to the normal view, or click any other buttons. Just one simple key in, same key out. Note: If the letter Y takes you to a split view, click on the before and after button until you have one of the side-by-side views.
Hope you found that helpful.
Have a great weekend, everybody – stay safe, and we’ll catch ya here next week. 🙂
-Scott