How I Use Lightroom’s Color Labels
I primarily rely on Pick Flags and just the singular 5-star rating to tag photos in Lightroom Classic, but there’s a particular situation where I use Color Labels as well, and thought you might find it handy, too.
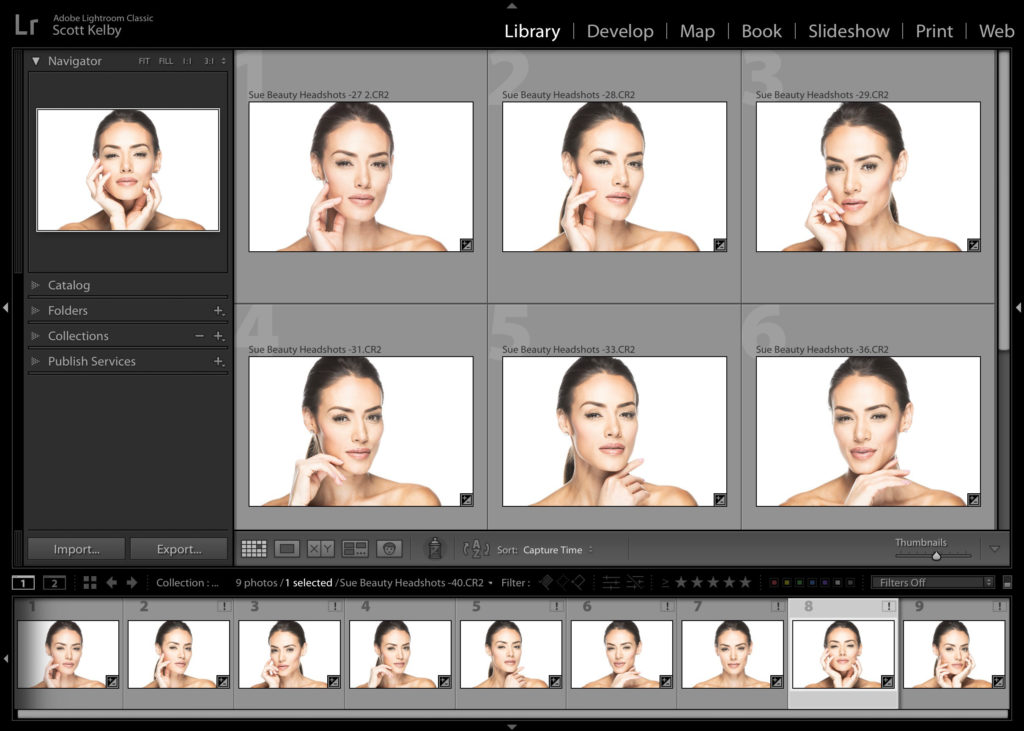
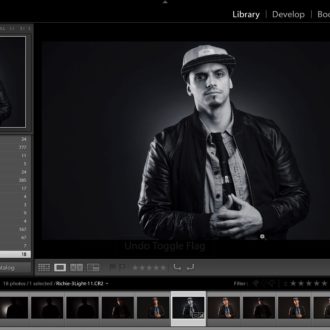
Here’s a typical use for me: I’m doing a shoot (could be in-studio like this shoot above, or out on location where I’m shooting tethered), and there are multiple people working on this shoot. Maybe a model, a hair stylist, a makeup artist (MUA), maybe a fashion stylist, the client, and so on.
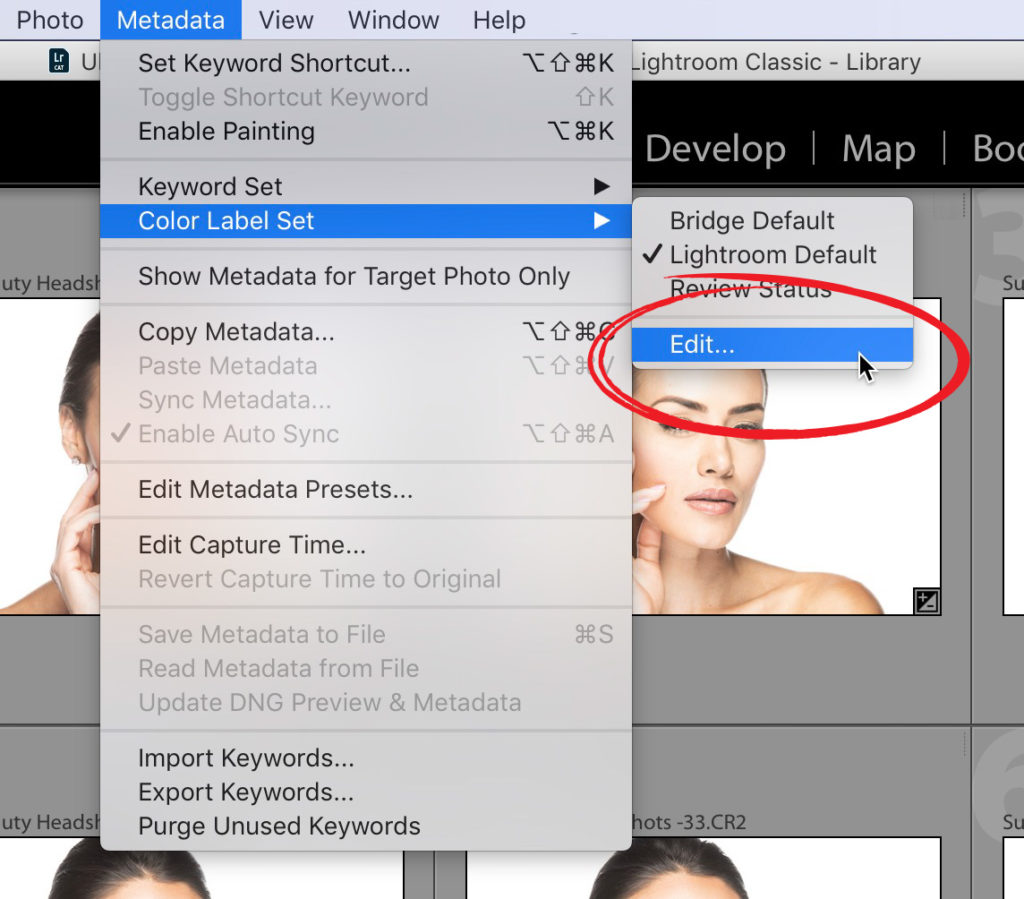
To set up my Color Labels to use on this shoot, I want to give them names that work with what I’m doing. To do that, go to the Library module, under the Metadata menu, go to ‘Color Label Set’ and from the pop-out menu choose ‘Edit,’ (as shown above).
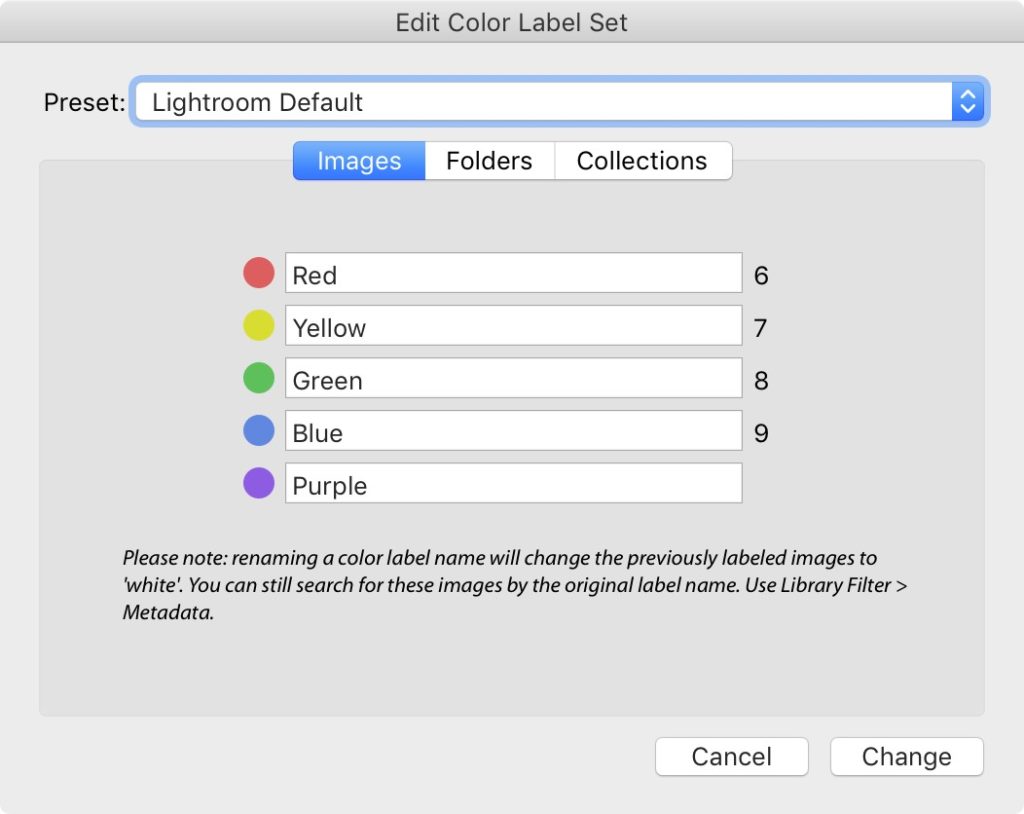
When the Edit Color Label Set appears, it shows you the default names of Red, Yellow, Green, etc.. While you’re here, take not of the keyboard shortcuts for each of these color labels: Press 6 to add red label to a photo, 7 to add a yellow, 8 for green and so on. There’s no shortcut for purple.
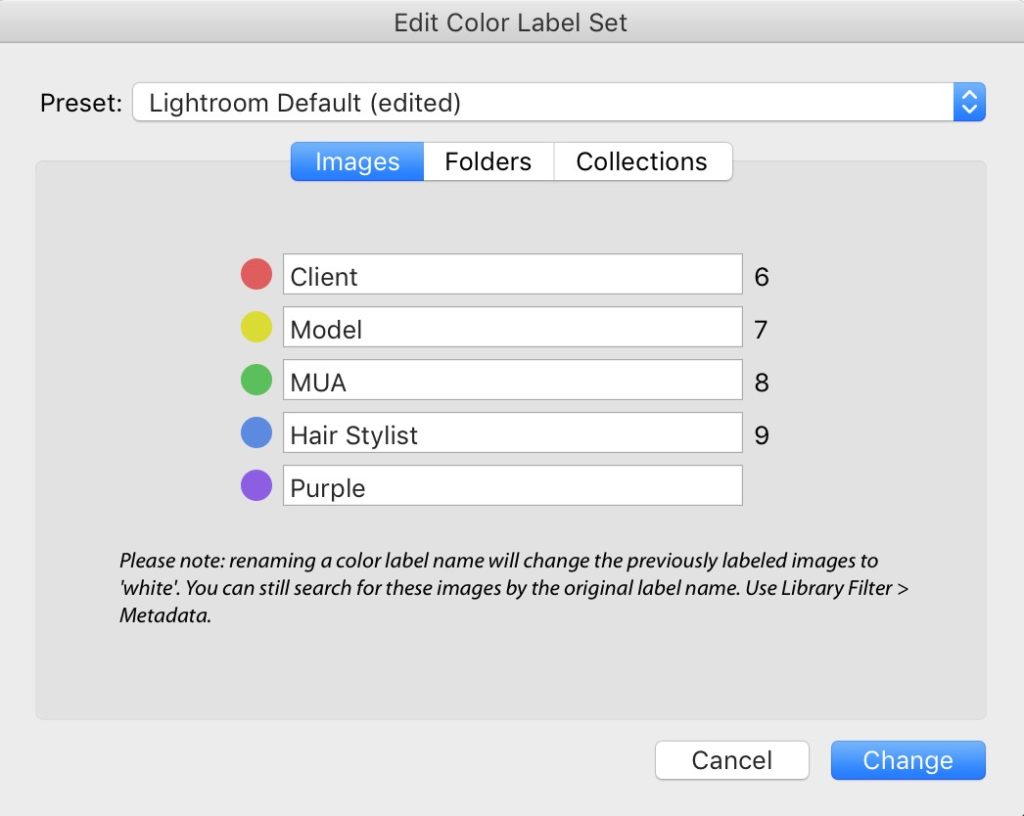
I rename the labels so I can tag my client’s favorite images, the model’s, the Makeup Artists, and the Hair Stylist’s images from that shoot (and yes, they will all have different choices. The client may be looking for one particular type of look; the hair stylist wants shots that really show off the hair. The Makeup artist wants ones where the makeup looks amazing, so you have (in this case) four other people beside the photography who want to make their picks for shots that they want from this shoot. By typing in their titles in this box, I won’t accidentally send the wrong person the wrong images.
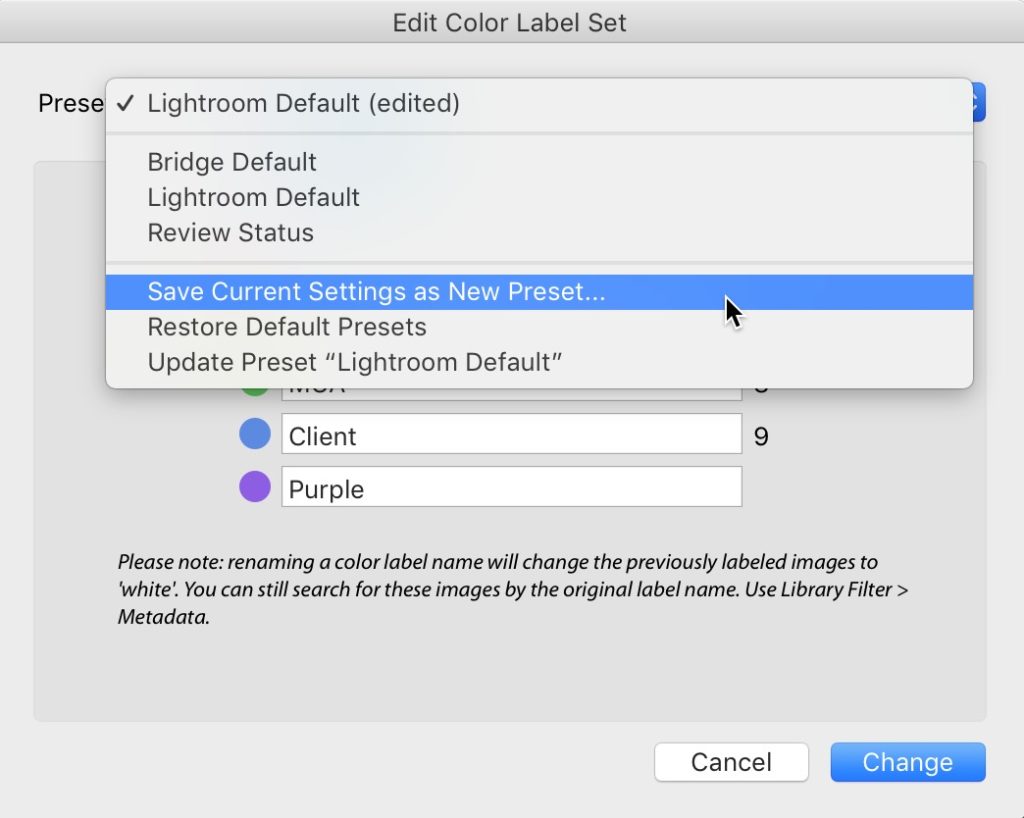
Once I’ve made up this set, if I think I’ll be using it again, I save it as a Color Label Preset by choosing ‘Save Current Settings as New Preset’ form the Preset pop-up menu at the top of the window (as seen here).
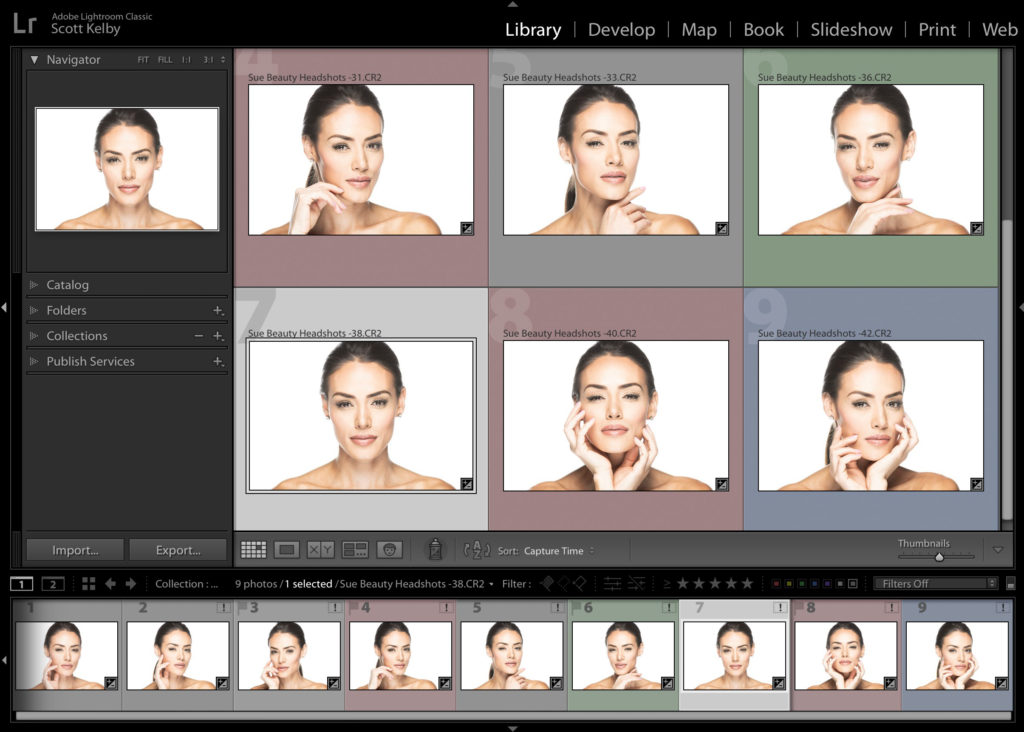
Now, while we’re shooting if the Client sees a shot she really likes, I click on the thumbnail and hit the number 6 on my keyboard to add a red label to that image. Now I know which ones are the client’s favorites. If the Hair Stylist sees a shot she loves, I hit number 9 to assign it a blue label.
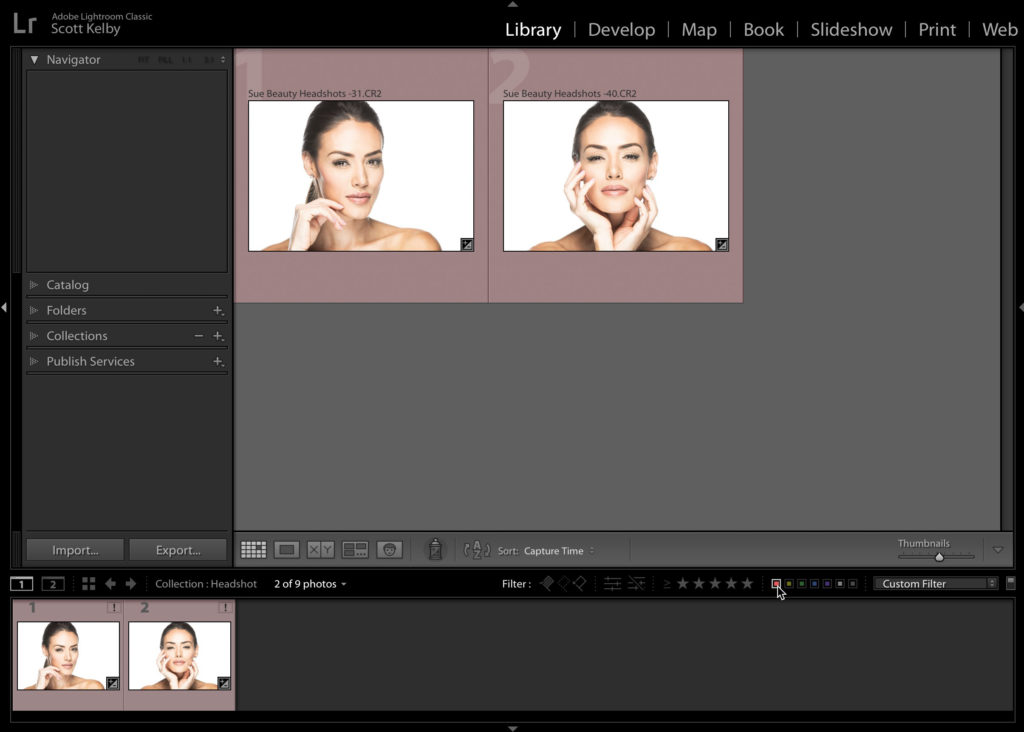
Later, after the shoot is over and I’m starting to process the images in Lightroom, when I went to get a batch to get ready to send over to the client, I go down to the Color Label filter swatches on the top of the Filmstrip on the right side and I click on the Red label. Now, just the shots my client chose will appear on screen. I can just click through the color label filters like this and quickly see which images I need to send to which person.
If I forget which color is for which person, I can go look in the Color Label editing window and I’ll see which close goes with which person. By the way — the image I like get a Pick Flag, so the Color Labels are for everybody else on the set.
Hope you found that helpful.
If you’re a beginner to photography, I’ve got a great free class for you to watch this weekend.
The details and the official class trailer are over on my blog today. Here’s the link.
Have a safe, fun, productive weekend, everybody!
-Scott