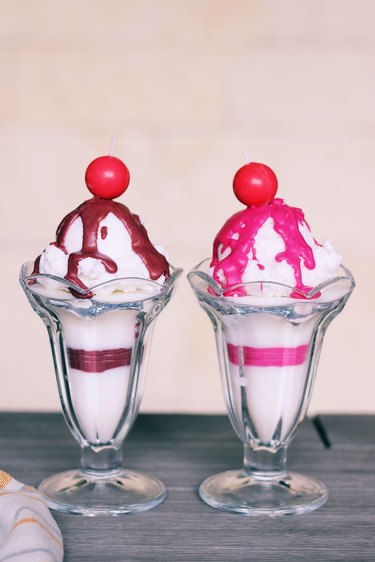
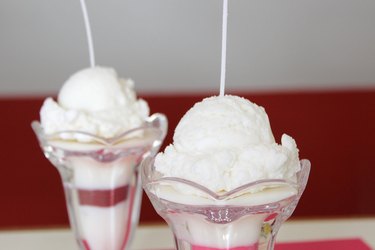
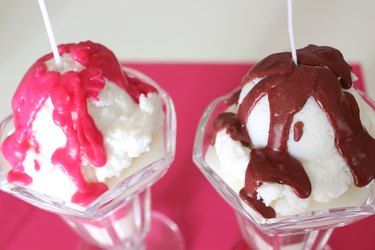
Ice cream fans, rejoice! Here are some "ice cream sundaes" that have no calories or carbs — because you can't eat them. These candles in a parfait glass may look just like the real thing, but they're made entirely out of wax, including the swirls of toppings and cherries. And even though the ice cream is fake, these candles will satisfy your appetite for fun, whimsy and creativity.

Video of the Day
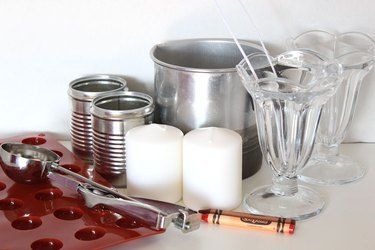
Things You'll Need
8-inch candle wick
Ice cream parfait glass
Hot glue
White pillar wax
Wax pouring pot
Clothespins
Red and/or brown crayon
Empty, clean tin cans
Fork or whisk
Ice cream scoop
Skewer
Semi-sphere silicone mold, 1-inch diameter
Toothpick
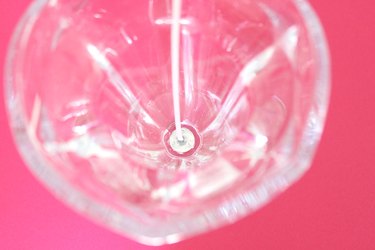
Step 1: Prepare the Wick
You will need a wick that is at least eight inches long to accommodate the height of the candle. Wicks with metal tab bases attached are available at crafts stores and online retailers.
Video of the Day

Secure the wick's metal tab to the bottom of a parfait glass with hot glue. You can also use a glue dot if you prefer.
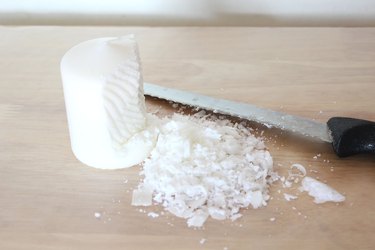
Step 2: Prepare the Wax
There are two main types of wax — one for pillar candles and one for container candles. Pillar candle wax is harder and formulated to work without a vessel since the melted wax won't run everywhere. Thus it can be molded into pillars and other sculptures. Container candle wax is softer and must be held in a vessel. For this sundae candle, we're using pillar candle wax because the ice cream scoop section sits alone above the glass. While you can buy bags of candle wax, it can be confusing to determine if it's made for pillars or containers. That's why I find it easier to just buy white pillar candles and crumble them. Then I know for sure it's the right type of wax. Use a knife to shave down the sides, and the candle crumbles nicely into workable pieces.
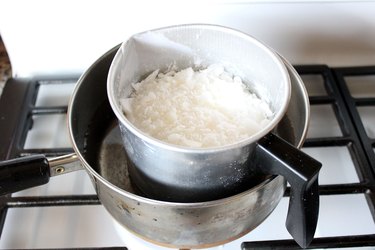
Step 3: Melt the Wax
Place the crumbled wax into a wax pouring pot. You can also use a large coffee can.

Place the pouring pot in a larger pot with a shallow amount of water to create a double boiler.
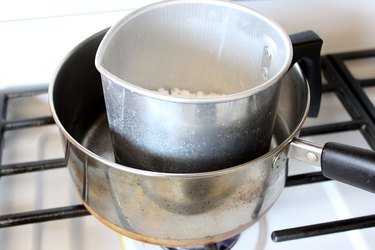
Simmer the water on low heat, and all the wax will eventually melt. You can use a skewer to stir the wax as it is melting.
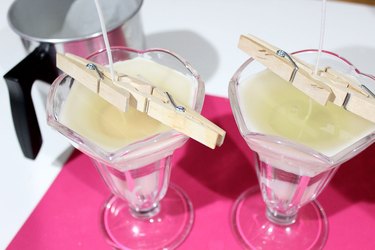
Step 4: Pour the First Layer
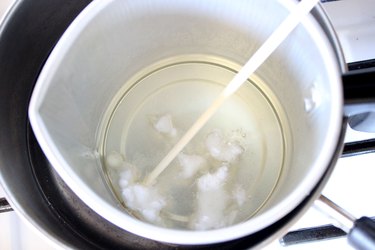
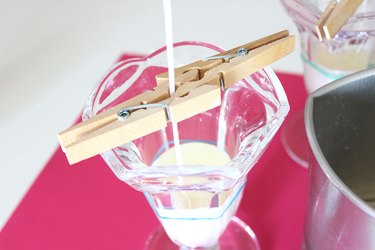
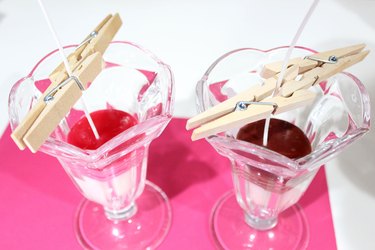
Steady the candle wick with interlocked clothespins so it doesn't move around. Then pour the first layer of wax into the glass. Depending on the size of your glass, this layer will be between two to three inches high. Try not to get any wax on the sides of the glass as you pour.
To help you keep track of how much wax you are pouring, wrap a rubber band around the glass at the point you want the first layer of wax to end.
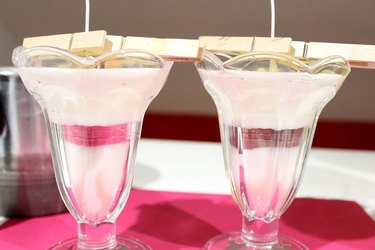
Step 5: Add the Middle Layer of Topping
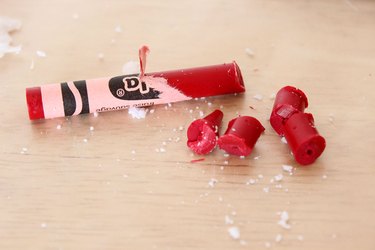
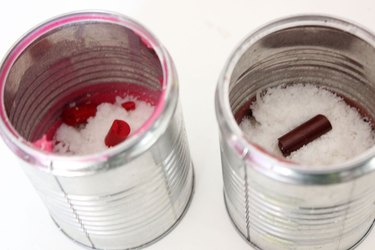
Let's add a stripe of strawberry or chocolate in the middle of the glass to give it more color and pizazz. For a strawberry sundae, you'll need a red crayon to dye your wax; for a chocolate sundae, a brown one. Cut about an inch of the crayon into little pieces.
Place some white wax shavings in a tin can along with the pieces of crayon.
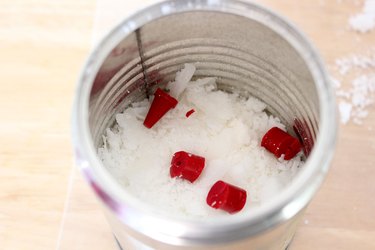
Place the tin can in a pot of shallow water, melting the wax using a double boiler system. You can stir the wax around with a skewer or popsicle stick.

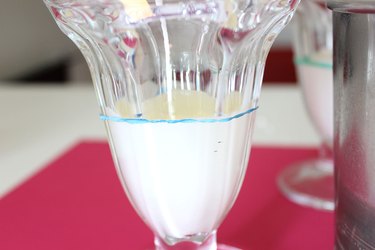
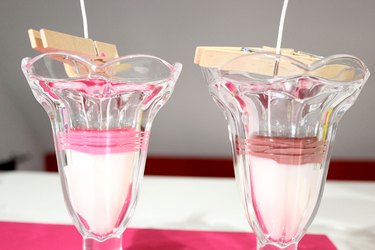
When the colored wax is melted, pour about a half inch of it on top of the first layer of wax.
Be sure to wait until the bottom layer of wax is completely hardened before pouring in the colored wax so that the layers remain distinct and don't melt into each other. It usually hardens in about an hour.
Step 6: Add the Third Layer
Melt more white wax in the pouring pot. After the colored wax layer has hardened, pour the next layer of white wax on top.
Go up to about a quarter inch from the rim of the glass.
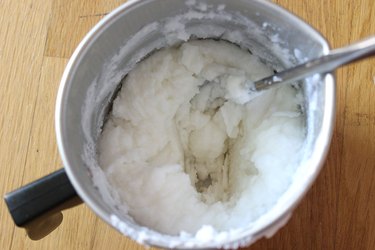
Step 7: Whip the Wax
For the top section of the sundae that looks like a big scoop of ice cream, we'll need to whip the wax so it becomes light and airy, looking more like the real thing. Start by melting more white wax in a double boiler.
Let it cool. When the sides and top of the melted wax start to turn opaque, stir the contents with a fork or whisk, being sure to scrape the hardened wax from the sides of the pot.
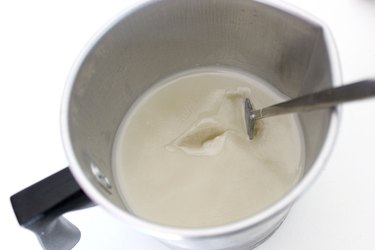
Continue whisking the wax until it turns clumpy like mashed potatoes, but still warm and moldable.
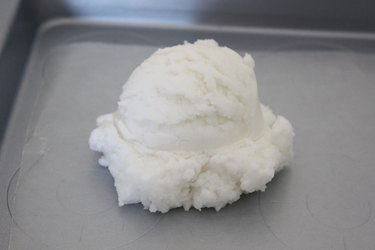
Step 8: Scoop the Wax
Pack a big ball of wax in an ice cream scoop.

Release the mound of wax onto a piece of parchment or wax paper. Notice how whipping the wax gives it the texture of ice cream.
Insert a skewer through the middle of the mound of wax to create an opening for the candle wick. Remove the skewer.
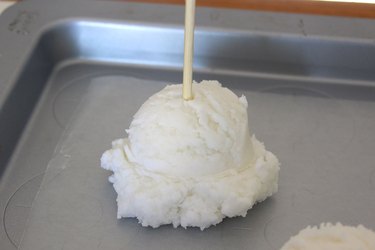
When the wax has completely hardened, usually in about an hour, position the scoop of wax on top of the sundae and run the wick through the hole you created.
Step 9: Drizzle with Toppings
Melt more of the colored wax, adding more wax shavings and crayons to the tin cans as needed.
After the wax has completely melted, let it cool, stirring with a popsicle stick or skewer until the wax has a syrupy consistency.
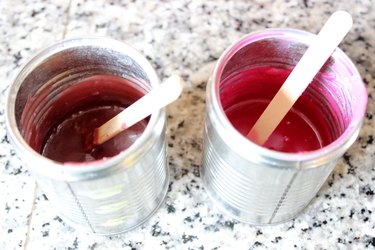
Drizzle this syrupy wax on top of the scoop of ice cream.
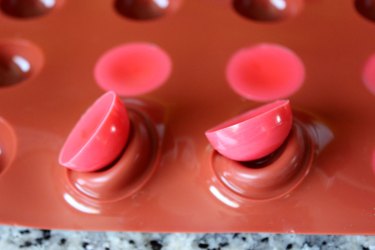
Step 10: Make the Cherry on Top
Melt more white wax with a red crayon. I used a different red because I wanted the cherry to have a different color from the "strawberry" syrup. Then pour the melted wax in a one-inch diameter half-sphere silicone mold.
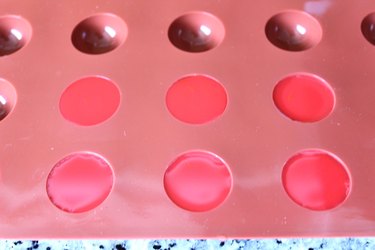
It hardens enough to pop right out in about 30 minutes.
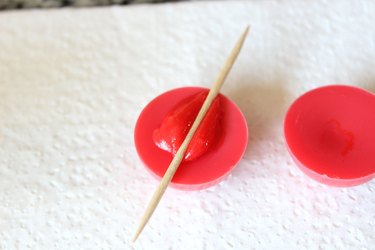
Whatever colored red wax remained in the tin can will have hardened again, so melt a little in the double boiler until it has a paste consistency. Apply a dab of the wax to one half sphere and place a toothpick across it. The toothpick will create the opening for the wick.
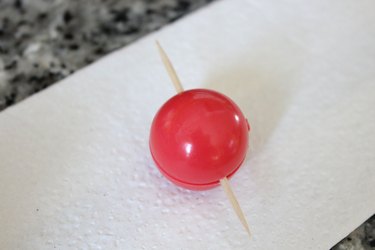
Place another dab of the pasty wax on top of the toothpick and sandwich it in with another half-globe of red wax. Press the two halves together to bond them. Remove the toothpick and smooth out any excess wax that may have seeped out.
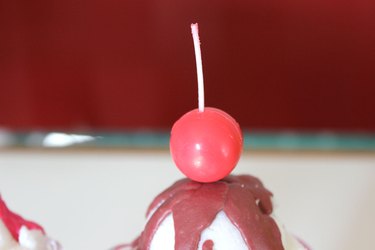
Position the cherry on top of the sundae, running the wick through the hole created by the toothpick. Trim the wick to about a half inch.
These candles would make delightful gifts for any ice cream lover. Because every day is a good day for a sundae candle.