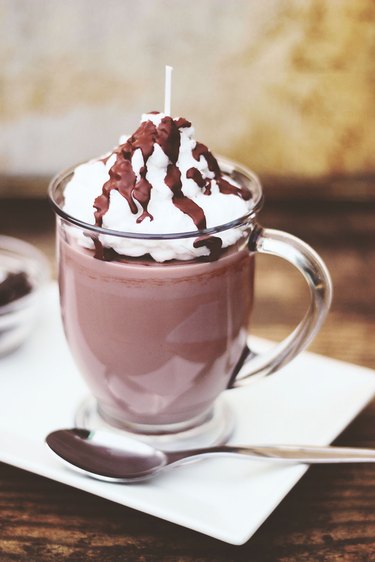
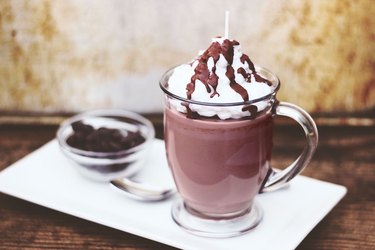
What could possibly be cozier than snuggling up to a cup of hot cocoa on a cool evening? That's easy — sipping that cocoa while lighting this candle that looks just like hot chocolate. This candle features cocoa-scented wax in a glass coffee mug, topped with "whipped cream" and even a drizzle of "chocolate." It may not be the real thing, but it will certainly make you feel all warm and comfy.
Video of the Day
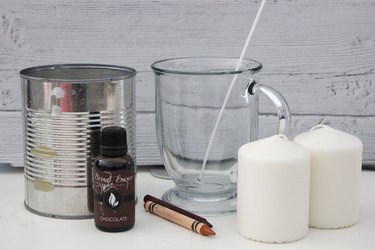
Things You'll Need
8-inch tabbed candle wick
Hot glue or glue dot
Glass mug
Clothespins
White candle wax
Brown crayon
Tin cans or pouring pot
Chocolate candle fragrance
Piping bag or zip lock bag
Scissors
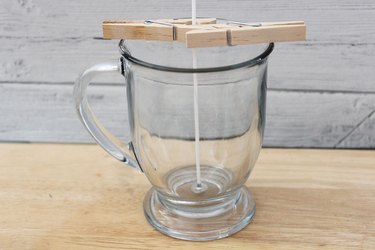
Step 1: Prepare the Wick
You will need a candle wick that is at least 8 inches long to allow for the height of the candle. Wicks that are pre-tabbed with a metal base are available at the crafts store. Using a dab of hot glue or a glue dot, adhere the tab to the bottom of a glass mug.
Video of the Day
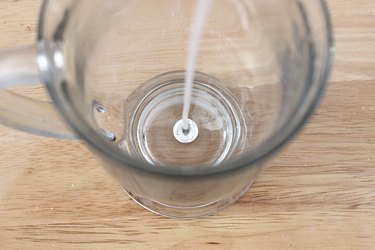
Keep the wick upright and centered by supporting it between two interlocked clothespins.
Step 2: Prepare the Wax
For this candle, you will want to use wax that is formulated for pillars rather than containers since part of the candle, i.e., the whipped cream section, will be outside of a container. While you can purchase bars of candle wax at the crafts store, I find it easier to just purchase white pillar candles and cut up the wax into smaller pieces with a knife.
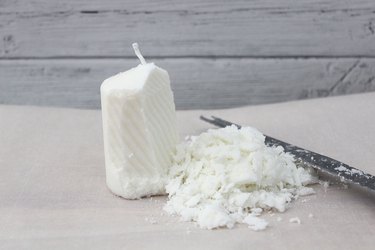
To make the wax chocolate-colored, start by breaking up a dark brown crayon into pieces.

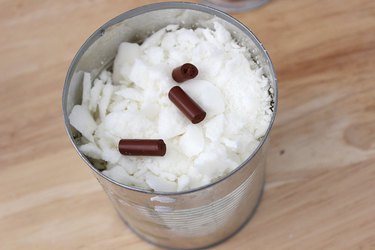
Step 3: Melt the Wax
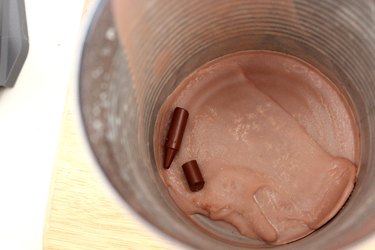
Place the crumbled white wax in a large tin can or candle pouring pot, along with about two-thirds of the brown crayon.
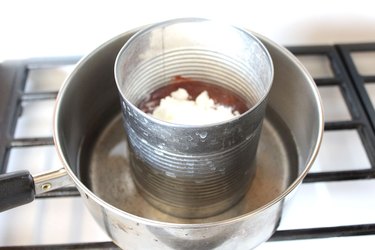
Place the tin can in a pot filled with about an inch of water to create a double boiler, and simmer on low heat until all the wax melts. Stir the contents with a skewer as it melts.
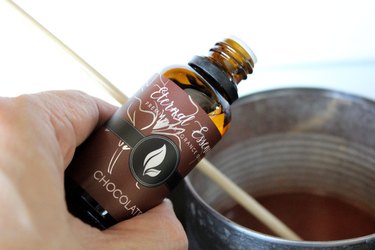
Step 4: Add Chocolate Fragrance
After the wax has melted, add about 20 drops of chocolate fragrance and stir. If you want the candle to smell more chocolatey, add a few more drops.
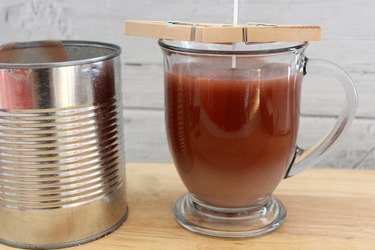
Step 5: Pour the Wax
Pour the melted wax into the prepared mug. Go up to about a half inch below the rim of the mug. You can move the wick aside as you pour and position it back in the center when you're finished.
Step 6: Make the "Whipped Cream"
Crumble some more white wax and place it into a separate tin can or pouring pot. You will only need about a quarter of the wax you used for the hot cocoa section. Melt it in a double boiler.
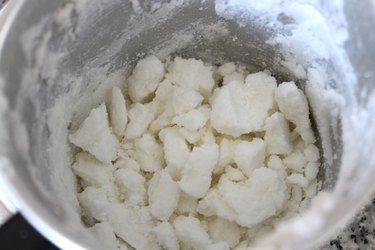
As the melted wax cools and solidifies, whip it with a fork to make it airy. Keep whipping it until it has the consistency of whipped cream.

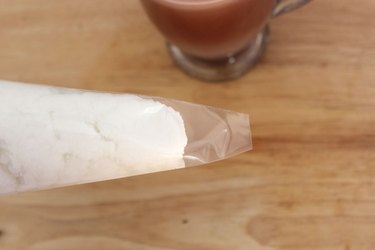
Step 7: Place Wax in Piping Bag
Spoon the whipped wax into a piping bag. If you don't have a piping bag, a large zip lock bag will also work.

Snip off the end of the piping or zip lock bag with scissors.
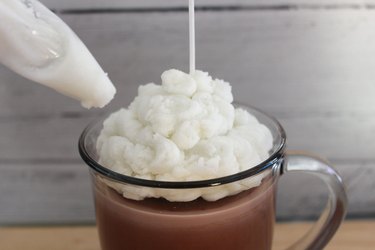
Step 8: Top with Whipped Wax
Squeeze the piping bag to release the whipped wax on top of the hot cocoa section, moving the tip of the bag around the wick. You do not have to wait for the hot cocoa section to completely harden before doing this. Once the top has formed a crust, it's safe to add the whipped wax layer.

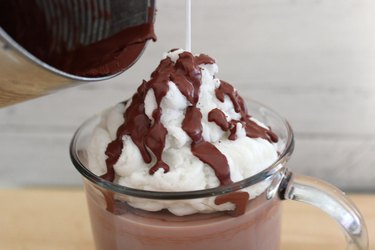
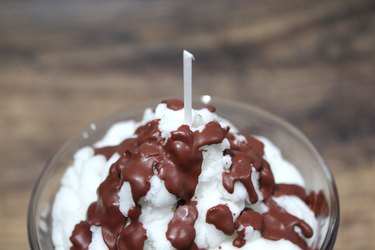
Step 9: Drizzle with "Chocolate"
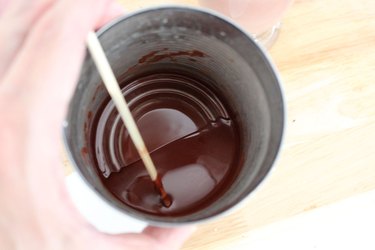
Add the remaining pieces of the brown crayon in the tin can you used to melt the cocoa-colored batch of wax. Whatever residual wax that's in the can, plus the crayon, will be enough for the drizzle.
Melt the wax and crayon in the double boiler. It will melt very quickly. As it cools, stir it with a wood skewer. Keep stirring until the brown wax has the consistency of syrup.
Drizzle the "chocolate" wax over the whipped cream. This detail adds realism and lusciousness to the candle.
Step 10: Trim the Wick
Using scissors, trim the wick to about one half inch.
These candles would also make great gifts for the chocoholics in your life. They'll go coco for them.