


Microsoft’s Blazor is an open source and cross-platform web UI framework used for developing single-page applications (SPAs) in .NET and .NET Core. Blazor is built on a flexible component model that allows for the development of rich, interactive web UIs.
You can take advantage of Blazor to build interactive Web UIs using C# in lieu of JavaScript. This means you can use C# for both server-side and client-side development. That said, you can still use JavaScript if you would like to. Blazor can invoke JavaScript functions and vice versa.
Note that Blazor is included as part of .NET 5.0. Thus you have everything you need to build rich, modern web apps using .NET Core and C#. This article discusses how we can get started with Blazor in .NET 5.0.
To work with the code examples illustrated in this article, you should have Visual Studio 2019 installed in your system. If you don’t already have a copy, you can download Visual Studio 2019 here.
Full-stack development with Blazor
Before Blazor, using .NET to build web applications meant combining the use of C# and JavaScript. Developers used C# to build APIs, business logic, and data access components and used JavaScript (or JavaScript frameworks such as Angular or React) to build the front-end of the application. Until Blazor, we didn’t have a single .NET technology stack that could be used for both server-side and client-side code.
Blazor is available in two models: client-side and server-side. The client-side model runs in the browser via WebAssembly and updates the DOM there, while the server-side model maintains a model of the DOM on the server and uses a SignalR pipeline to send diffs back and forth between the browser and the server.
Blazor gives you three hosting models to choose from:
- Blazor: You can deploy a complete client-side Blazor application without the need for any server-side components. This type of deployment is helpful for static hosting on Azure Blob Storage.
- Blazor WebAssembly: This is a client-side hosting model in which the application runs entirely on the web browser using WebAssembly. The Blazor application, its dependencies, and the .NET or .NET Core runtime are downloaded in the browser when the application runs. WebAssembly (abbreviated Wasm) is a low-level assembly-like language that is supported on all modern web browsers, executes in a sandbox environment, and provides near-native performance. Blazor WebAssembly represents a standardized bytecode for the web and comprises a .NET runtime that is downloaded with your Blazor WebAssembly app at run time.
- Blazor Server: This is a hosting model in which the application runs on the server using .NET Core, and all interactions between the server and the client happen using WebSockets or SignalR. Because a Blazor Server application doesn’t involve downloading the entire application to the web browser, it is faster for every request. However, the overall performance could be slower because of the round trip needed to and from the server.
Create a Blazor Server application in Visual Studio 2019
Let’s create a Blazor application in Visual Studio 2019. Following these steps will create a new Blazor Server application in Visual Studio 2019.
- Launch the Visual Studio IDE.
- Click on “Create new project.”
- In the “Create new project” window, select “Blazor Server App” from the list of templates displayed.
- Click Next.
- In the “Configure your new project” window, specify the name and location for the new project.
- Optionally check the “Place solution and project in the same directory” check box, depending on your preferences.
- Click Next.
- In the “Additional Information” window shown next, select .NET 5.0 as the target framework from the drop-down list at the top. Leave the “Authentication Type” as None (default).
- Ensure that the check boxes “Enable Docker” and “Configure for HTTPS” are unchecked as we won’t be using any of those features here.
- Click Create.
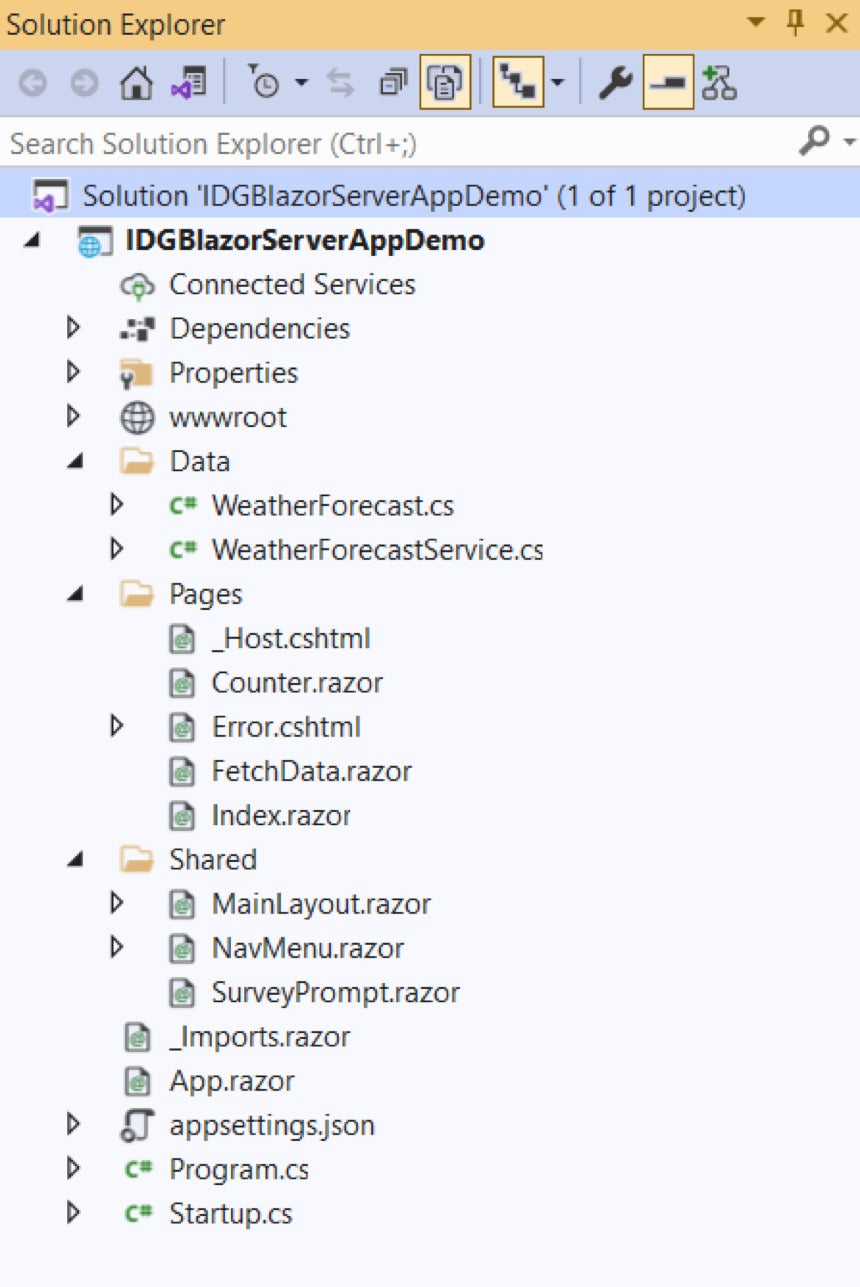
This will create a new Blazor Server app at the location you specified. Figure 1 below shows the solution structure for the Blazor Server application.
 IDG
IDG
Figure 1: The Blazor Server app solution structure.
Note that the Pages folder contains the razor components that you would navigate to. Each of these components will have a @page directive.
The Shared folder contains the razor components that are not navigation destinations but can be used throughout the application. You can also store your model classes here.
The App.razor file comprises your routing component and specifies what should be done if a particular route is non-existent.
The Program.cs file is responsible for setting up dependency injection and starting your Blazor application.
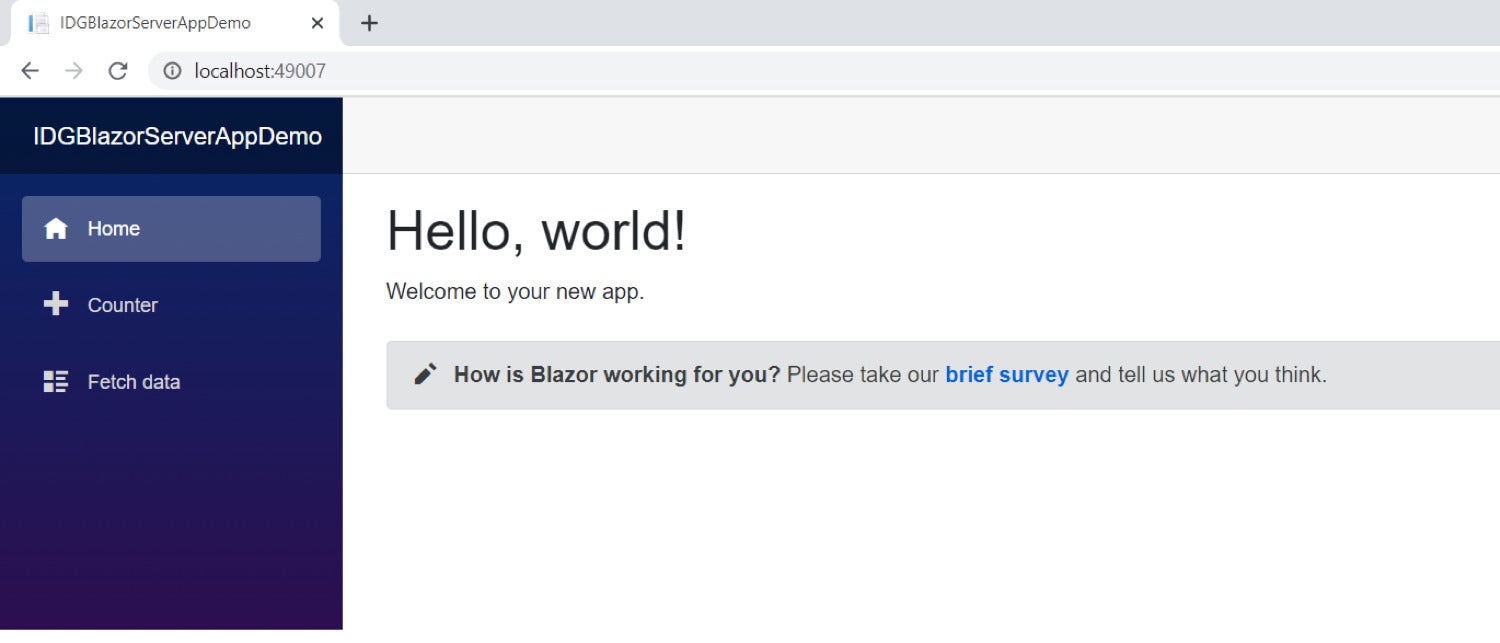
When you run the application, the output would appear in your web browser as shown in Figure 2 below.
 IDG
IDG
Figure 2: Your first Blazor Server application in action!
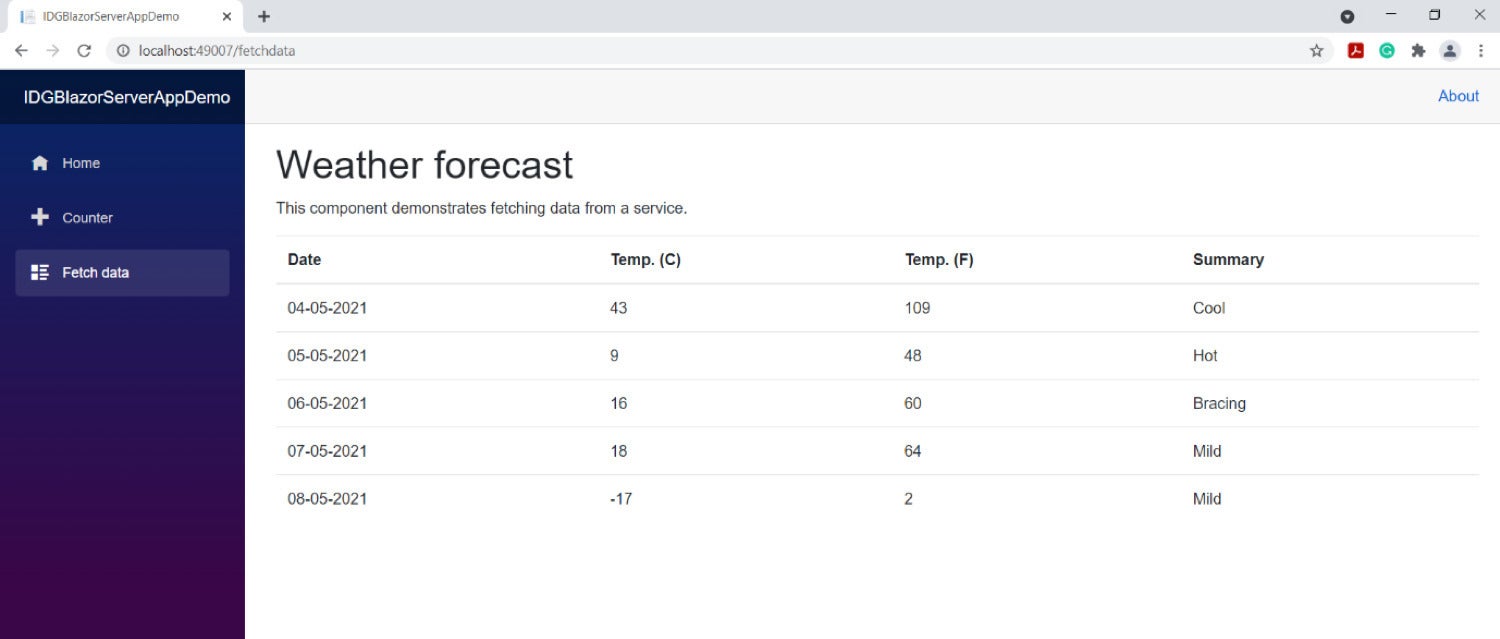
When you click on Fetch data, the application’s data (demo weather forecast data) will be displayed in your web browser as shown in Figure 3.
 IDG
IDG
Figure 3: Displaying data in the Blazor Server app.
Microsoft's Blazor framework opens up a new world of front-end development for .NET and .NET Core developers. Blazor (which stands for “browser plus razor”) gives you the flexibility of building dynamic web pages using C# or VB.NET. You can take advantage of Blazor to write client-side code using C# instead of JavaScript or any other client-side framework.
With Blazor, .NET developers can take advantage of a single technology stack to build both the server-side and client-side of an application. As such, Blazor offers both productivity gains and cost savings.