How to set up a VPN on an iPhone or iPad
 Malcolm Owen
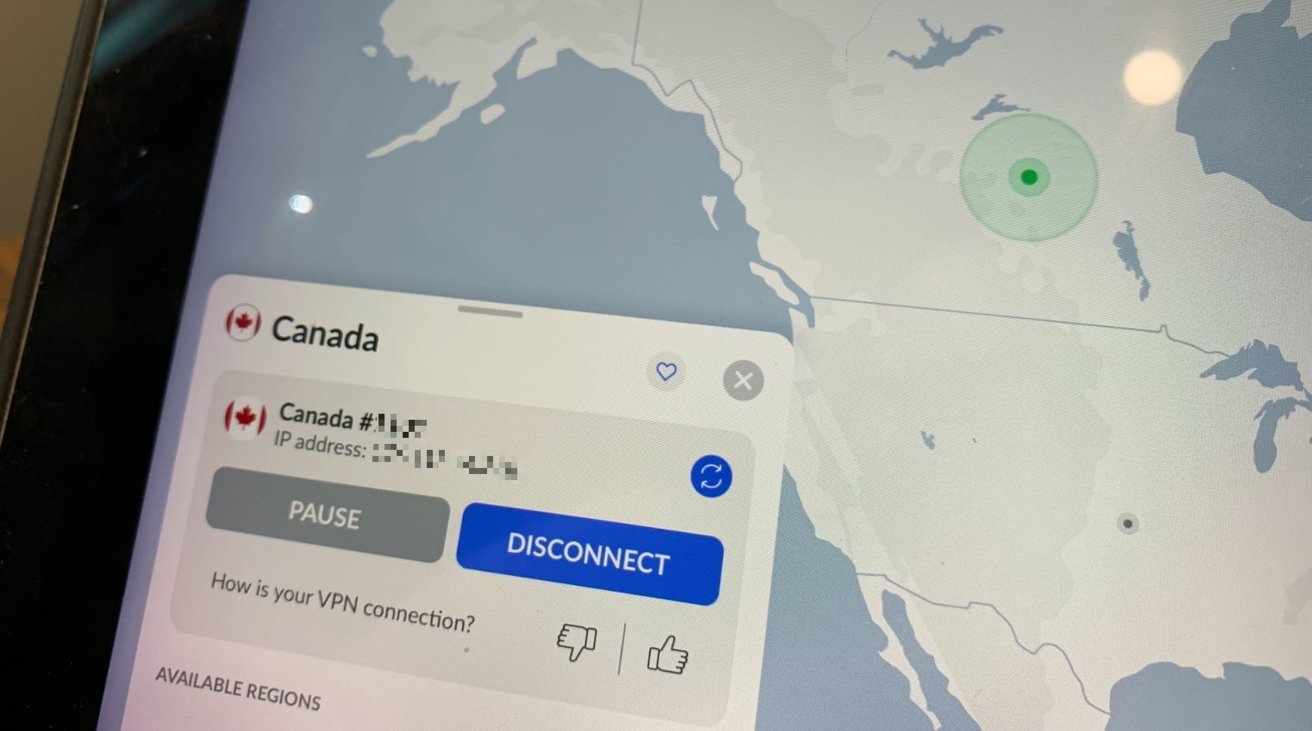
While Apple's Private Relay is on the way, not everyone may want to sign up for iCloud+ to get its benefits, or even to wait for it to arrive. Here's how to set your iPhone or iPad to use a VPN right now.
Apple introduced its Private Relay service as part of its iCloud bundle, which will include other items such as Hide My Email, with the ultimate goal of making web browsing safer and more private for iPhone and iPad users.
However, while Private Relay is an important element, it could be argued that many users could already be enjoying enhanced online privacy and security by using a VPN service. Since Apple has included the ability to add a VPN connection to iOS and iPadOS for quite a while, it may be worth exploring adding a VPN separately, ahead of Apple's rollout of the service.
What is a VPN, and why should I use one?
A Virtual Private Network (VPN) connection is basically a way to funnel your Internet connection through a specific online gateway. As the data from your device is encrypted before being sent to the VPN service, and vice versa, the encrypted data is kept private and secure from prying by anyone trying to listen in to the connection.
This may seem to be excessive for home network users, but it could be extremely useful in public places.
For example, say you are connecting to a Wi-Fi network at a cafe that's offered free to customers, but the Wi-Fi access point is actually malicious. The access point could be used for a man-in-the-middle attack, listening in to unencrypted or openly transmitted data, all without the customer's knowledge.
By using a VPN, once the encrypted connection is established, such MITM attacks simply won't work, as everything passing through the access point remains encrypted and out of reach.
There's also the security and utility of having your connection appear to stem from another city or another country, with a VPN able to mask your real location.
This has a byproduct of also allowing users to access websites as if they are based in different countries, changing the experience and potentially allowing access to content that could be blocked in specific territories.
VPN vs Private Relay
Apple's Private Relay service is, effectively, a VPN but with a further enhanced level of privacy. Like a normal VPN, Private Relay encrypts the user's web traffic and funnels it through a gateway, giving all of the security and privacy benefits a VPN can offer.
However, Apple adds in the use of multiple secure proxies run by as-yet-unnamed third party firms. The system encrypts data in such a way that Apple can know the identity of the user but not the servers or content they are viewing online.
This data is then passed to the third-party service Apple has partnered with, which can decrypt enough to determine the data the user has requested, albeit without knowing the identity of the user.
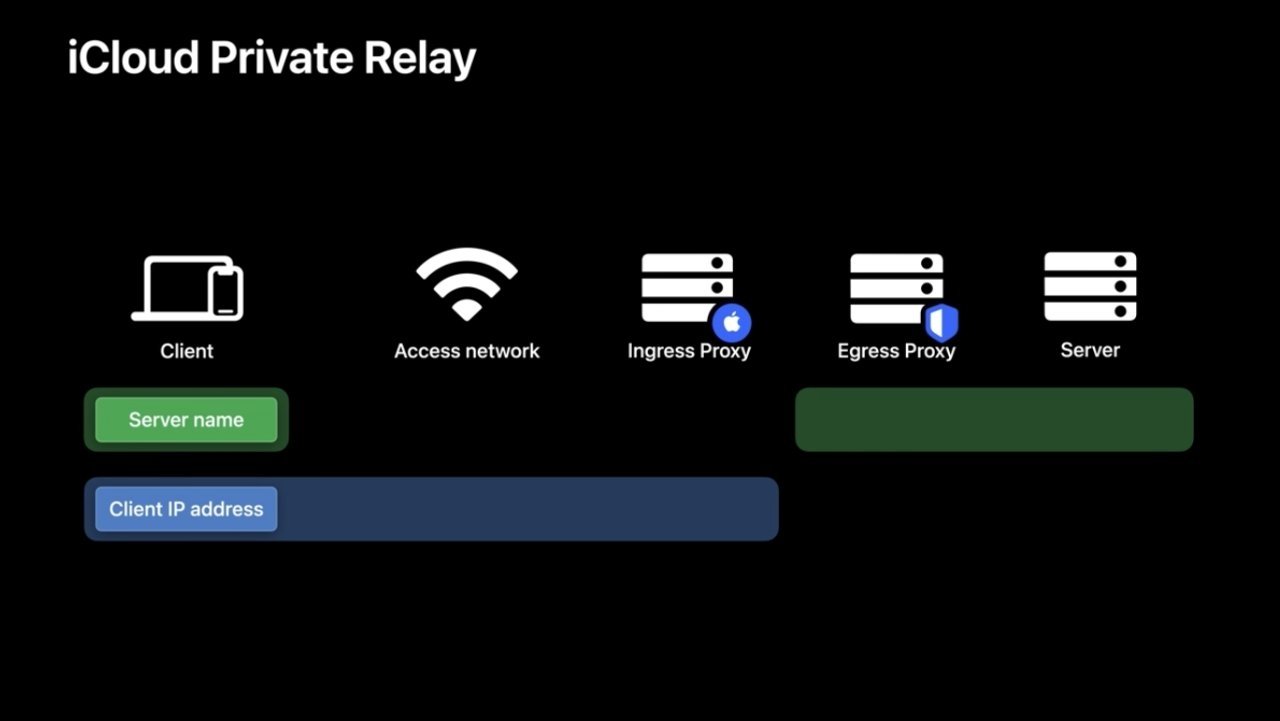
By Apple knowing the customer's identity but not what they want, and the third-party service knowing what the user wants but not the user's identity, this in theory means there's less data for tracking services to use for fingerprinting connections, as well as making it more secure for end users.
Though Apple has explained how secure its service will be, there is the problem of users needing to trust the system functions as described, and that there isn't any collusion with the unknown third-party service to combine the datapoints for a complete picture of the user's surfing habits.
For those who don't necessarily trust the new system, there's always other third-party services they can use. However, the same questions about trust can be raised over VPN providers, as again there's no guarantee that the VPN is being operated honestly and with good intentions.
Ultimately, it all comes down to user trust.
Selecting a VPN
The first thing you need to do is to have details of a VPN service you want to use. A quick check in a search engine will reveal there are many different services on the market that offer VPNs, including some that are free.
While a free VPN may seem like a good thing for a one-off trial or infrequent usage, be extremely wary of them, as it's plausible that the service isn't providing important elements like secure encryption, or may be limited in some way. There's also a chance that the free VPN you're using is actually a bad actor, monitoring your data passing through the connection, or worse.
Remember that even a free service has to earn money somehow, and while advertising is the obvious method, it can easily be your data that's being sold on to third parties.
As for paid VPN services, there's also quite a few things to look out for.
First, check out the privacy and security of the service. Make sure it's using at least 256-bit encryption, and look out for assurances that there's no logging of your activity. You may also want to check the privacy policies of the services you want to use for any tracking-based language.
Other things to look out for are quality-of-life elements, such as if there are data caps, if the data allowance is sufficiently large enough, the number of locations you could pass your traffic through, the number of devices you can have on a plan, and the connection speed.
Popular VPN options include:
Consumer VPN setup
The easiest way to get started with a VPN is to use the service's app. Once you have set up the account with them, including payments if required, you will then have to open the app up, authenticate, and then follow the app's procedure to set up the VPN on your iPhone or iPad.
While the initial setup will vary depending on the app and the service, the process of telling iOS and iPadOS to enable the VPN is the same across the board. Typically after you select to connect to a location, you will be warned that the app will need to install a new VPN profile on the device.
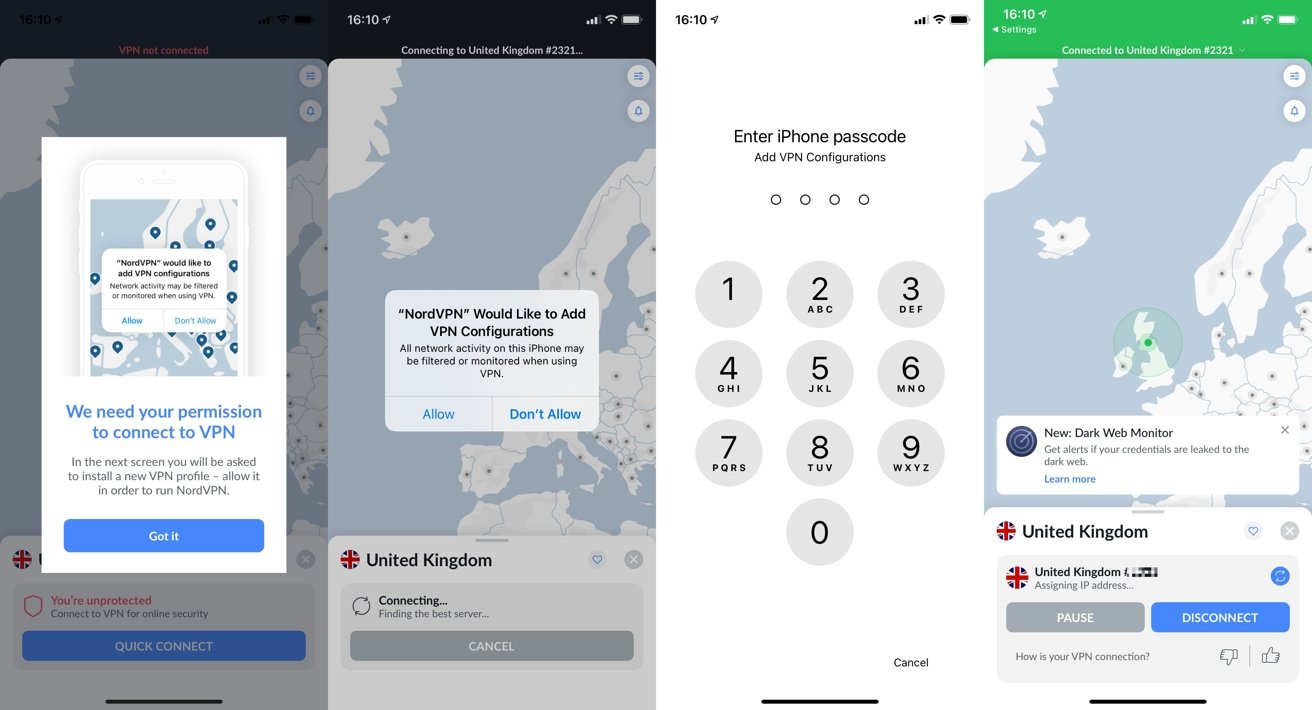
This will bring up a new notification stating the VPN "Would like to add VPN Configurations," and advising the network activity could be "filtered or monitored" when using the VPN. Click Allow.
You will then be prompted to enter your passcode to add the VPN configurations. Once authenticated, the VPN will complete the setup and your connection will be passing through your chosen service.
You can tell that you're connected through a VPN by seeing the VPN icon briefly appearing in the top-right corner of the display. You can also bring down Control Center and see the icon there, next to other connectivity icons.
Manual VPN configuration
If you have to use a company-supplied VPN for work, you can set it up within the iPhone and iPad's Settings menu.
How to manually set up a VPN in iOS and iPadOS
- Open Settings
- Tap General, then VPN
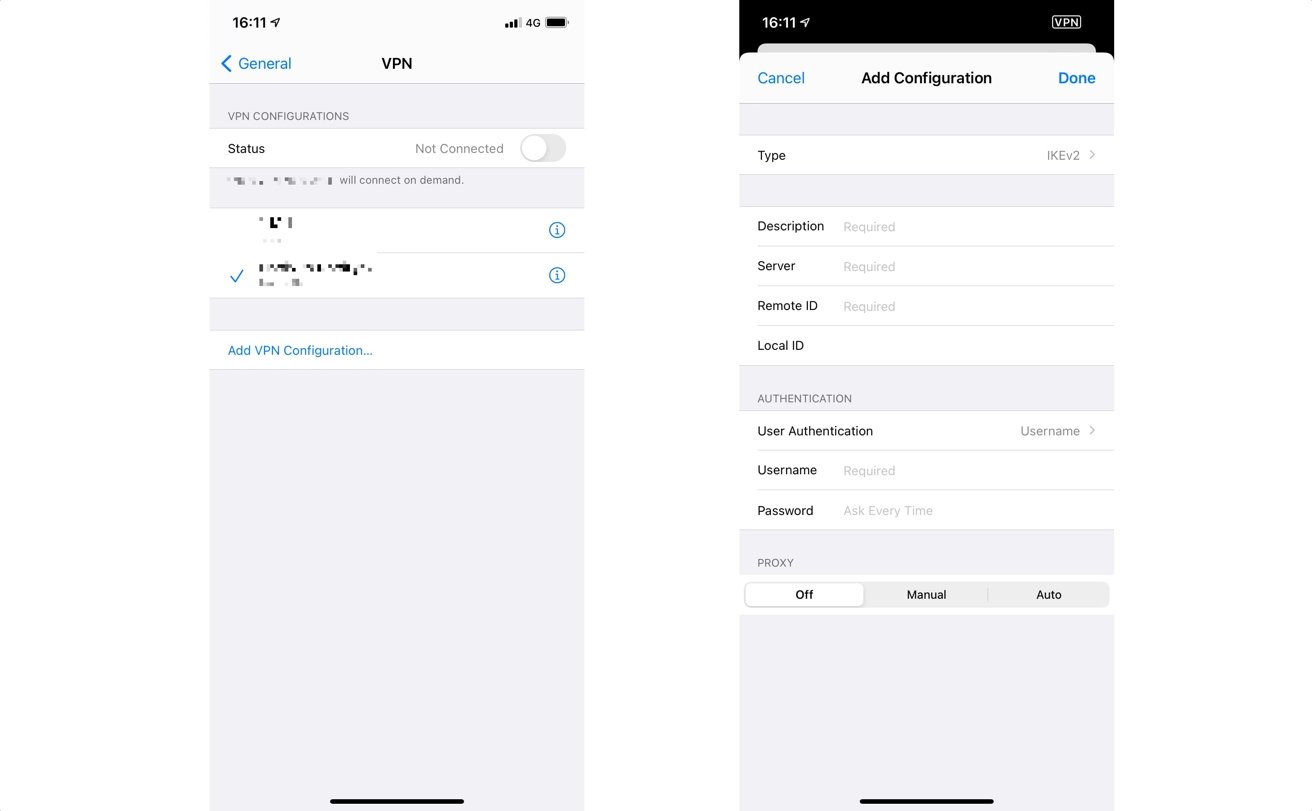
- Tap Add VPN Configurations
- Tap Type and select the type of VPN you are going to configure, then Add Configurations
- Enter the rest of the information that you will need for the connection, such as the server address, account name and password details, Remote and Local IDs, and whether there's a proxy in use.
- Once the details have been added, click Done.
Managing your VPNs.
If you're using a service's app, there's usually options to enable and disable the VPN inside, but Apple also includes the option to enable and disable a VPN within the Settings app. The same section can also be used to manage if you have multiple VPNs operating, and to delete the VPN.
How to turn VPNs on and off within iOS and iPadOS
- Open Settings
- Tap General, then VPN.
- Next to Status, tap the toggle switch.
There is also a chance that the installed VPN may prevent you from turning it off via the toggle. This may be because the VPN's profile is set to automatically enable itself when a data connection is required.
To disable this, tap the information circle icon next to the VPN to bring up more information about the VPN's settings. If the toggle next to Connect On Demand is green, tap it to turn it off.
How to switch between installed VPN profiles in iOS and iPadOS
- Open Settings
- Tap General, then VPN.
- Tap the VPN you want to use.
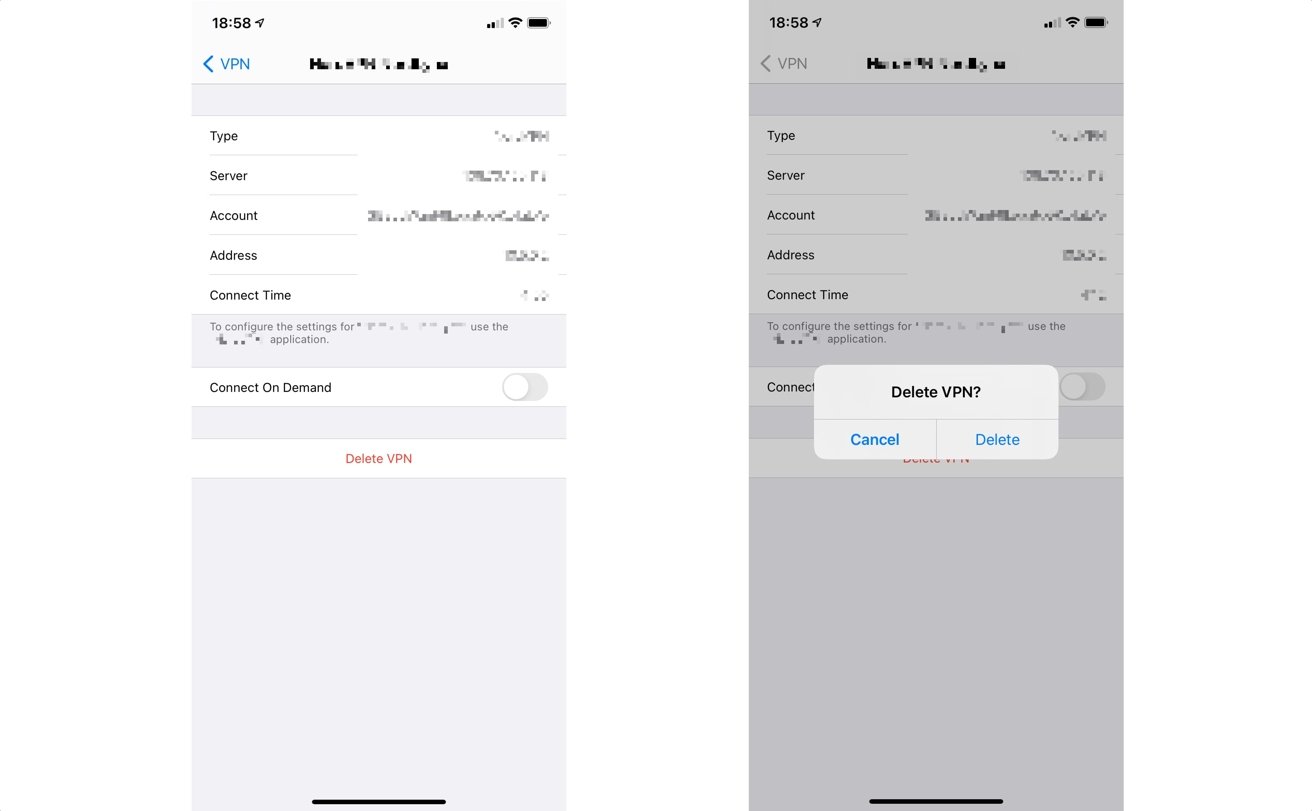
How to delete the VPN configuration from iOS and iPadOS
- Open Settings
- Tap General, then VPN.
- Tap the information circle icon next to the VPN you want to remove.
- Tap Delete VPN.
- On the notification box, tap Delete.
Bear in mind this will delete the installed VPN profile, but any VPN apps will remain installed on your device.


 Wesley Hilliard
 Andrew Orr


 Amber Neely
 William Gallagher