

This guide will demonstrate how to install Sysdig on Ubuntu 24.04, 22.04, or 20.04 LTS using the command-line terminal with the official Sysdig APT repository for the latest version and for easy future upgrades via CLI commands.
Sysdig stands out as a comprehensive monitoring and troubleshooting tool designed specifically for the complexities of modern, containerized environments. With its ability to capture, filter, and decode system calls and other OS events, Sysdig offers unparalleled visibility into the behavior of applications, services, and the underlying infrastructure. Whether you’re managing cloud-native applications or microservices or just looking for a robust tool to understand system performance, Sysdig equips you with the insights needed to diagnose problems, ensure security, and optimize performance effectively.
Here’s why Sysdig has become an indispensable tool for developers and system administrators:
- Deep visibility: Delve into system-level operations with granularity.
- Security enforcement: Identify and mitigate security risks in real-time.
- Performance analysis: Pinpoint and resolve performance bottlenecks swiftly.
- Troubleshooting efficiency: Simplify the diagnosis of complex issues.
- Cloud-native focus: Tailored for Kubernetes and container environments.
- User-friendly: Accessible via a command-line interface for ease of use.
- Rich data capture: Collect comprehensive data for forensic or analytical purposes.
- Integration capability: Seamlessly integrates with existing DevOps tools.
Transitioning to the technical how-to section, you’ll find installing Sysdig is straightforward and accessible, ensuring you can quickly leverage its powerful features for your Ubuntu systems.
Install Sysdig on Ubuntu via APT PPA
Update Ubuntu System Packages Before Sysdig Installation
Before diving into installing Sysdig, it’s crucial to ensure your Ubuntu system is up-to-date. We guarantee that all existing packages are in their latest versions by updating. This practice enhances your system’s stability and overall security.
Accomplish this by running the following command in your terminal:
sudo apt update && sudo apt upgradeInstall Initial Packages for Sysdig on Ubuntu
We need to integrate some essential software packages to ensure a seamless installation of Sysdig on your Ubuntu system. These packages are the bedrock of Sysdig’s proper functionality and integration with your system.
Execute the command below in your terminal to install the required packages:
sudo apt install software-properties-common apt-transport-https ca-certificates ncurses-term dkms -yIncorporating the Sysdig APT Repository
Sysdig is not present in Ubuntu’s default repository out-of-the-box. However, the Sysdig developers maintain a dedicated repository. To incorporate this repository into your system, follow the following steps:
- Import the GPG Key: The GPG key ensures the authenticity and integrity of the packages downloaded from the Sysdig repository. To import the GPG key, run the following command:
sudo curl -s https://s3.amazonaws.com/download.draios.com/stable/install-sysdig | sudo bash- Add the Sysdig Repository: After importing the GPG key, we can add the Sysdig repository to your system’s sources list by executing the command below:
echo 'deb [signed-by=/usr/share/keyrings/sysdig.gpg] https://download.sysdig.com/stable/deb stable-$(ARCH)/' | sudo tee /etc/apt/sources.list.d/sysdig.listNote that the $(ARCH) variable will automatically map to the appropriate architecture that Sysdig currently supports.
Refresh the Package List for Sysdig
Having added the Sysdig repository to your system, it’s time to refresh your package list. This refresh will include the newly added repository and ensure that the Sysdig package is available for installation. To update the package list, run the command below:
sudo apt updateInstall Sysdig on Ubuntu via APT Command
With the Sysdig repository in your system and the package list refreshed, we can now move on to installing Sysdig. Execute the following command in your terminal to install Sysdig:
sudo apt install linux-headers-$(uname -r) sysdig ncurses-termThis command will install the Linux headers suitable for your kernel version.
Verifying Sysdig Installation
Verifying Sysdig’s installation on your Ubuntu system is paramount upon successful installation. We check the version and build of Sysdig to ensure it is installed correctly.
Run the following command in your terminal to check the version of Sysdig:
sysdig --versionBy the end of this process, you will have successfully installed and verified the Sysdig installation on your Ubuntu system.
Sysdig Commands on Ubuntu
Activating Sysdig Monitoring Software on Ubuntu
Having successfully installed Sysdig on your system, you can now leverage the monitoring software. The command csysdig is your tool of choice here. It’s essential to note that Sysdig must run as root due to its requirements for access to critical areas such as the /proc file system, /dev/sysdig* devices, and the need to auto-load the sysdig-probe kernel module.
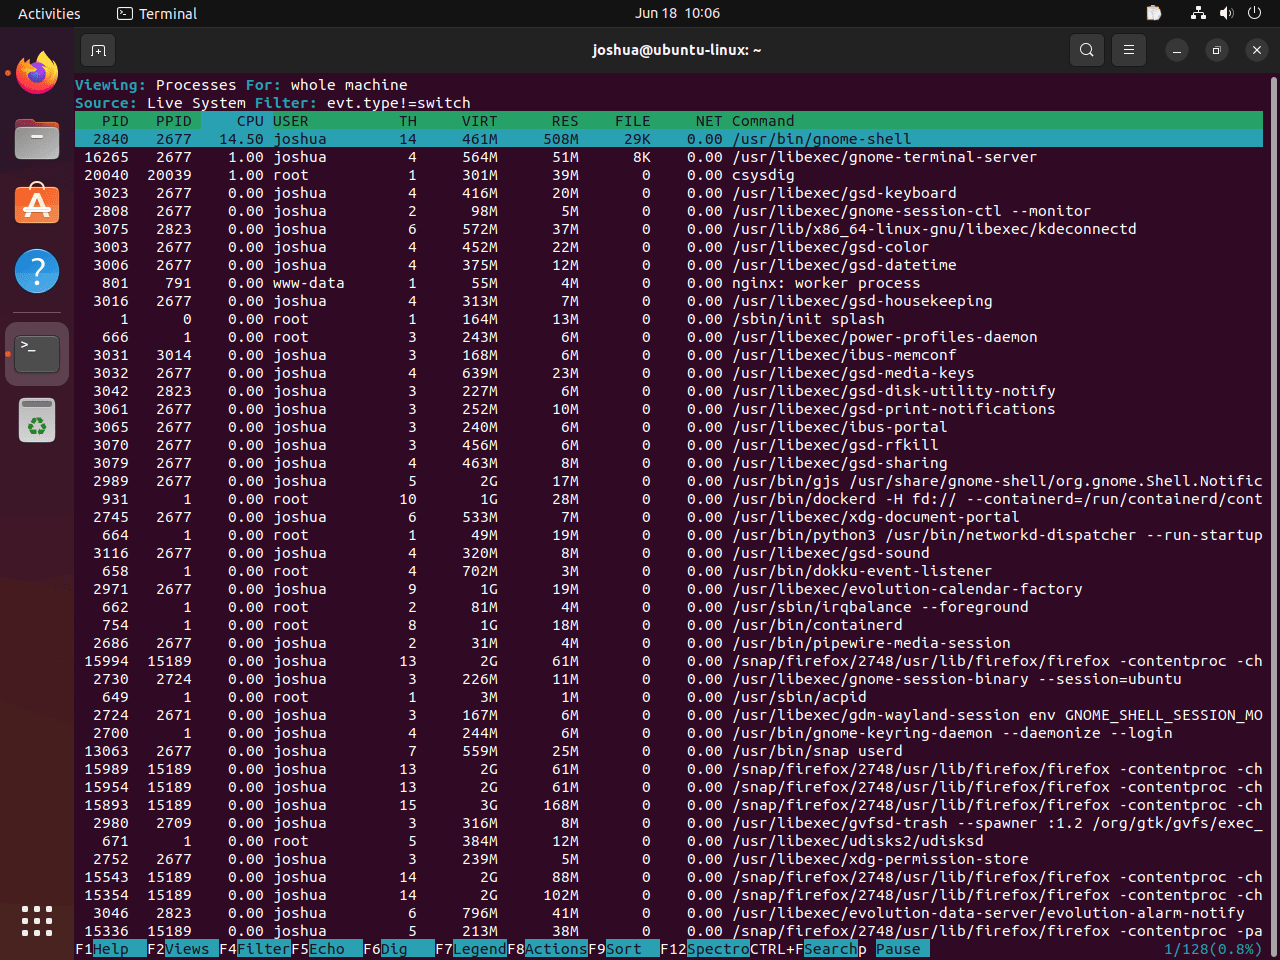
To display the initial Sysdig interface, execute the following command:
sudo csysdigUpon successful execution, you should be presented with the Sysdig display.
If you encounter difficulties initiating Sysdig, refer to the troubleshooting guide provided after this tutorial.
Modifying the Sysdig View
Sysdig offers flexibility with its display views. To change your current view, press the F2 button.
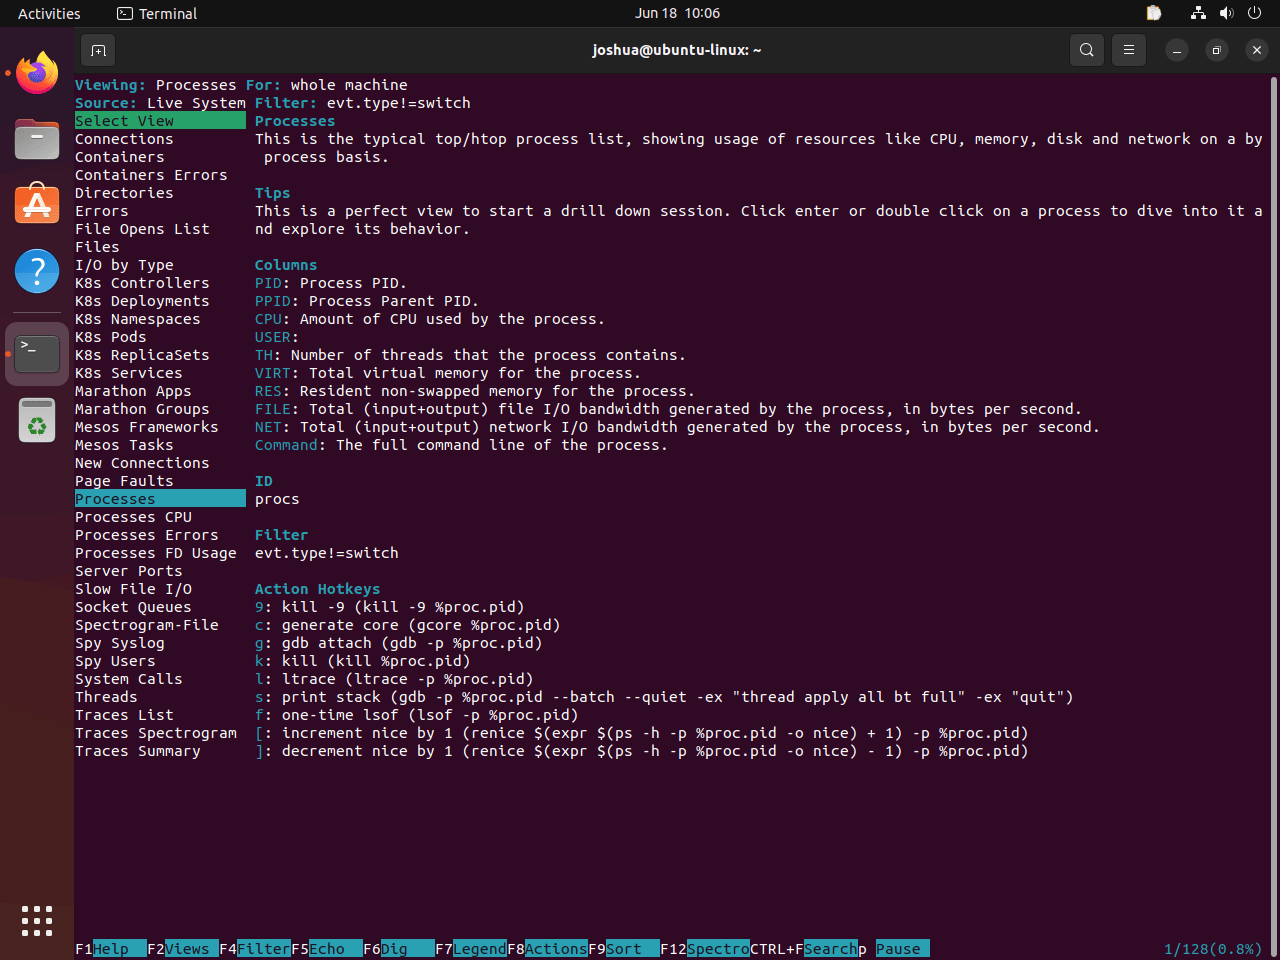
Within this menu view, you can use your arrow keys to navigate and select a specific monitoring option. For instance, to monitor Processes CPU, scroll down to the option and hit the ENTER key.
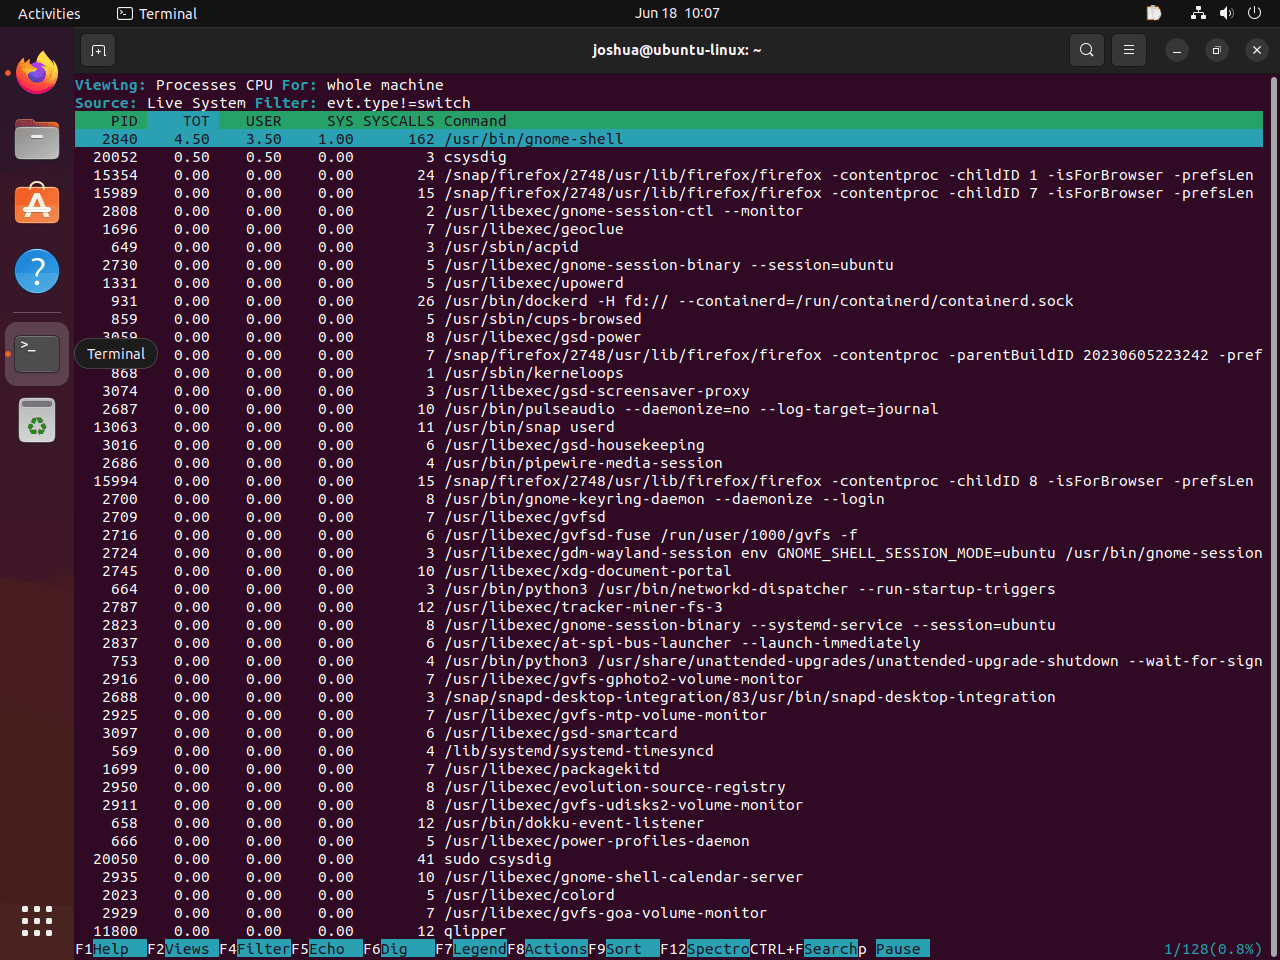
You can return to the previous menu selection by again pressing the F2 button. From here, you can choose from a vast array of options. Alternatively, you may use terminal line commands for more specific operations.
Utilizing Terminal Line Commands
Sysdig’s versatility is showcased through its various terminal line commands, providing a focused and detailed outlook on system processes and metrics.
For instance, to see the top processes ranked by CPU utilization percentage, use the command below:
sudo sysdig -c topprocs_cpu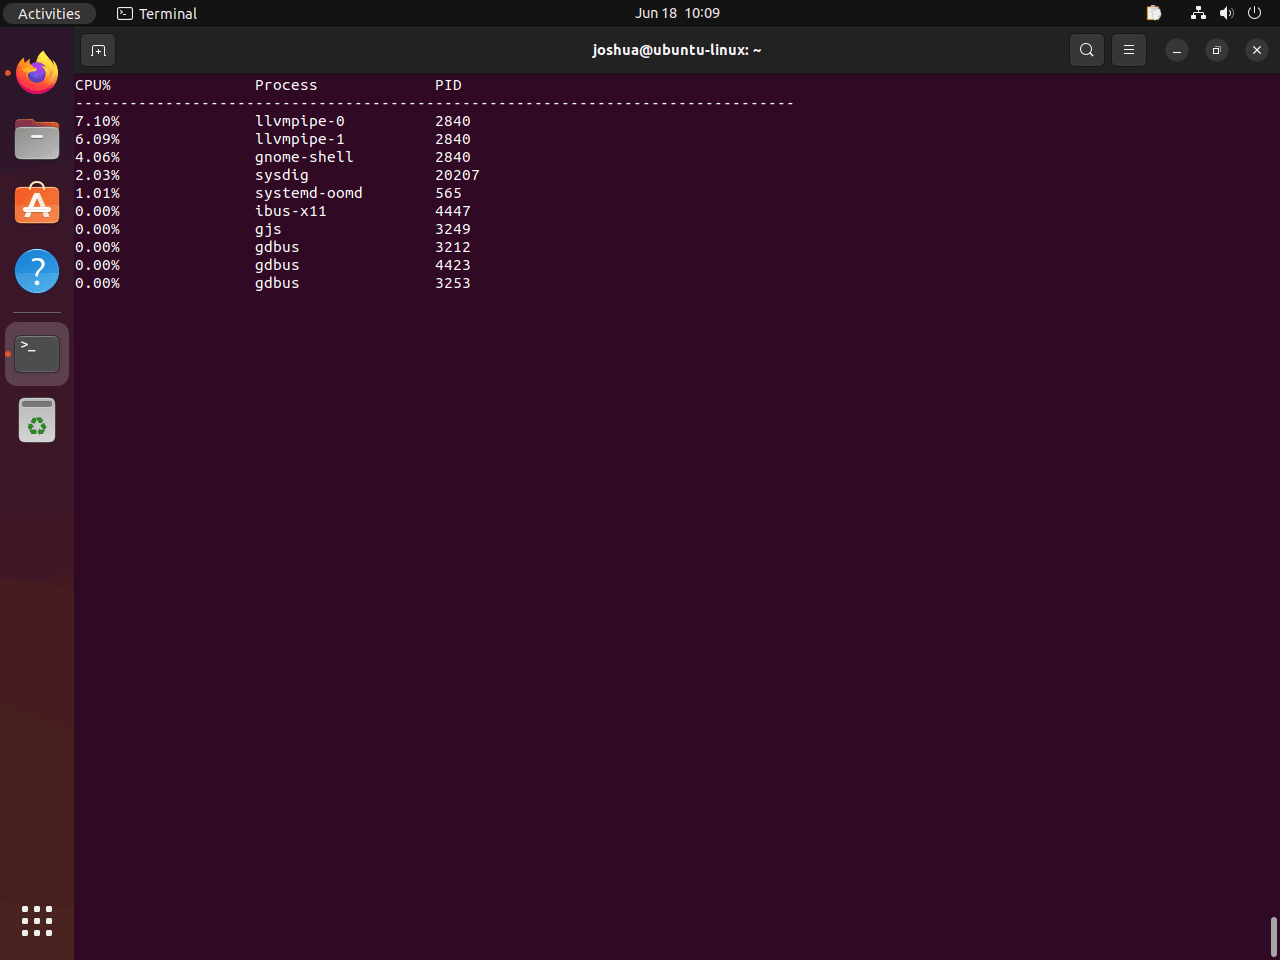
To observe your system’s network connections, run the following command:
sudo sysdig -c netstat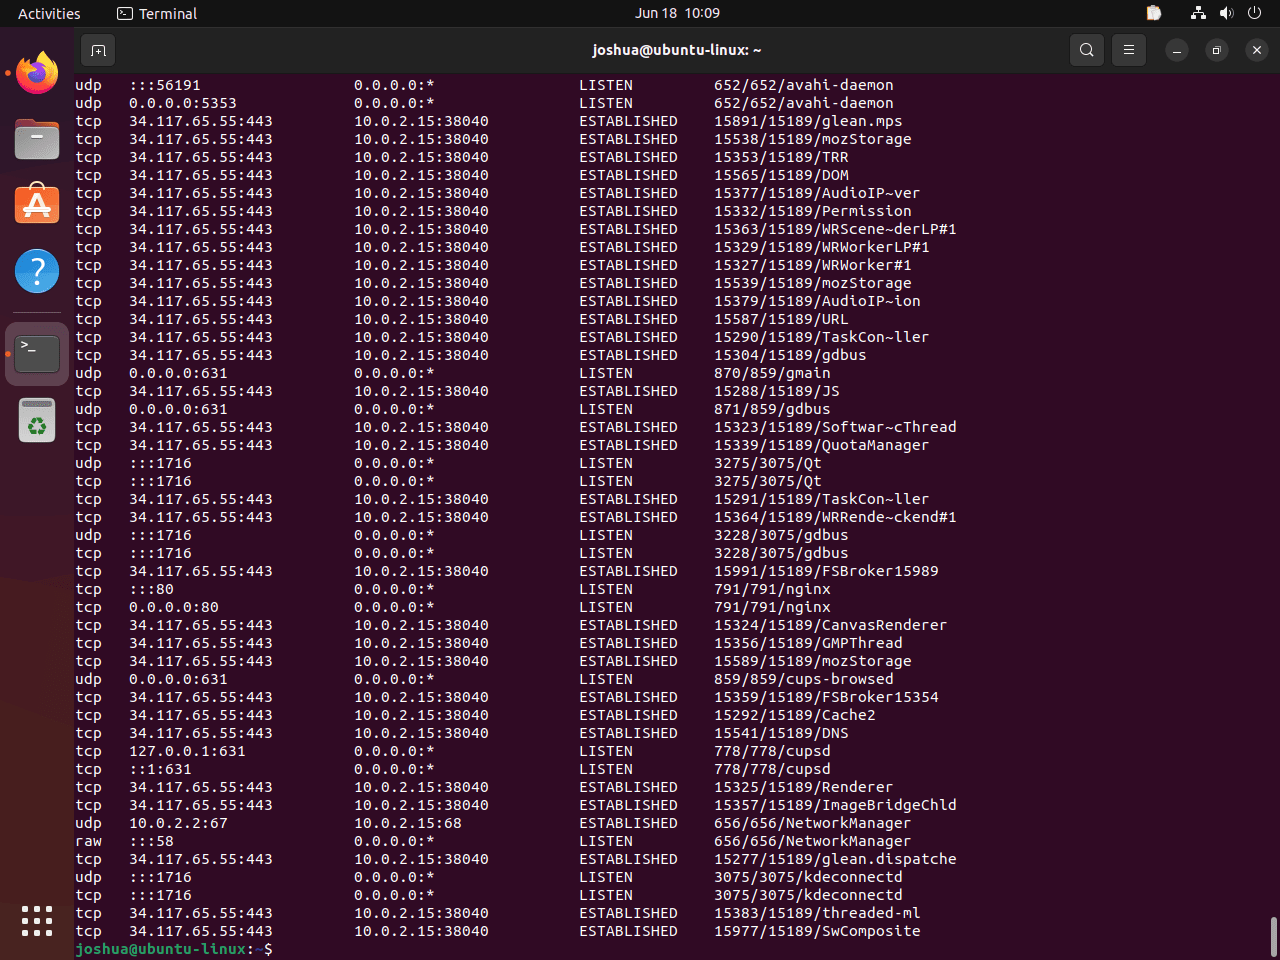
If you wish to list all the system processes, execute the following command:
sudo sysdig -c ps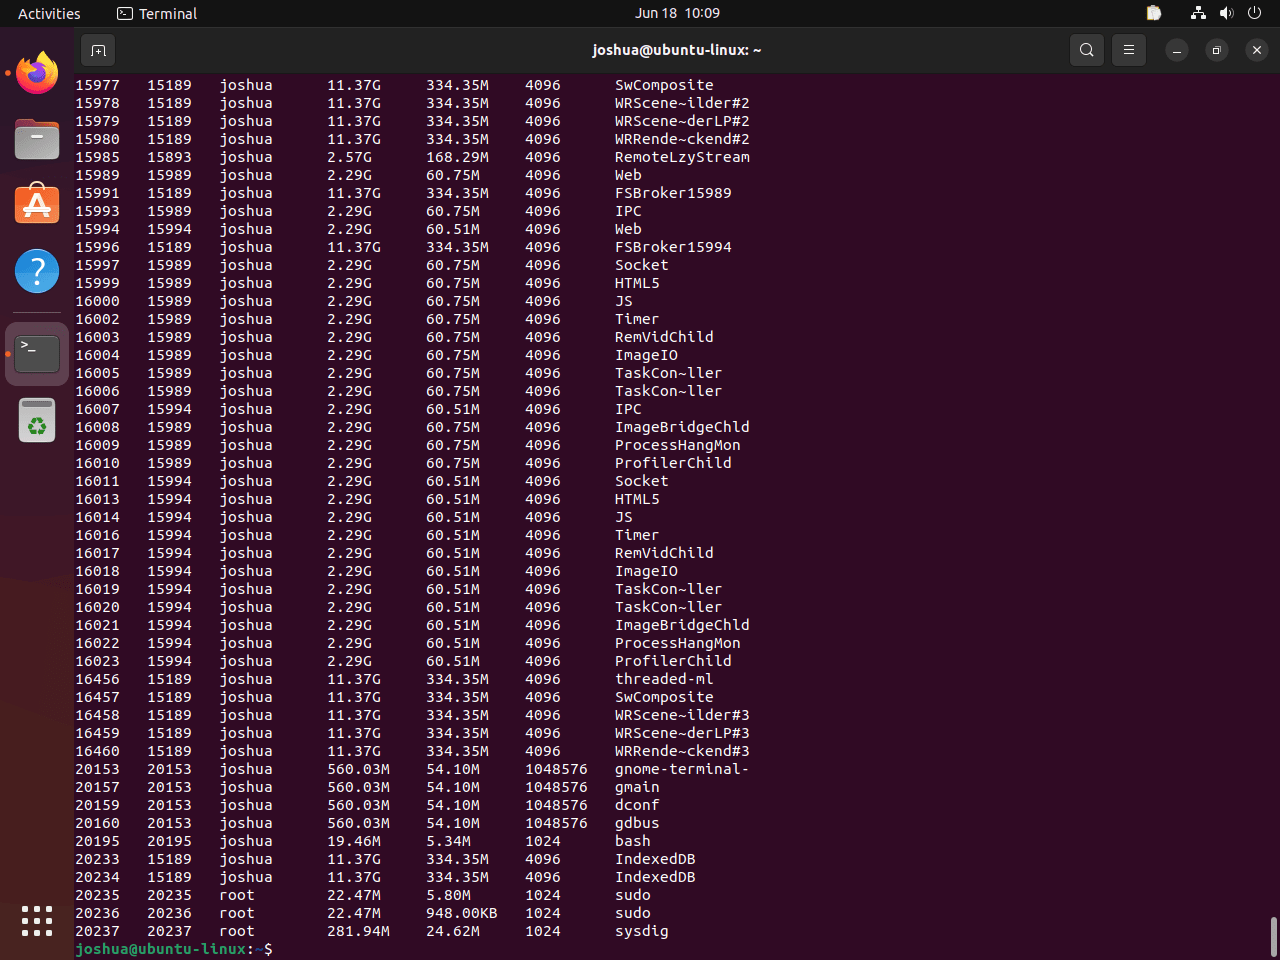
Resolving Common Issues with Sysdig on Ubuntu
Navigating new software can occasionally lead to encountering some bumps along the road. Knowing how to troubleshoot common issues that might arise while using Sysdig is essential. Let’s walk through one such scenario and its solution.
Identifying a Common Error
You may encounter a specific error message when trying to use csysdig for the first time. The error message would read as follows: Error opening terminal: xterm-256color. This issue typically occurs due to a missing package that needs to be installed on your Ubuntu system.
Troubleshooting the Error
To rectify the error above, you can install the ncurses-term package by using the following command:
sudo apt install ncurses-termPlease remember that this action should be performed only if the error message Error opening terminal: xterm-256color is encountered. Inappropriately installing packages when not needed can lead to unnecessary complications or conflicts within your system.
Final Thoughts
In this guide, we walked through the steps to install Sysdig on your Ubuntu system, making sure you’re equipped with the latest version for top-notch system monitoring and troubleshooting. Remember, keeping Sysdig updated ensures you have the latest features and security patches at your fingertips. Don’t forget to experiment with its powerful capabilities to truly understand your system’s ins and outs. Think of Sysdig as your go-to tool for keeping your Ubuntu environment healthy, secure, and running smoothly. Happy monitoring, and here’s to making your sysadmin tasks a bit easier!