How to install Mattermost Server on Rocky Linux 8
On this page
- Prerequisites
- Step 1. Updating the System
- Step 2: Installing MySQL Server
- Step 3. Creating Database for Mattermost
- Step 4. Installing Mattermost
- Step 5. Configuring Config.json File
- Step 6. Creating Systemd Service for Mattermost
- Step 7. Configuring the Firewall
- Step 8. Accessing Mattermost Web UI
- Conclusion
Mattermost is messaging software that can be configured to support your organization's messaging requirements.
It works just like messaging software you will have used before. Users are able to log in and use the messaging platform to send messages of any kind between themselves or directed at other users which they choose to subscribe to their messaging feed. It also supports group messaging, where a conversation thread emerges between more than one person. Messages also include file attachments, images, links, etc, for sharing across an organization. Additionally, there are some interesting extra features that can be enabled, such as video conferencing if required.
Developers want to use this software because it's easy to configure, it can be hosted in your own private cloud, it's free, and messaging is an important requirement for most organizations.
If you are a Google Apps customer, then messaging has always been a bit of a pain because the messaging services that they provide (Google Talk) do not really work on mobile devices (never mind supporting group messaging). Mattermost, on the other hand, works across mobile phones as well as desktop clients. You can even run Mattermost on your own hardware or cloud servers if required.
Prerequisites
- A server running Rocky Linux 8 with a minimum of 2 GB of RAM.
- A non-root user with sudo privileges.
Step 1. Updating the System
Before installing Mattermost, let's update software packages and upgrade the system to the latest.
sudo dnf update
The update process may take a while depending upon the Internet speed and how frequently you apply updates in your system.
Step 2: Installing MySQL Server
MySQL is an open-source database management system with many advanced features that is used to store, manage and retrieve data in relational database format. It is most commonly used in database-driven web applications.
Mattermost uses MySQL as a backend database to store all user's data.
You can skip this step if you have MySQL already installed.
Now, let's install MySQL server on your server before installing Mattermost.
sudo dnf install mysql-server -y
Once the installation is complete, start and enable MySQL service by running the following command.
sudo systemctl start mysqld
sudo systemctl enable mysqld
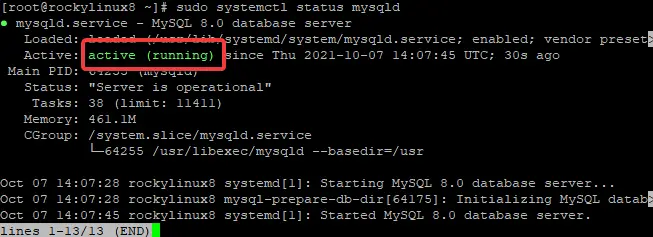
Check the status of the MySQL service by running the following command.
sudo systemctl status mysqld
You should get the following output.
Step 3. Creating Database for Mattermost
Once MySQL has been installed, run the following command to create a database for Mattermost.
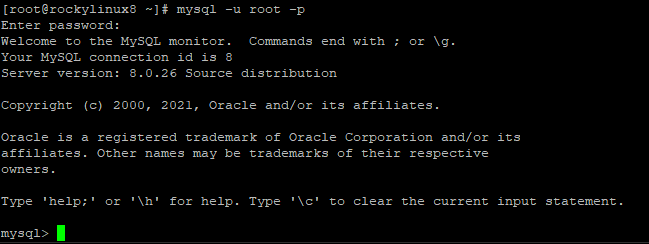
First, log into the MySQL shell.
mysql -u root -p
You will be prompted to enter your password. Leave it blank and hit Enter. You should see a MySQL prompt.
Now, run the following command to create Mattermost database and user with all privileges on the database.
CREATE DATABASE mattermost_db;
CREATE USER 'mattermost_user'@'localhost' IDENTIFIED BY 'password_of_your_choice ';
GRANT ALL ON mattermost_db. * TO mattermost_user@localhost;
FLUSH PRIVILEGES;
Now type \q and hit Enter to quit MySQL prompt.
Step 4. Installing Mattermost
In this step, we will download and install the latest version of Mattermost from its official website.
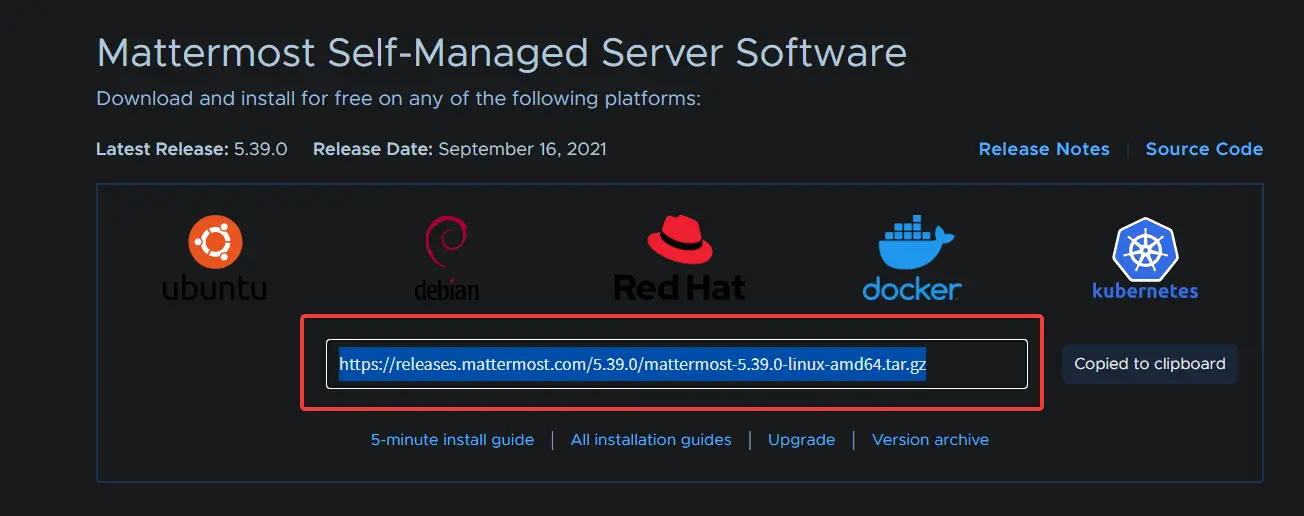
First, open your web browser and go to
https://mattermost.com/download/#
This will take you to the download page for Mattermost. Copy the link address for your server's architecture.
Once you have copied the URL, run the following command to install Mattermost.
wget https://releases.mattermost.com/5.39.0/mattermost-5.39.0-linux-amd64.tar.gz
This command will download the tar file and save it as a file named mattermost-5.39.0-linux-amd64.tar.gz
Once the package is downloaded, we will extract the tar file and move the extracted files to the /opt directory.
sudo tar -xf mattermost-*-linux-amd64.tar.gz
sudo mv mattermost /opt
Step 5. Configuring Config.json File
Mattermost configuration file is config.json. This file is located at the mattermost/config directory, and it contains all Mattermost configuration settings.
In this step, we will configure Mattermost to work with MySQL. If you use PostgreSQL, you can skip this step.
Run the following command to create a config.json file using the nano text editor.
sudo nano /opt/mattermost/config/config.json
It will open up the Mattermost configuration file in the nano text editor.
Now, find the section named DriverName and replace the postgres value with mysql value as shown below.
![]()
Next, find the section named DataSource. This is what the original DataSource line looks like.
![]()
Replace:
- mmuser: replace this value with your MySQL database user you created above.
- mostest: replace this value with your MySQL database password you created above.
- localhost: keep this value as it is if you installed Mattermost and MySQL on the same server. If you installed Mattermost and MySQL database on different servers, you will need to replace this value with the IP address of the server where you installed MySQL.
- mattermost_test: replace this value with your database name you created above.
Once you are done, the DataSource line should look like this.
![]()
Finally, press Ctrl+X and Type Y, Enter to save changes. It will take you back to your shell.
Step 6. Creating Systemd Service for Mattermost
In this step, we will create the Mattermost systemd service.
Systemd is the system and service manager for Linux. The Mattermost systemd service allows us to start, stop and restart the Mattermost service. And most importantly, it ensures that the Mattermost service will be running at all-time in the background.
First, change the directory to the /etc/systemd/system directory.
cd /etc/systemd/system
Then, run the following command to create the Mattermost service file under this directory.
sudo nano mattermost.service
It will open up an empty text editor with full PATH privileges.
Now, copy and paste the following line into the text editor.
[Unit]
Description=Mattermost
After=syslog.target network.target mysqld.service

[Service]
Type=notify
WorkingDirectory=/opt/mattermost
User=mattermost
ExecStart=/opt/mattermost/bin/mattermost
PIDFile=/var/spool/mattermost/pid/master.pid
TimeoutStartSec=3600
LimitNOFILE=49152

[Install]
WantedBy=multi-user.target
Make the Mattermost service file executable and reload the unit file by running the following command.
sudo chmod 664 /etc/systemd/system/mattermost.service
sudo systemctl daemon-reload
At this point, the Mattermost service is being monitored by systemd. You can start, stop, enable, and disable the Mattermost service using the following commands.
sudo systemctl start mattermost.service
sudo systemctl stop mattermost.service
sudo systemctl enable mattermost.service
sudo systemctl disable mattermost.service
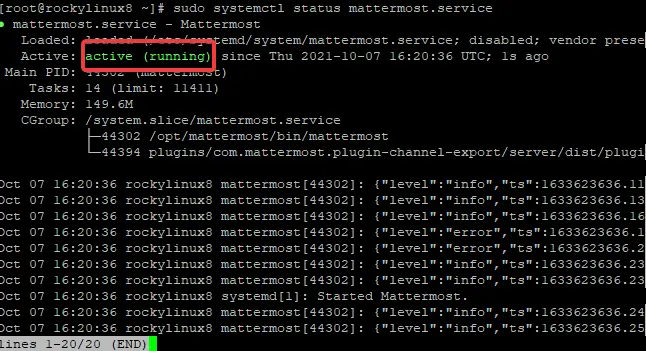
To check whether the Mattermost service is running properly, running the following command.
sudo systemctl status mattermost.service
Here is what you should see when the Mattermost service is running successfully.
Step 7. Configuring the Firewall
In this step, we will configure the firewall for Mattermost.
A firewall is a security system to deny un-authorized users access to private networks through an interface with a public network. It screens all traffic that comes in and goes out of your server. In this step, we will allow access to Mattermost service on specific network ports.
Mattermost listens on port number 8065 by default. This is a non-standard port. So, we will need to allow port 8065 inbound traffic to the Mattermost server.
sudo firewall-cmd --zone=public --add-port=8065/tcp
Reload the firewall to reflect the new rules by using the following command.
sudo firewall-cmd --reload
To check if the rule is added successfully, use the following command.
sudo firewall-cmd --zone=public --list-all
Step 8. Accessing Mattermost Web UI
Now that everything is set up properly, you can access Mattermost Web UI by opening a web browser and typing http://server_ip:8065 in the address bar.
Where server_ip is the actual IP address of your Mattermost server.
You will be taken to the following page. Provide your username, email address, and password, click on Create Account.

Once the authentication is done, you will be taken to the Mattermost dashboard.


The Mattermost installation is now complete.
Conclusion
In this guide, you have learned how to set up a Mattermost server on a Rocky Linux 8.4 system.
If you have questions, comments, or feedback, feel free to let us know in the comment section below.

